This DIY Patriotic Banner is a Pottery Barn Dupe! It’s an easy DIY project for anyone to do and it doesn’t require a lot of supplies. Save it to Pinterest so you can make it!

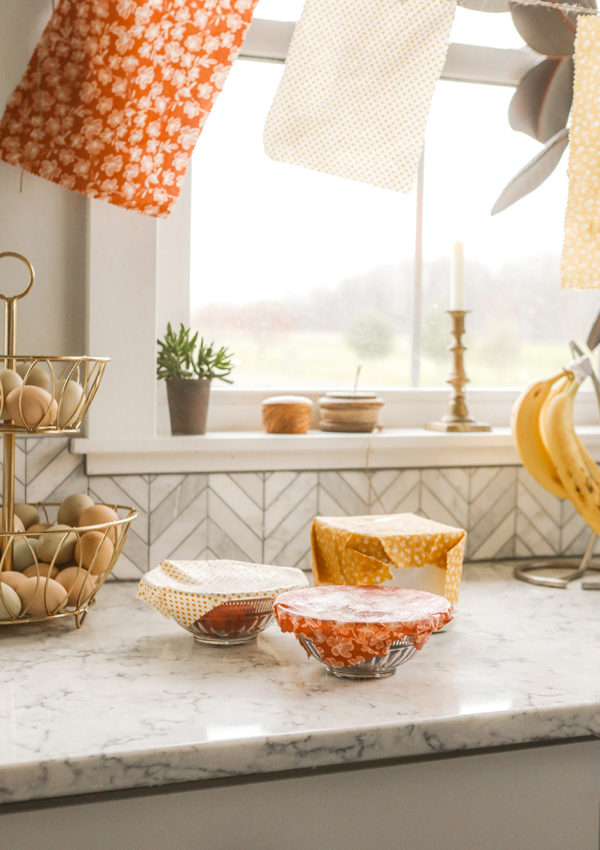
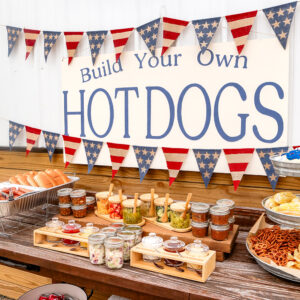
Last year, I bought two Pottery Barn American Flag banners {HERE} for a 4th of July set up that I created. While I thought they were beautiful and exactly the look I was going for, they each banner cost $30 and only came with 7 flags. This year, I wanted more banners but I didn’t want to pay another $60 plus for more banners. Instead, I decided to make a DIY Patriotic Banner with some supplies that I had an a less expensive, plain burlap banner I purchased online. I’m so happy with how my version of this banner turned out and I wanted to share it with you. I’ve already used these in our Hot Dog Bar {HERE} and they’re now hanging on our front porch for the summer holidays. Here’s how I made them.


Creating the Pottery Barn dupe & the differences
You can see in the photo below the differences between the Pottery Barn Banner and my DIY Pottery Barn dupe.The Pottery Barn one is on the left and mine is on the right. My DIY Patriotic Banner is about half the size of the Pottery Barn banner. However, it also has double the flags. I love that it has more flags and I didn’t mind the smaller size because that just meant there would be more of the flags hanging in general giving a fuller look to whatever space I happened to be decorating.
My banner also cost less. The banner itself that you can find {HERE} cost $7. I used paint samples that I had purchased for another project to paint them and then I used blue tape and some Cricut cut out stars to create the patterns. If you don’t have a Cricut, don’t worry, I have a few suggestions below on how you can still make this work without using a Cricut machine. If yo’ve been on the fence about buying a Cricut, my machines is {HERE} and you can use it for so many projects! I used it for all of these below:
- Football Grass Table Runner {HERE}
- Football Mugs {HERE}
- Wood Centerpiece with Gold Adhesive Foil {HERE}
- DIY Pencil Banner {HERE}
- Custom Wood Signs – See example {HERE}
Looking for my farmhouse front porch sign? You can find it {HERE}.


DIY Patriotic Banner supplies
- To get started, you need a few supplies to make the DIY patriotic banner. They are:
- The banner itself. {HERE} is the one I used and {HERE} is a longer 30-foot one with 30 flags.
- Paint. I used Behr paint samples in a Satin finish. The colors are Firecracker and English Channel.
- Blue tape. You can find some {HERE} or at any hardware store.
- Craft paper for your table {HERE}
- *** Cricut Machine, Blue Mat or Roll holder and Cricut Stencil Paper – You can find my machine {HERE} and then {HERE} is the stencil paper. {HERE} is the blue mat or the roll holder is {HERE}.
- To get my exact stars, visit my Cricut Design space {HERE}. the smaller stars are the size on this banner.
If you don’t have a Cricut Machine…
Here are a ways I would suggest for making the DIY Patriotic Banner if you don’t have a Cricut Machine.
- You could use a star stencil and do a reverse pattern for the stars. I ordered this stencil {HERE} just in case.
- Use star stickers. I like these 1-inch stickers {HERE}.
- You could try using this Avery Sticker paper {HERE} with a Star punch {HERE} to make the stars.


Steps for making the DIY Patriotic Banner
- First, layout something on your work surface so you don’t get paint all over it. I like the kraft paper above and we always have some of that on hand for my projects and the kids’ projects. The paint will seep through the banner so this is important for this project in particular.
- Next, position the stars and the blue tape for your stripes. I tried to stay as close to the Pottery Barn banner with this so I used 5 stars, just like their banner and made two thick sets of stripes with the blue tape. You can use the blue tape for the stripes to hold down the banner itself. It really helps. You can see an example of that in the YouTube video.
- Paint with all one color first, dabbling your brush, especially for the stars. You don’t want paint seeping under those so the dabbing is important. You can watch the youTube video above to see exactly how I did it.
- Paint with the second color.
- Let a few hours at least. Or, if you have the space and time, let it dry overnight.
- Remove the banner from the kraft paper and hang. Just an FYI since the paint will leak through the banner, it might be stuck to the paper in some parts. Just gently pull it off.

A couple of things…
My DIY patriotic banner is under a covered porch so it isn’t getting wet. I have no idea how these will hold up if they get wet. I know that dampness is okay. Real rain, I have no idea. Sorry, friends.
Overall, this project ended up costing me $14 to make two banners. However, I already had all the other elements so if you have to buy everything (assuming you are buying one of the non-Cricut options to make these) everything should cost around $25-$30 to make 2 banners.
Looking for more Patriotic ideas for summer celebrations?
If you’re looking for more ideas for Patriotic food or decor for your summer celebrations, try these posts!
- Summer Hosting Essentials {HERE}
- Homemade Angel Food Cake with Homemade Whipped Cream {HERE}
- Red White and Blue Trifle {HERE}
- 4th of July Tablescape inspiration {HERE}
- Pull A Part Baby Back Ribs with Homemade Barbecue Sauce {HERE}
- 4th of July Mocktail {HERE}
- Red White and Blue Lemonade {HERE}
- Homemade Blueberry Pie Ice Cream {HERE}
Thank you so much for stopping by today, friends! I hope that you love these DIY Patriotic Banners and I hope you come back and visit us here at the farmhouse.


I love how the banner turned out. I might have to make one even though I am a little upset with America at the moment.
This is such a beautiful banner. I really like it. I need to make one of them. It would be such a lovely decor item in my home.
That is a nice banner. It could work for all types of parties.
Love the final result. I am not going to make one though
The banner turned out nice! This sounds like a great project to do with the kids as well!
It’s a wonderful way to showcase your creativity and add a patriotic flair to any space. Thanks for sharing this fun and inspiring DIY project!
What a great idea to make this Patriotic banner at home with my kids!
This is a really great and nice way to make a Patriotic Banner! Thanks for sharing this with us
This is really great, I would love to try this with the help of my kids
I absolutely love your style and this DIY Patriotic Banner is the curtest thing ever and I am so bookmarking this one to come back to as I have to make these!
That is a cute banner, perfect for celebrating Memorial Day and the 4th of July!
I love the DIY patriotic banner you shared! The step-by-step instructions were clear and easy to follow. It’s a great project to add a festive touch to any patriotic celebration. Thanks for sharing this creative idea!
The banner looks really good. It would be ideal to use for the 4th of July celebrations. It looks like it’s shop bought. Great job!!!
I always love sweet and simple decorations for cookout gatherings!
I love how the banner turned out. The color is cool and it does look so beautiful. thanks for sharing this
I don’t have a cricuit, so it’s nice that you offered alternatives. I should invest in one, I keep thinking about it.
This is a cute patriotic banner. I’ll have to make one for my house.