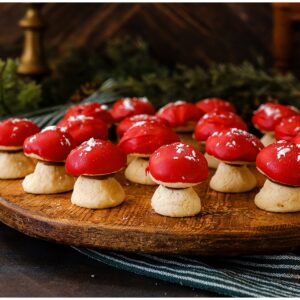
Russian Mushroom Cookies or Gribochky are a popular holiday treat in Russian and the Eastern European countries. They are easy to make and delicious too! Plus, they are also the cutest cookies I’ve ever seen. Save this recipe to Pinterest so you can make them!

I often talk about my Italian heritage here because my family – grandparents and parents – still lean heavily into the culture when it comes to food. However, after all the Italian running through my DNA there comes French, Aegean and then Eastern European/Russian. (There’s a few more blips of other cultures in there too.) My Grandma Charmaine was part Polish so I have a feeling that is where most of the Eastern European & Russian has come from. She wasn’t big into talking about her past or her family heritage. I hardly know anything about her parents with the exception that it was her mom who was Polish while her dad that was Italian. Food-wise she was a gourmet cook later in life. She focused on Italian cuisine, American food and whatever was in the monthly issue of Bon Appetite. We lost her to a stroke almost a decade ago, but she was a huge influence on the home cook that I am today. I like to think she would get a kick out of this blog and the fact that I’m working on a cookbook.
Cultural Perspective
Since my grandma is no longer here, I truly feel I’ve lost out on the opportunity to enjoy some of the family history knowledge that was wrapped up in her and the food knowledge that was ingrained in her from the other half of her DNA. However, every now and then I stumble onto something that I think might make that Eastern European side of her DNA smile like this Roasted Beet Toast {HERE} or these Russian Mushroom Cookies. I’ll be honest with you, I happened upon the idea of Russian Mushroom Cookies because I love the Cottage Core aesthetic. I also have this little obsession with gardening. But I also love learning. I’m so thrilled when a recipe can help me learn more about different cultures – especially one that runs through my veins.
These cookies are sometimes also called Gribochky, a slavic word that means mushrooms. From what I can find they are most often made around the Christmas holiday season. Looking at it culturally, it seems many of the Eastern European countries have a version of Mushroom Cookies. Lithuanians have a version that includes honey and spices in the dough, which sounds lovely. I suspect that if I keep digging or were to talk to some of the people more ingrained in these cultures I would eventually find that all the Eastern European countries have a version of Russian Mushroom Cookies.
If these mushroom cookies are popular in you family around the holidays I’d love to hear about it in the comments below!

Making Russian Mushroom Cookies
My recipe for Russian Mushroom Cookies is not difficult. After looking into this more I would say it is a good base recipe for this cookie that will make you happy. Keira and I made two batches to decorate differently. We’ve all been snacking on mushroom cookies for almost a week. They keep really well, even on the counter. I could see us making some additions to this recipe in the future by adding in honey and cinnamon like Lithuanian Mushroom Cookies.
When to comes to making the shape, that is done by hand. I did run into some recipes that used a mushroom mold like this one {HERE}, but we just used our hands. I’ve included photos of the cookie dough shapes before and after baking.
Once the cookies have baked, I use my finger to create the little indent in the caps while they are still soft. You can use a small spoon too. It is just important to do it right after they come out of the oven before they begin to harden.


Combining the two pieces of the Mushroom Cookies
Chocolate is used to hold the two pieces of the Russian Mushroom Cookies together. The tops there is usually a sugar icing mix or a chocolate icing mix. For mine, I created a very light coating of icing for the brown mushrooms. Then I just dipped the red ones in melted white chocolate with food coloring. I can’t seem to find if one way is more traditional than the other. So, I tried each to see what my family would like nest. I liked the ones with the light icing and cocoa powder and Keira and Roman liked the red Mushroom cookies. The dough for the Mushroom Cookies is not overly sweet so I have a feeling they liked the red ones better due to the additional chocolate.
If you want to use a thicker icing combination for the tops of your Russian Mushroom Cookies you can find my Sugar Icing Recipe {HERE}. In full transparency I wish I would have used this for topping both cookies but I felt like I would have had to hold them too long to dry them.
Tips for making Russian Mushroom Cookies recipe
- You can use a hand mixer to mix these or even your hands after all the flour is incorporated.
- Don’t be afraid to really shape the dough with your hands.
- Know that the Russian Mushroom Cookies will spread just a bit on you, including any of the cone shapes for the bottom that are standing upright. Make sure that they are pointing straight up. Some of them will flop.
- This recipe will make 30 – 35 cookies depending on the size of the mushrooms. If you want to be consistent with size, use a melon baller for the caps.
- I believe in traditional recipes these cookies are dipped in chocolate or icing again on the bottom and sometimes poppy seeds too. I opted not to do that. I made these to go on a Yule Log Cake and felt like the frosting on that cake was going to be more than enough chocolate. I’m also not a huge chocolate person so what we used was enough for me.
- There’s no real different in the recipe for these two cookies you see. The only thing that was different was the way we shaped the dough and topped the cookies.
- These mushroom cookies keep for up to 5 – 7 days on the counter! I lightly covered them and we nibbled a bit each day. They will harden slightly to more of a biscuit cookie but I really enjoy that in these cookies. You can also store them in an airtight container if you want.


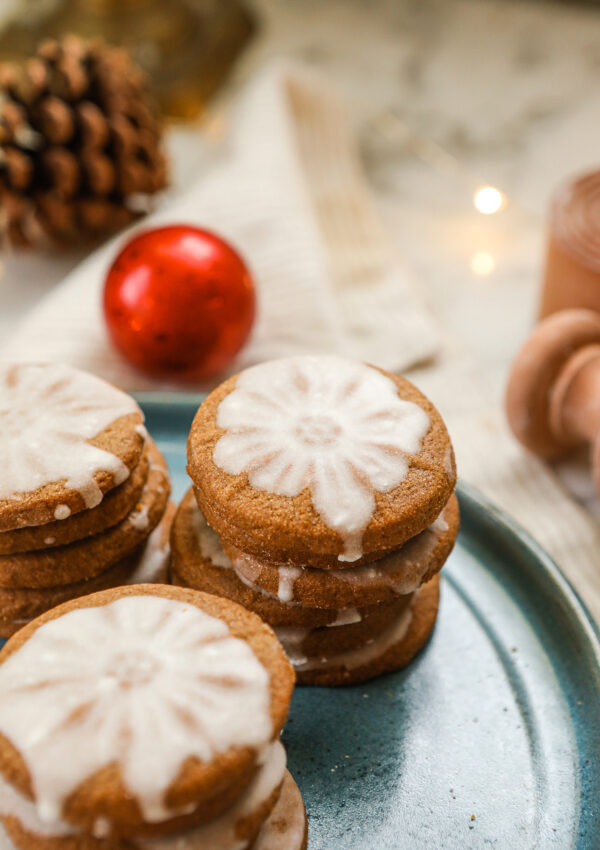
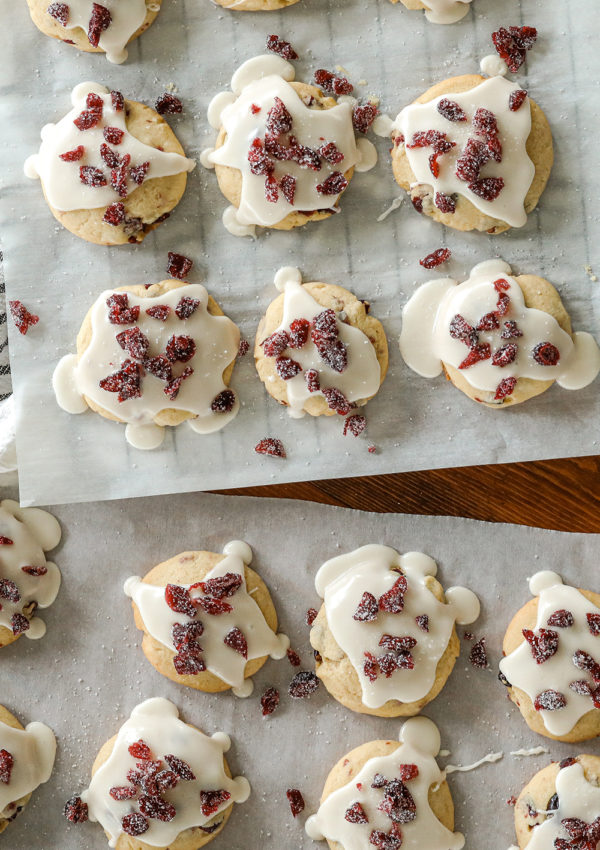
Looking for more holiday cookie recipes?
If you are looking for more cookies to make this holiday season, try these!
- Pizzelle Cookies {HERE}
- No Chill Cut Out Sugar Cookies {HERE}
- Soft Gingerbread Cookies {HERE}
- Lemon Shortbread Cookies {HERE}
- Cranberry Shortbread Cookies {HERE}
Thank you so much for visiting today, friends! I hope you love my Russian Mushroom Cookies recipe. You can find a full, printable recipe below with all the ingredients and steps. Happy Eating!
Visit on our Social Channels!
- Instagram @sugarmaplefarmhouse
- Pinterest Pinterest Sugar Maple Farmhouse
- YouTube Sugar Maple Farmhouse
- Facebook Sugar Maple Farmhouse
- Tik Tok Sugar Maple Farmhouse


Russian Mushroom Cookies
Equipment
- Hand mixer
- 2 Mixing bowls
Ingredients
- 2 1/4 cups all purpose flour
- 1/2 cup corn starch
- 1/4 tsp sea salt
- 1/2 tsp baking powder
- 1 1/4 cups sugar
- 1 stick unsalted butter at room temperature
- 1 egg at room tempature
- 1/2 cup sour cream Let this sit out about an hour before hand.
- 1 tbsp vanilla paste or vanilla extract If you are using paste then make sure it is 1 for 1 with vanilla extract.
- Additional flour for your hands and rolling the dough.
Ingredients for the red mushroom topping
- 8 oz meltable white chocolate Wafers or chips will work but I find wafers work better. This can also be pre colored red white chocolate. If so, skip the food coloring.
- Red gel food coloring Amount to be determined based on your desired color.
- 1 tbsp confectioners sugar
Ingredients for the brown mushroom topping
- 1/3 cup confectioners sugar
- 2 tbsp milk
- 1 tsp vanilla extract
Instructions
- Preheat the oven to 350 degrees.
- Sift or combine the flour, corn starch, sea salt and baking powder in a bowl and whisk.
- Cream together the butter and sugar. Then add in the egg, sour cream and vanilla and mix well.
- Add the flour mix to the butter mix little by little. About 1/2 cup at a time.
- Once the dough is well combined, dip your fingers in flour and begin to shape it. Make one cap for every stem and add them to a baking sheet lined with parchment paper. Use a melon baller for the caps if you want to be consistent. See photos for more on the shaping of the dough.
- Bake for about 12 minutes. These will not brown on their caps so it is okay if you don't see browning.
- When done, add to a cooling rack and make a small hole in the bottom of each mushroom cap. Then let cool for an hour.
- Meanwhile prep the icing or chocolate. - For the icing, combine everything in a small bowl and whisk well. Dip each mushroom cap in and before they dry, sprinkle with cocoa powder. - For the chocolate topping, melt over a double broiler or a chocolate melter. You can also use the microwave but beware of overcooking that will seize the chocolate. Dip each mushroom in the chocolate and let dry. Then tap each mushroom cap in confectioners sugar to make the white spots.
- Once the chocolate or icing is dry, enjoy!


Leave a Reply