Garland is one of my favorite ways to decorate year-round. It just adds that little, extra touch to your décor and to any celebration. While most often associated with Christmas, homemade garland can be used for any holiday, and you don’t have to just limit yourself to greens.
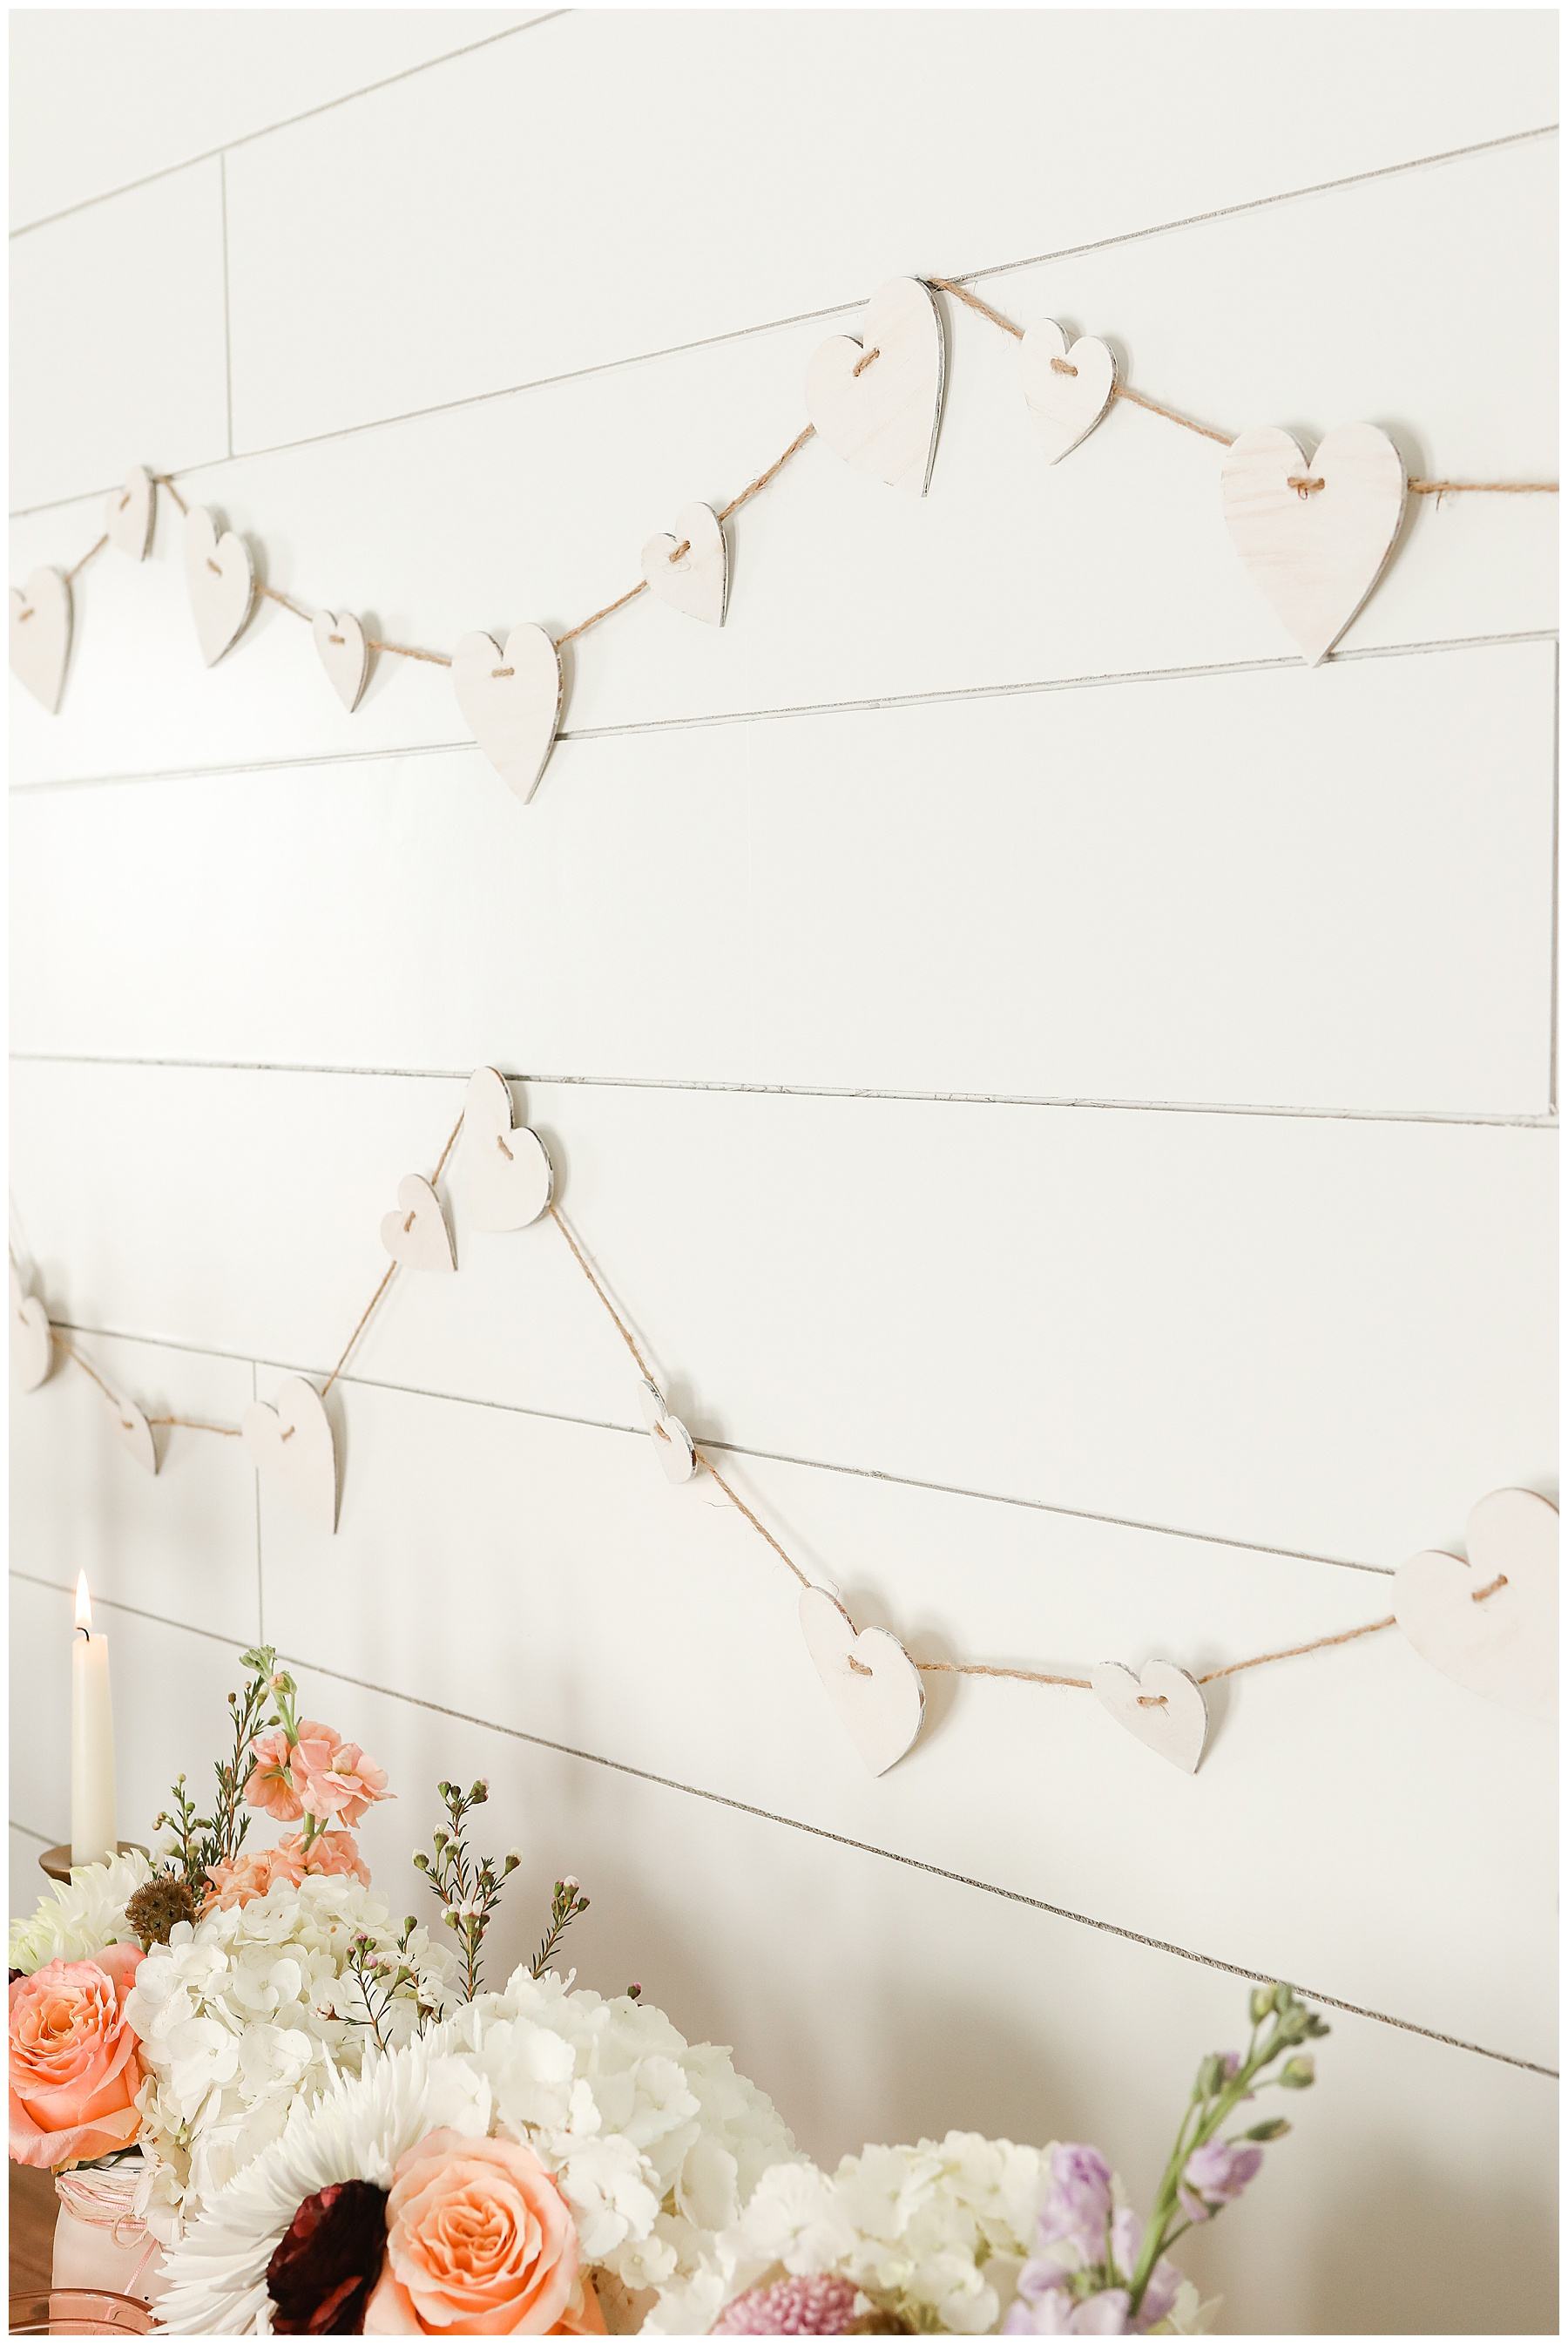
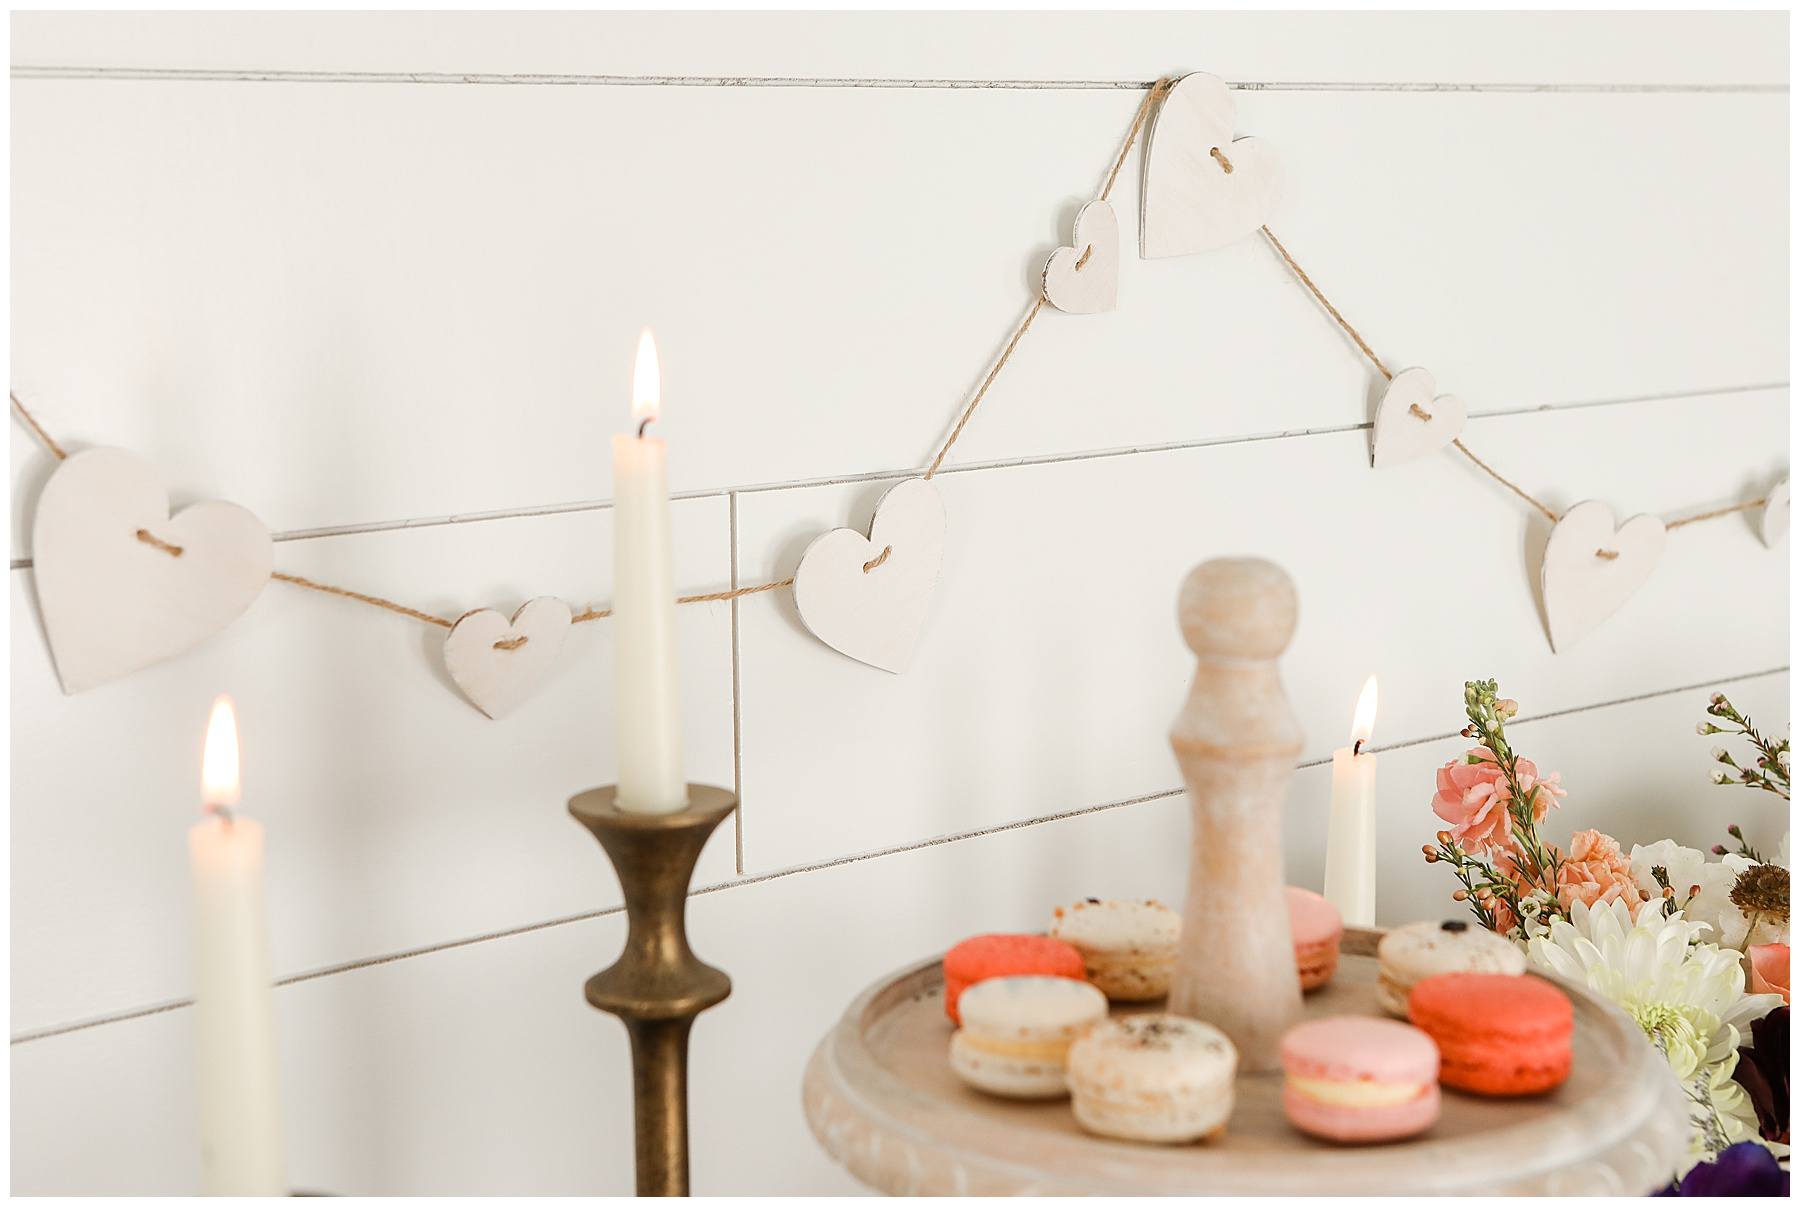
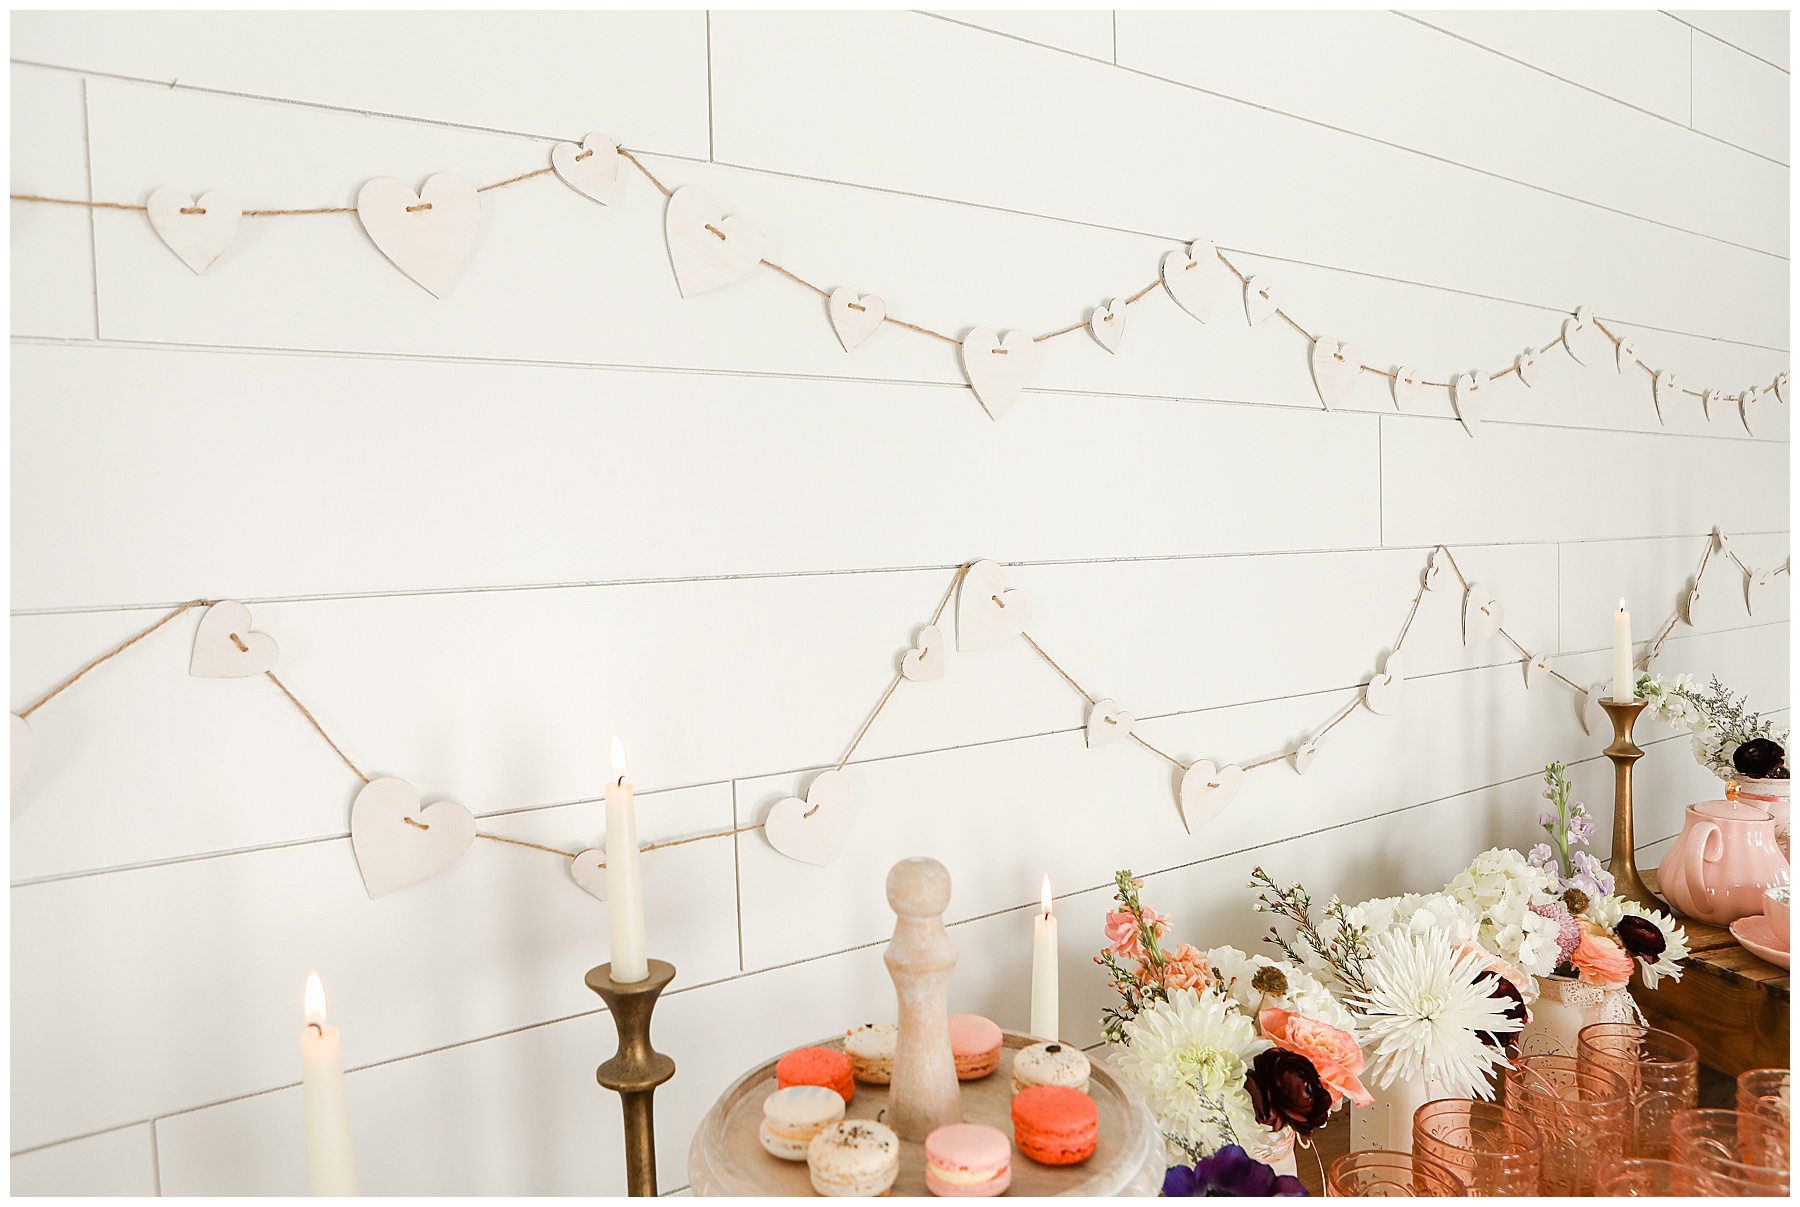
I recently made this Vintage Heart Garland for Valentine’s Day and I adore the simplicity of it. It’s sweet without being overwhelming and still added a little, sweet extra touch of charm to my Valentine’s Day set up earlier this month.

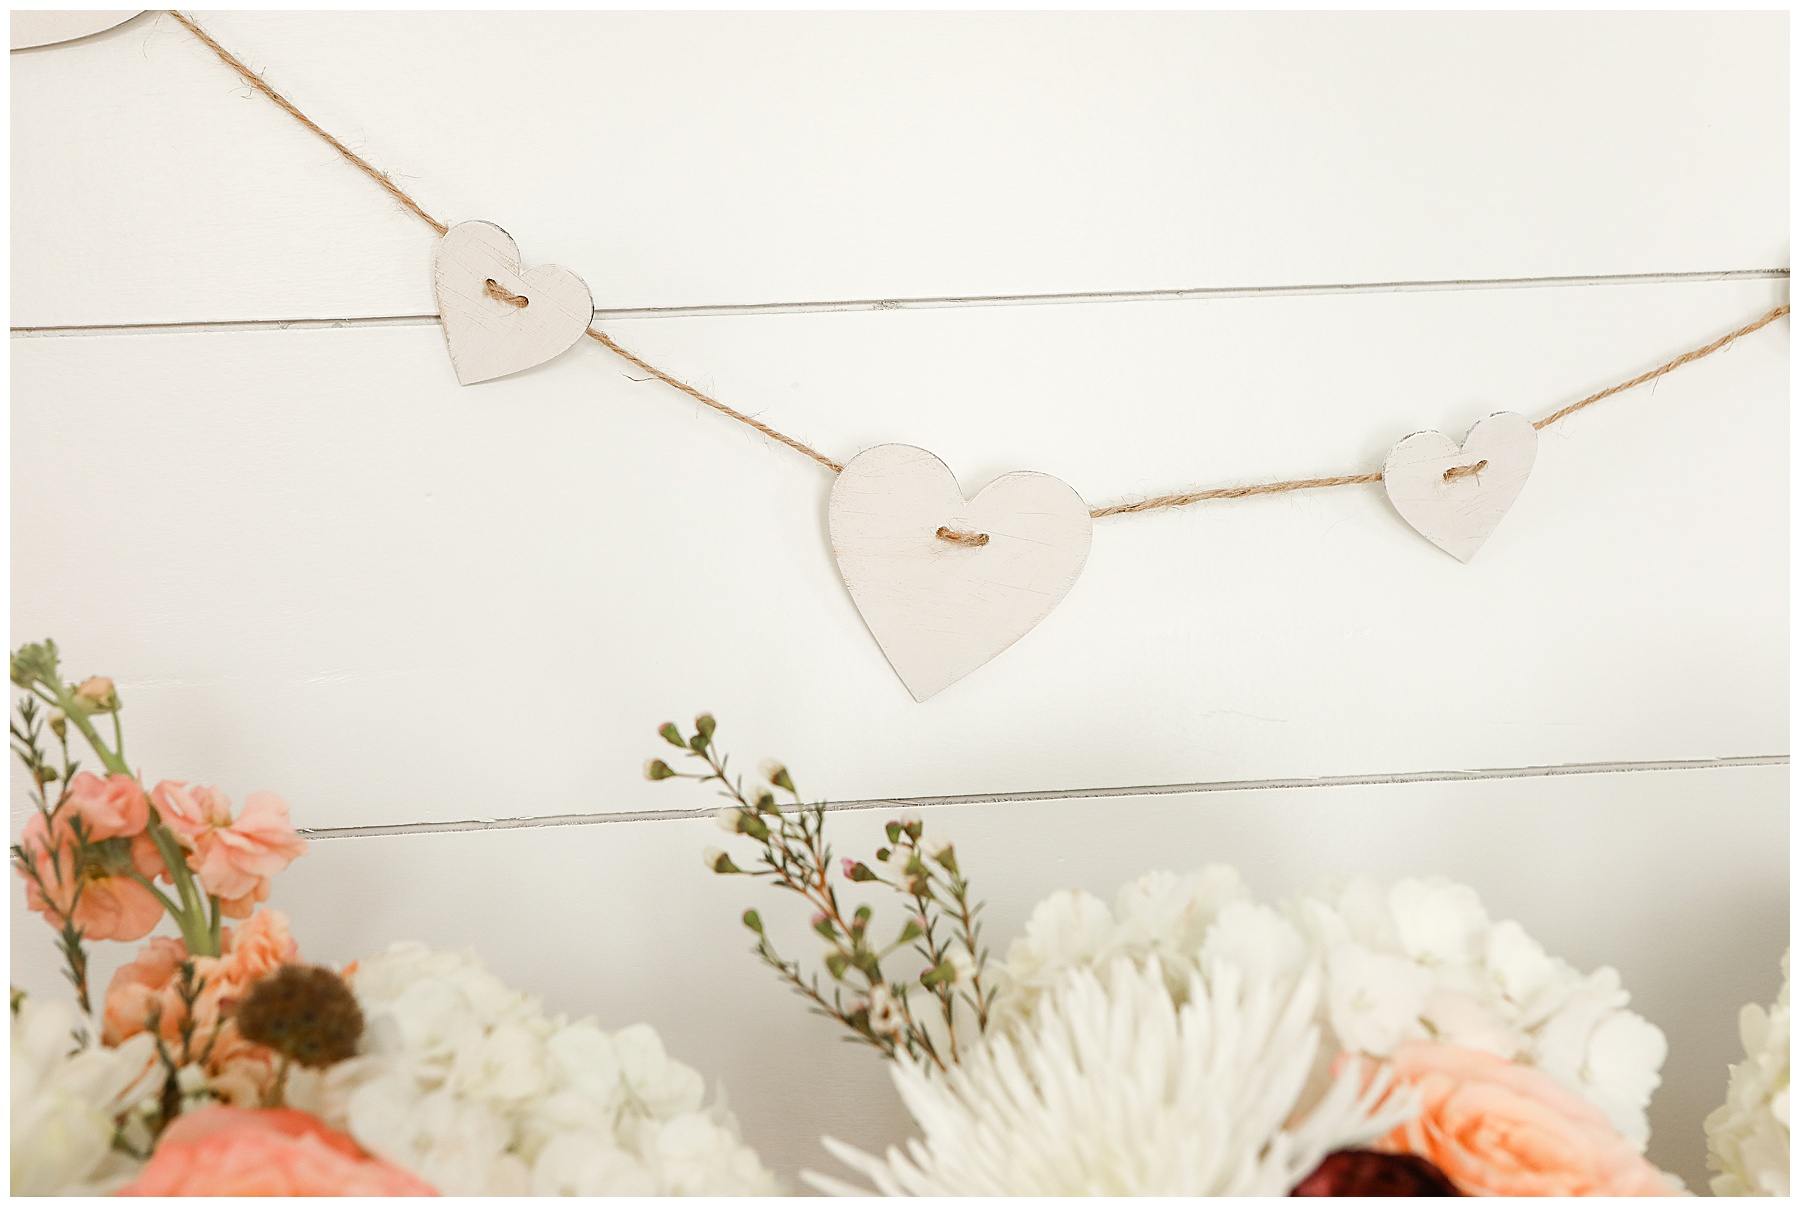
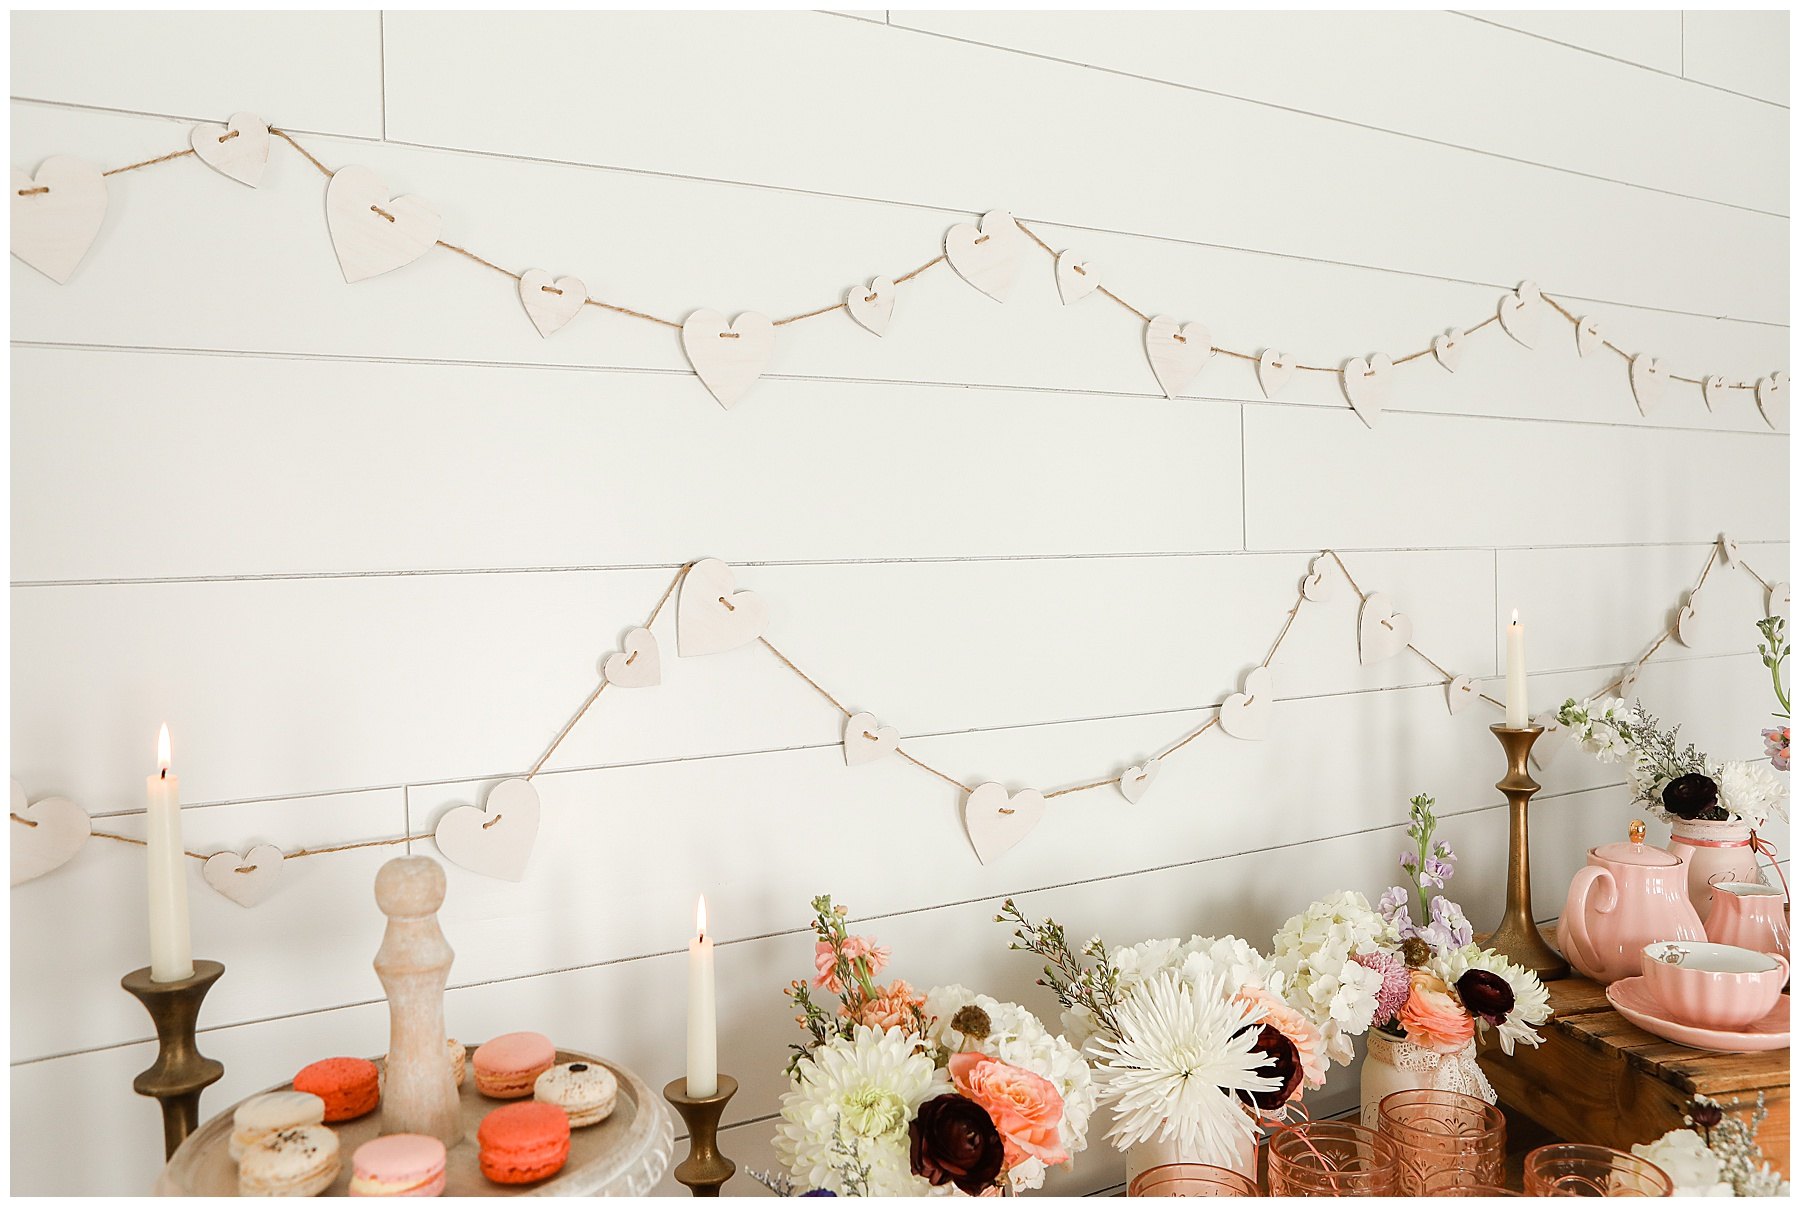
I also think that this garland can be used throughout the year. It’s perfect for a wedding or a bridal shower, a baby shower and would look lovely as part of your everyday décor. My daughter has it in her room now that I’m done using it for the holiday.
Perhaps the best part about my homemade Heart Garland is that it doesn’t take all day to make, either. I love a good craft as much as the next person but I’m a bit impatient and when a project takes too long I get a bit antsy. You can make one strand of garland in less than an hour. If you want a lot of them as part of your décor then you can make them in batches or enlist some helpers.
Here’s how I made it. You can watch the video to see the step-by-step too.
Supplies for making one strand of heart garland
- 1 package of wooden hearts from Amazon – You can try to find these at some local craft stores too but this made it so easy for me and they are inexpensive. If you want to make more than one, you will need more than one package.
- 1 spool of of twine. The thinner, the better. You want to make sure there aren’t too many strands wrapped together to make it thick or it will be harder to get through your holes.
- 1 plastic craft needle
- White Paint – I used Behr Paint Swiss Coffee
- Paint brush – These are my favorite.
- Paint container
- Sandpaper
- Drill with bit of 3/16 ths of an inch
- Painters tape
- Paper towels – optional for messy fingers

Steps to create your homemade heart garland
- Lay out your large and medium sized hearts in an alternating pattern so you know how many you will need. In the heart package form Amazon you will received a lot of hearts and sizes. I worked with the large and medium ones because I wasn’t sure we could drill two holes through the smaller ones. I did use all the large hearts in one package per strand of garland.
- Drill two holes into the upper, center portion of the hearts
- Sand down the hearts so that the wood isn’t splintering.
- Use your craft needle to help open up the holes.
- Paint the front of your hearts
- Paint the sides as desired. I just sort of dabbed the sides because I wanted to have a rustic sort-of look.
- Once dry, paint the backs of the hearts.
- Once the hearts are completely dry (about 15 minutes), use your sandpaper to rough up the front of them a bit to give them the rustic look. See the video above if you want to see how I did it.
- Use your craft needle to open up the holes again and make sure there’s enough room for the twine to go through.
- Tape off the end of your twine so you can ensure it doesn’t fray as you pull it through the wooden hearts. DO NOT CUT the other end away from the spool. Leave it attached for now. You don’t know how long the final result will be. See the video for more.
- Then start threading the hearts onto the twine in an alternating pattern.
- Once they are all on, go through and create a space of about two to three inches between the end of each heart.
- Finally cut the end away from the spool and knot both ends of the twine to complete the project.
- Hang as desired on a wall, fireplace or along the top of a window.
What do you think of the final project? You can see the whole set up where I used this garland {HERE}.
Thank you so much for visiting today friends. I hope you’ll come back again. For more craft projects, click here.


You have a real knack for holiday decorating with that garland. I really love hearts so i wish I had this in my house for all year
I actually bought something very similar last time I was at the store. Now that I see how easy it is to make, I’ll have to try it!
I’m remodeling my daughters room and this would be perfect for her room. I’ll have to make it for her.
How pretty! I might have to make one of these to brighten up the front room. I love your decor.
That is really cute, I like the neutral colors used vs a hot blinding pink. Thanks for sharing this!
That is so pretty. I would paint my hearts to make them look like candy hearts
How cute. This would also be cute on a Christmas tree, but I love how you have it too.
This is just my style. I really love all thing vintage, and country in style. I would use it year-round.
I would have so much fun with the painting part! Stripes, dots, etc!
I think this would be so sweet in a baby’s room. Guests could sign one of the little hearts.
Thanks for sharing this DIY. I would love to make this for my home. It’scsuch a great idea.
This is so pretty! I saw your video on it. I’ve started turning these kinds of projects over to my oldest daughter for the time being, and I bet she would love this!
That is an adorable garland! I think both of my girls would enjoy making these for their rooms.
Well this is insanely creative! I would have NEVER thought to ever make something like this!
This is such a pretty decoration idea. Perfect for a rustic wedding theme or just hanging in the house!
I really like the rustic look of this heart garland. I like how many different celebrations it can be used for.
This is really adorable! Would be perfect craft for any occasion!
Well, this is some creative stuff. I reckon it would be so fun to do this with friends. This will looks really good in my room.
I love the simplicity of the aesthetic. It would blend well with some of my lovely plants at home. This looks amazing!
This is so cute and creative. My daughter is getting married this summer and this would be awesome at one of her bridal showers.
This is precious! and I love your shiplap too.
How stinking cute! I really love these. They speak to my simple aesthetic perfectly.
How adorable! Your heart garland is perfect for any season and it adds a signature style to the entire decor of the room!
This is so cute! I love garlands but don’t have any good places to put them in my house right now which is unfortunate.
This is super cute and you can do this not just for Valentines day but any other event
OMG, these are super cute. I love how they look! I am going to have to make these, maybe for my office!
What a beautiful, easy DIY project! Perfect for engagement parties, weddings, and Valentine’s Day. Heck, I’d love to keep a strand of these up in my office all year long!
I’m not a crafty person so I think if I tried this is would not look as good as yours. You are right, I’m one of the people that usually only think of garland at Christmas time.