I’ve been searching for the perfect pieces for our house since we moved in and sometimes it can be a bit difficult due to the shape and size of the older rooms in the house I also like to sometimes sit with a space before I decide how I want to design it. I always feel that if I throw some furniture and décor into a space to just fill it, I find myself wanting to do something totally different a few months later. Our bedside tables have been an issue for me since we moved in. After the construction on the house last year – where we moved the bathroom door and the made a master closet – we switched our room from a larger space to a space that’s a bit of a tight squeeze with our king-sized bed. It gives us an attached bathroom and beautiful master closet in this old house but the bedroom itself is a bit of an odd bird.

The issues

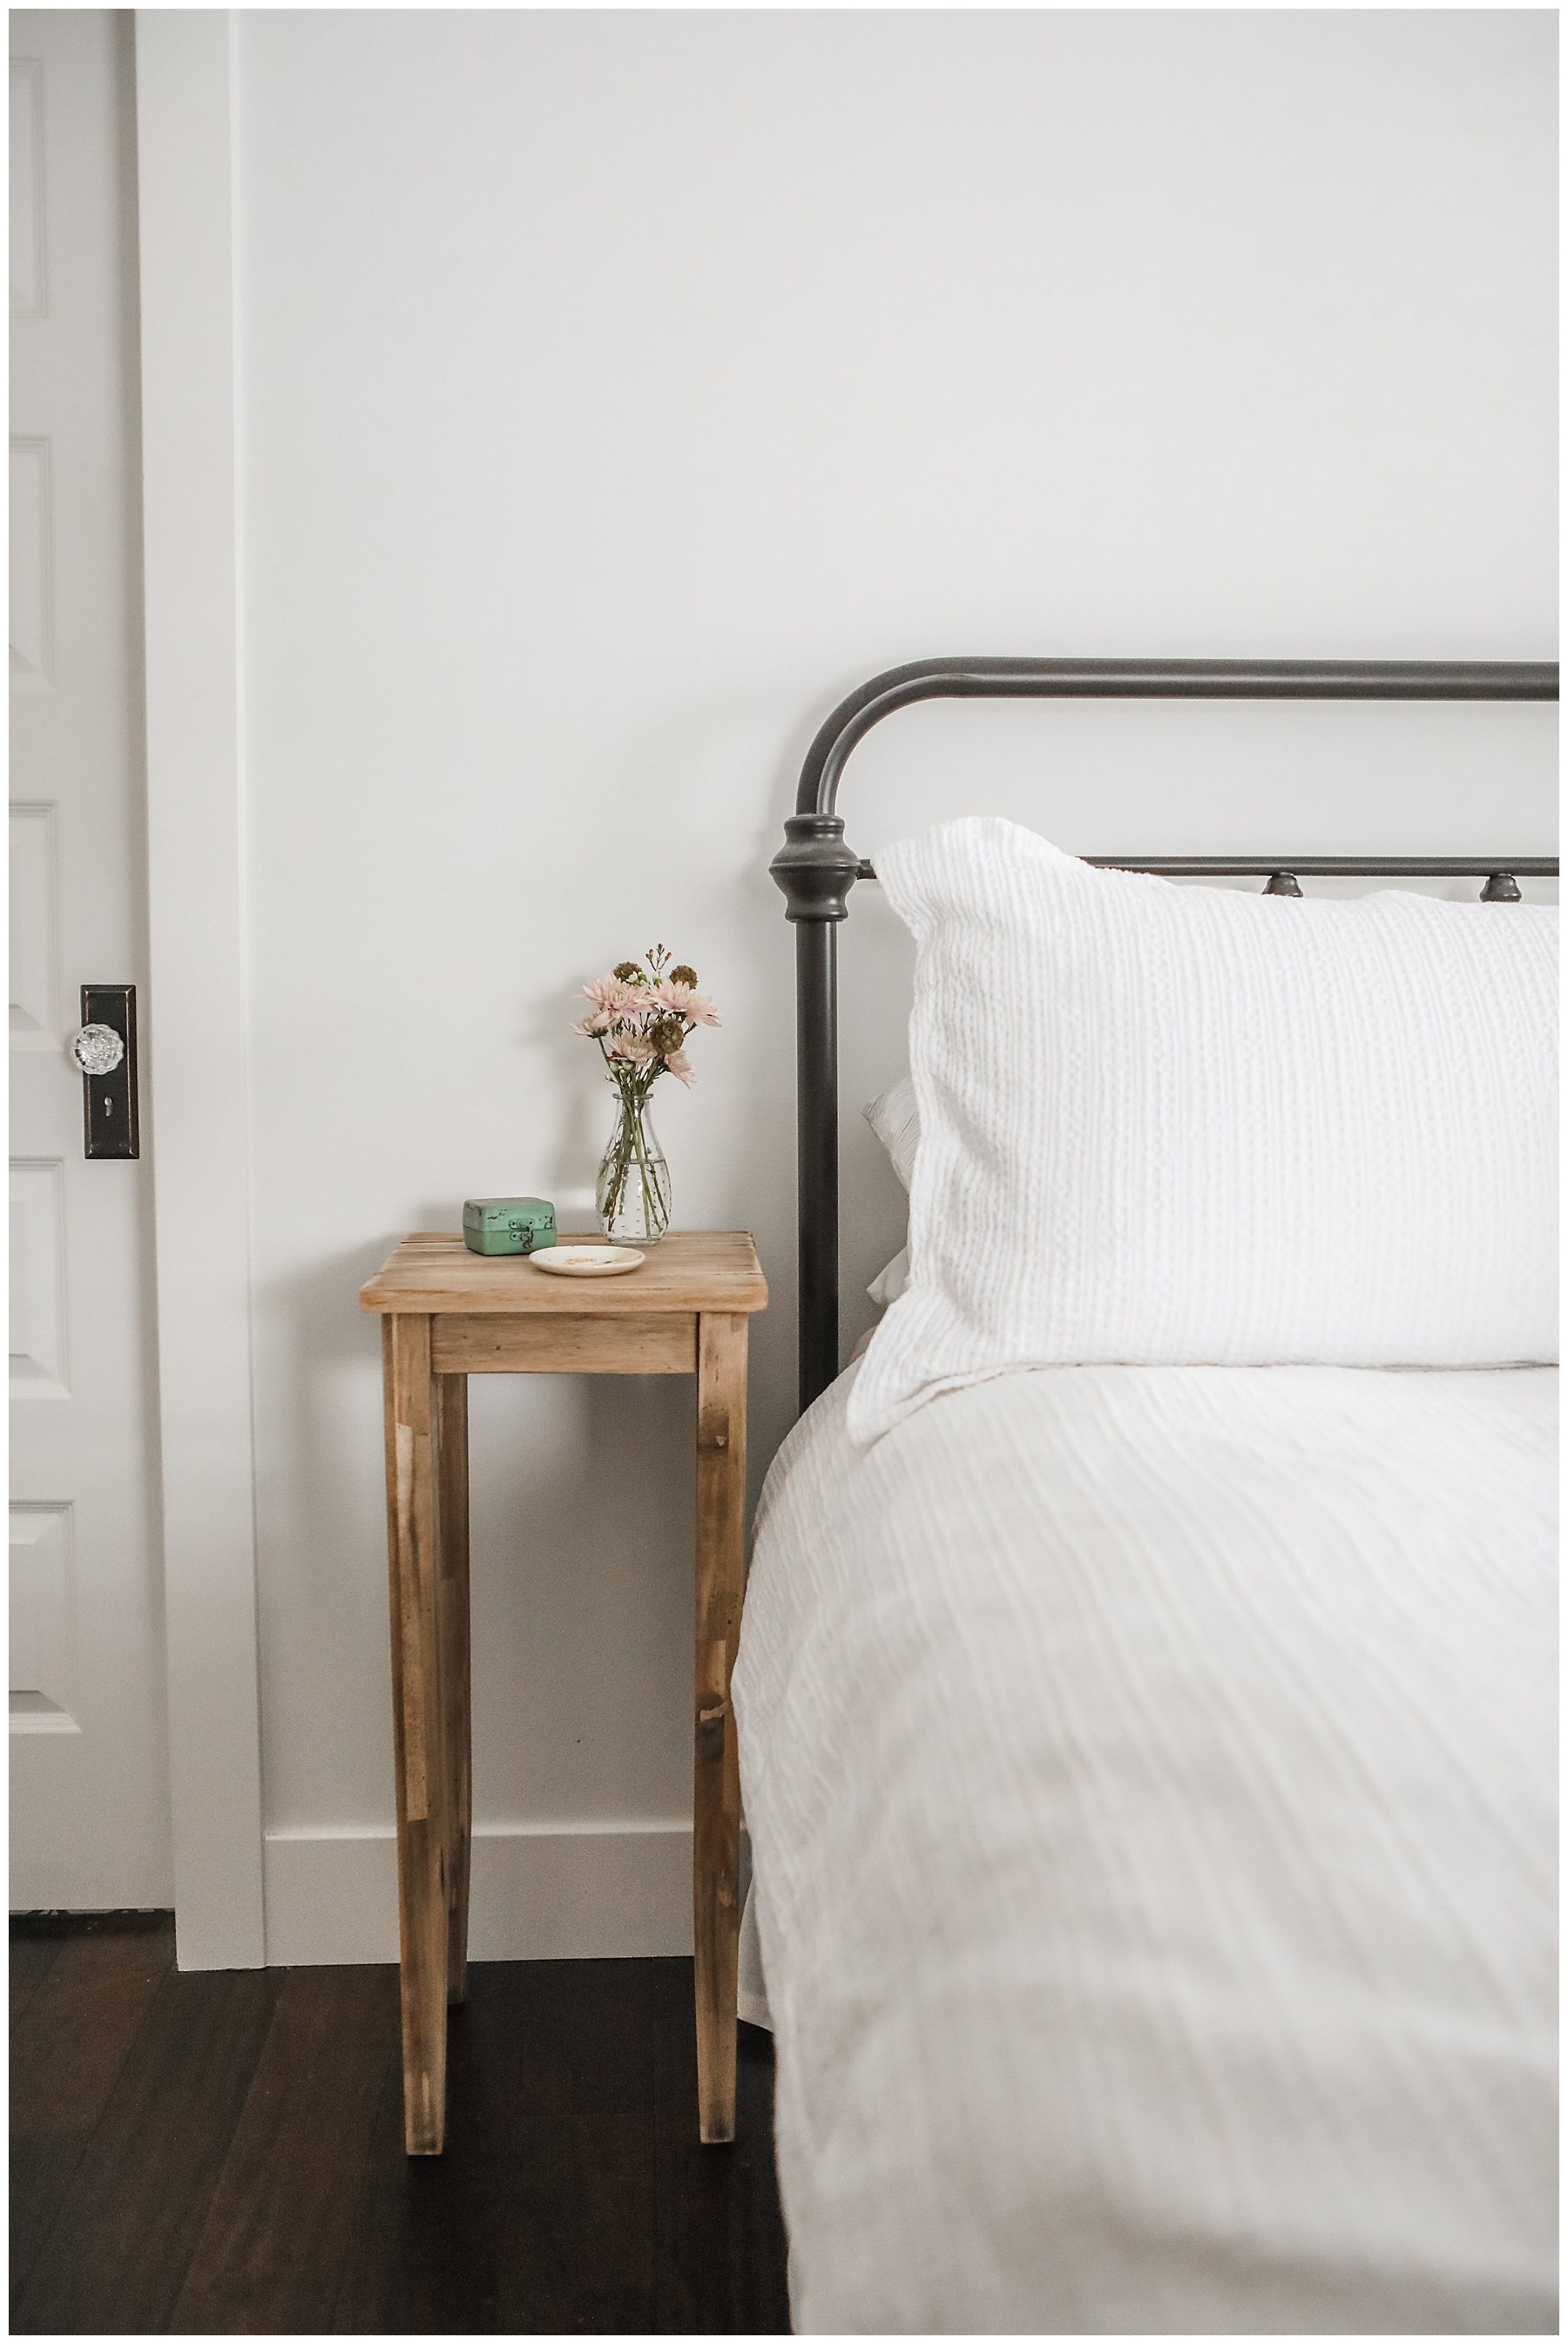
The sloping ceiling and the multiple doors in the small space leaves very little room for bedside tables. For a while, I felt like we could live without them. But after a few months with no place to put my phone or a glass of water, I started searching again.
I needed something small. The bedside tables could be no more than 15 x 15 inches. I also wanted something that was real wood and felt a bit more natural, without going too far into the country design space.
As you may be able to tell, I love modern farmhouse design mixed with some traditional pieces and a touch of mid-century straight lines. 🙂 Basically, I take a bit of everything, throw it all in and see what works. Sometimes I find natural wood tones can veer a little too far towards traditional country for my taste.
But the problem was really the size for the bedside tables. Everything I found – vintage and new – was too large.
Don’t discount off-the-shelf items
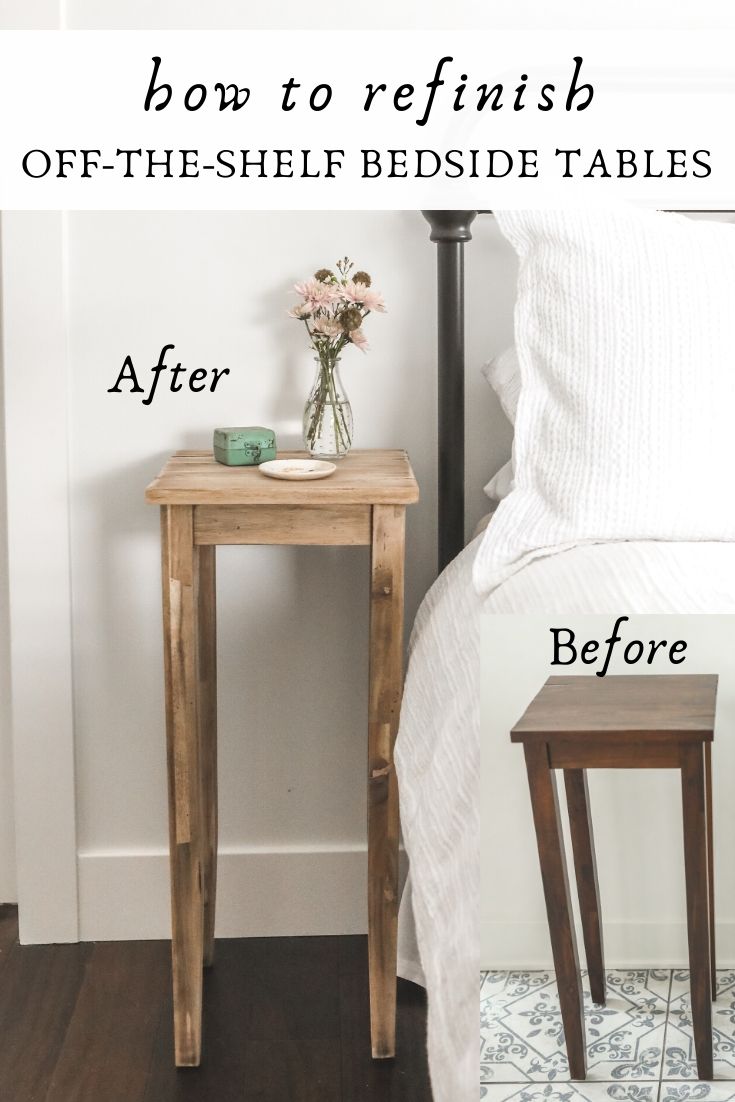
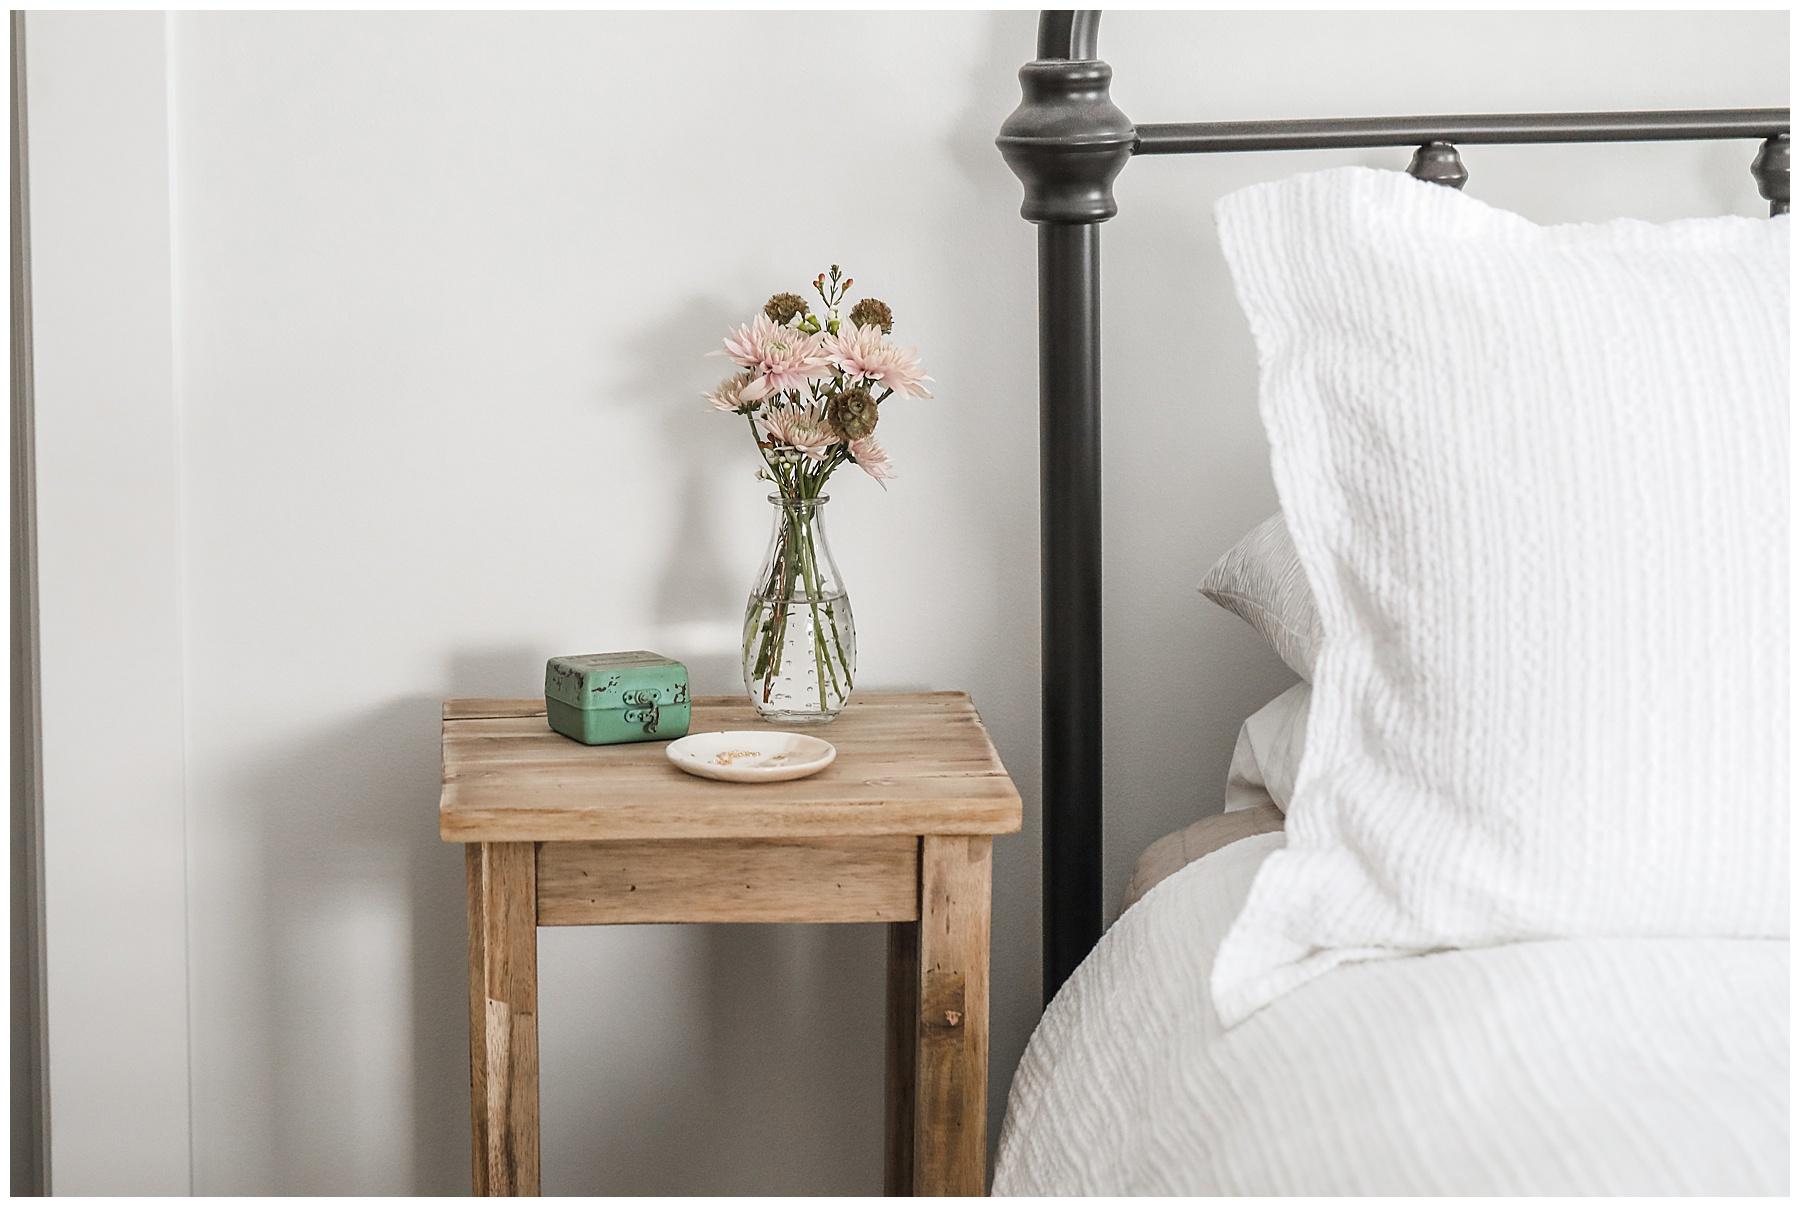
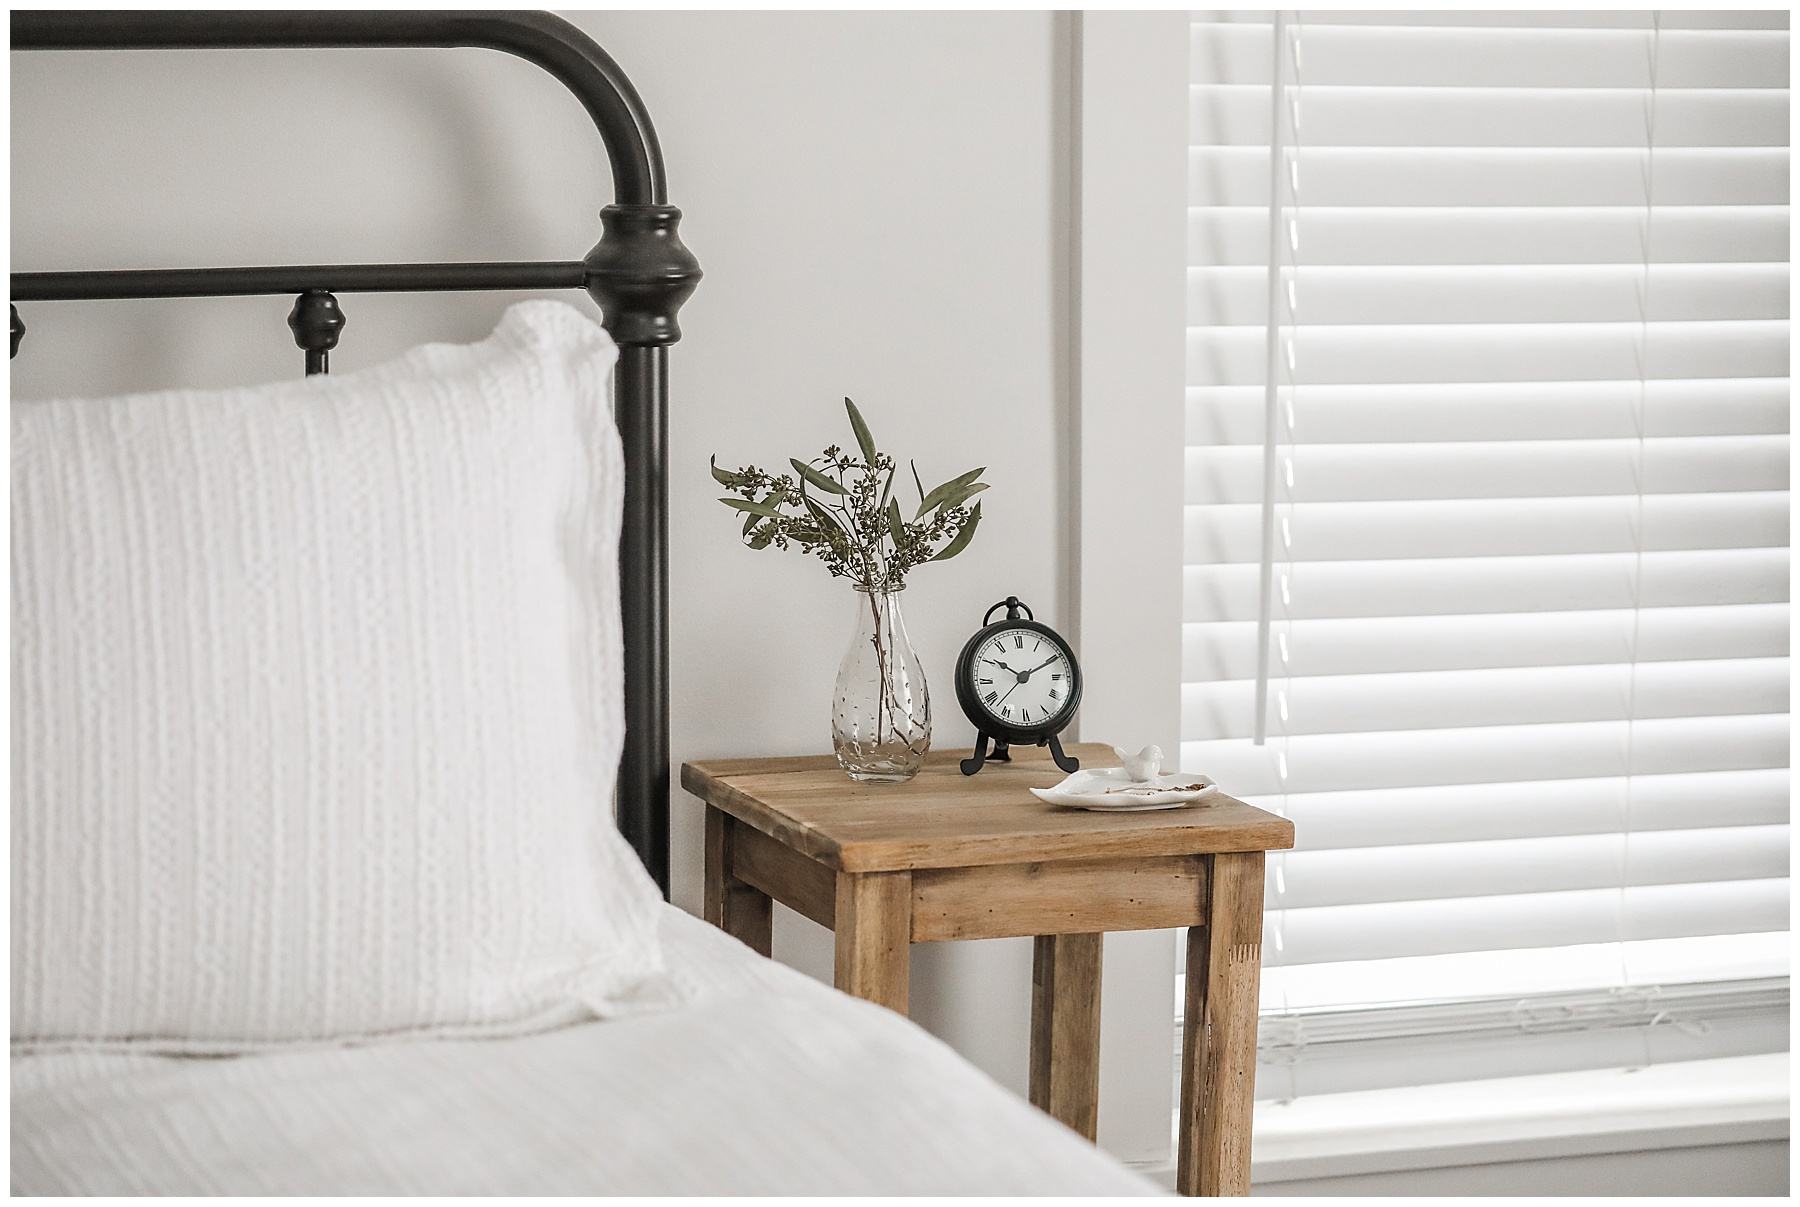
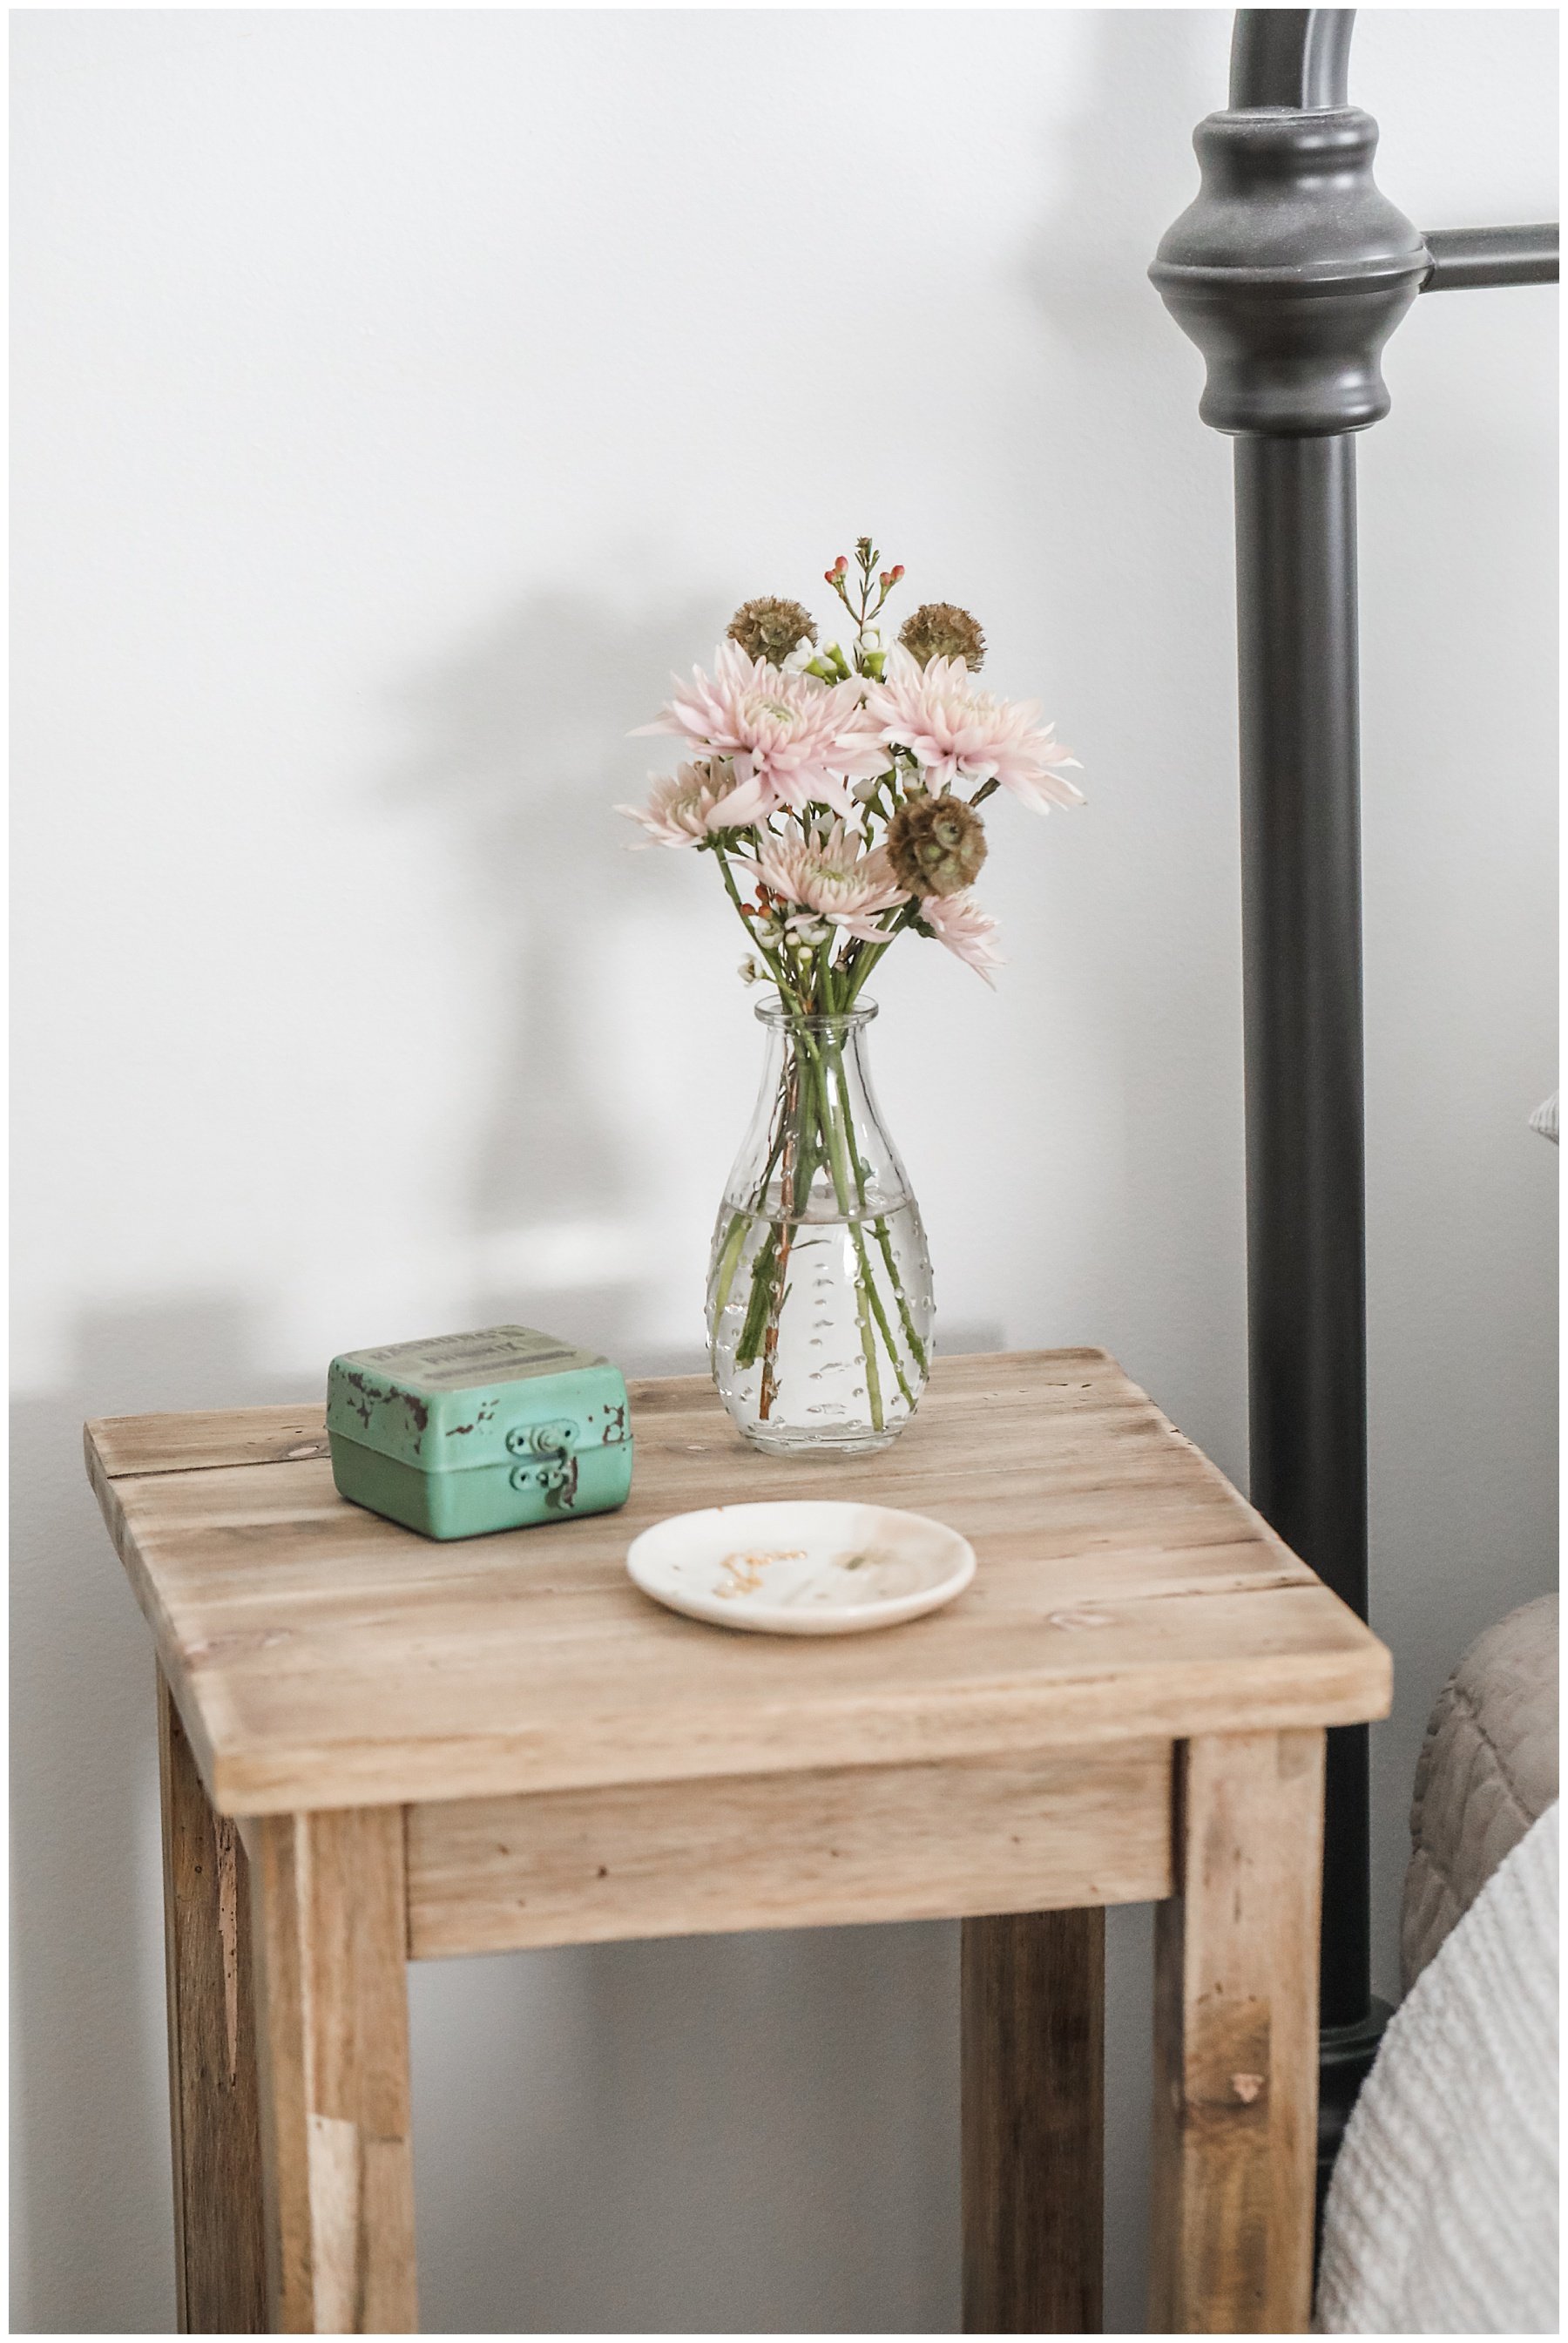
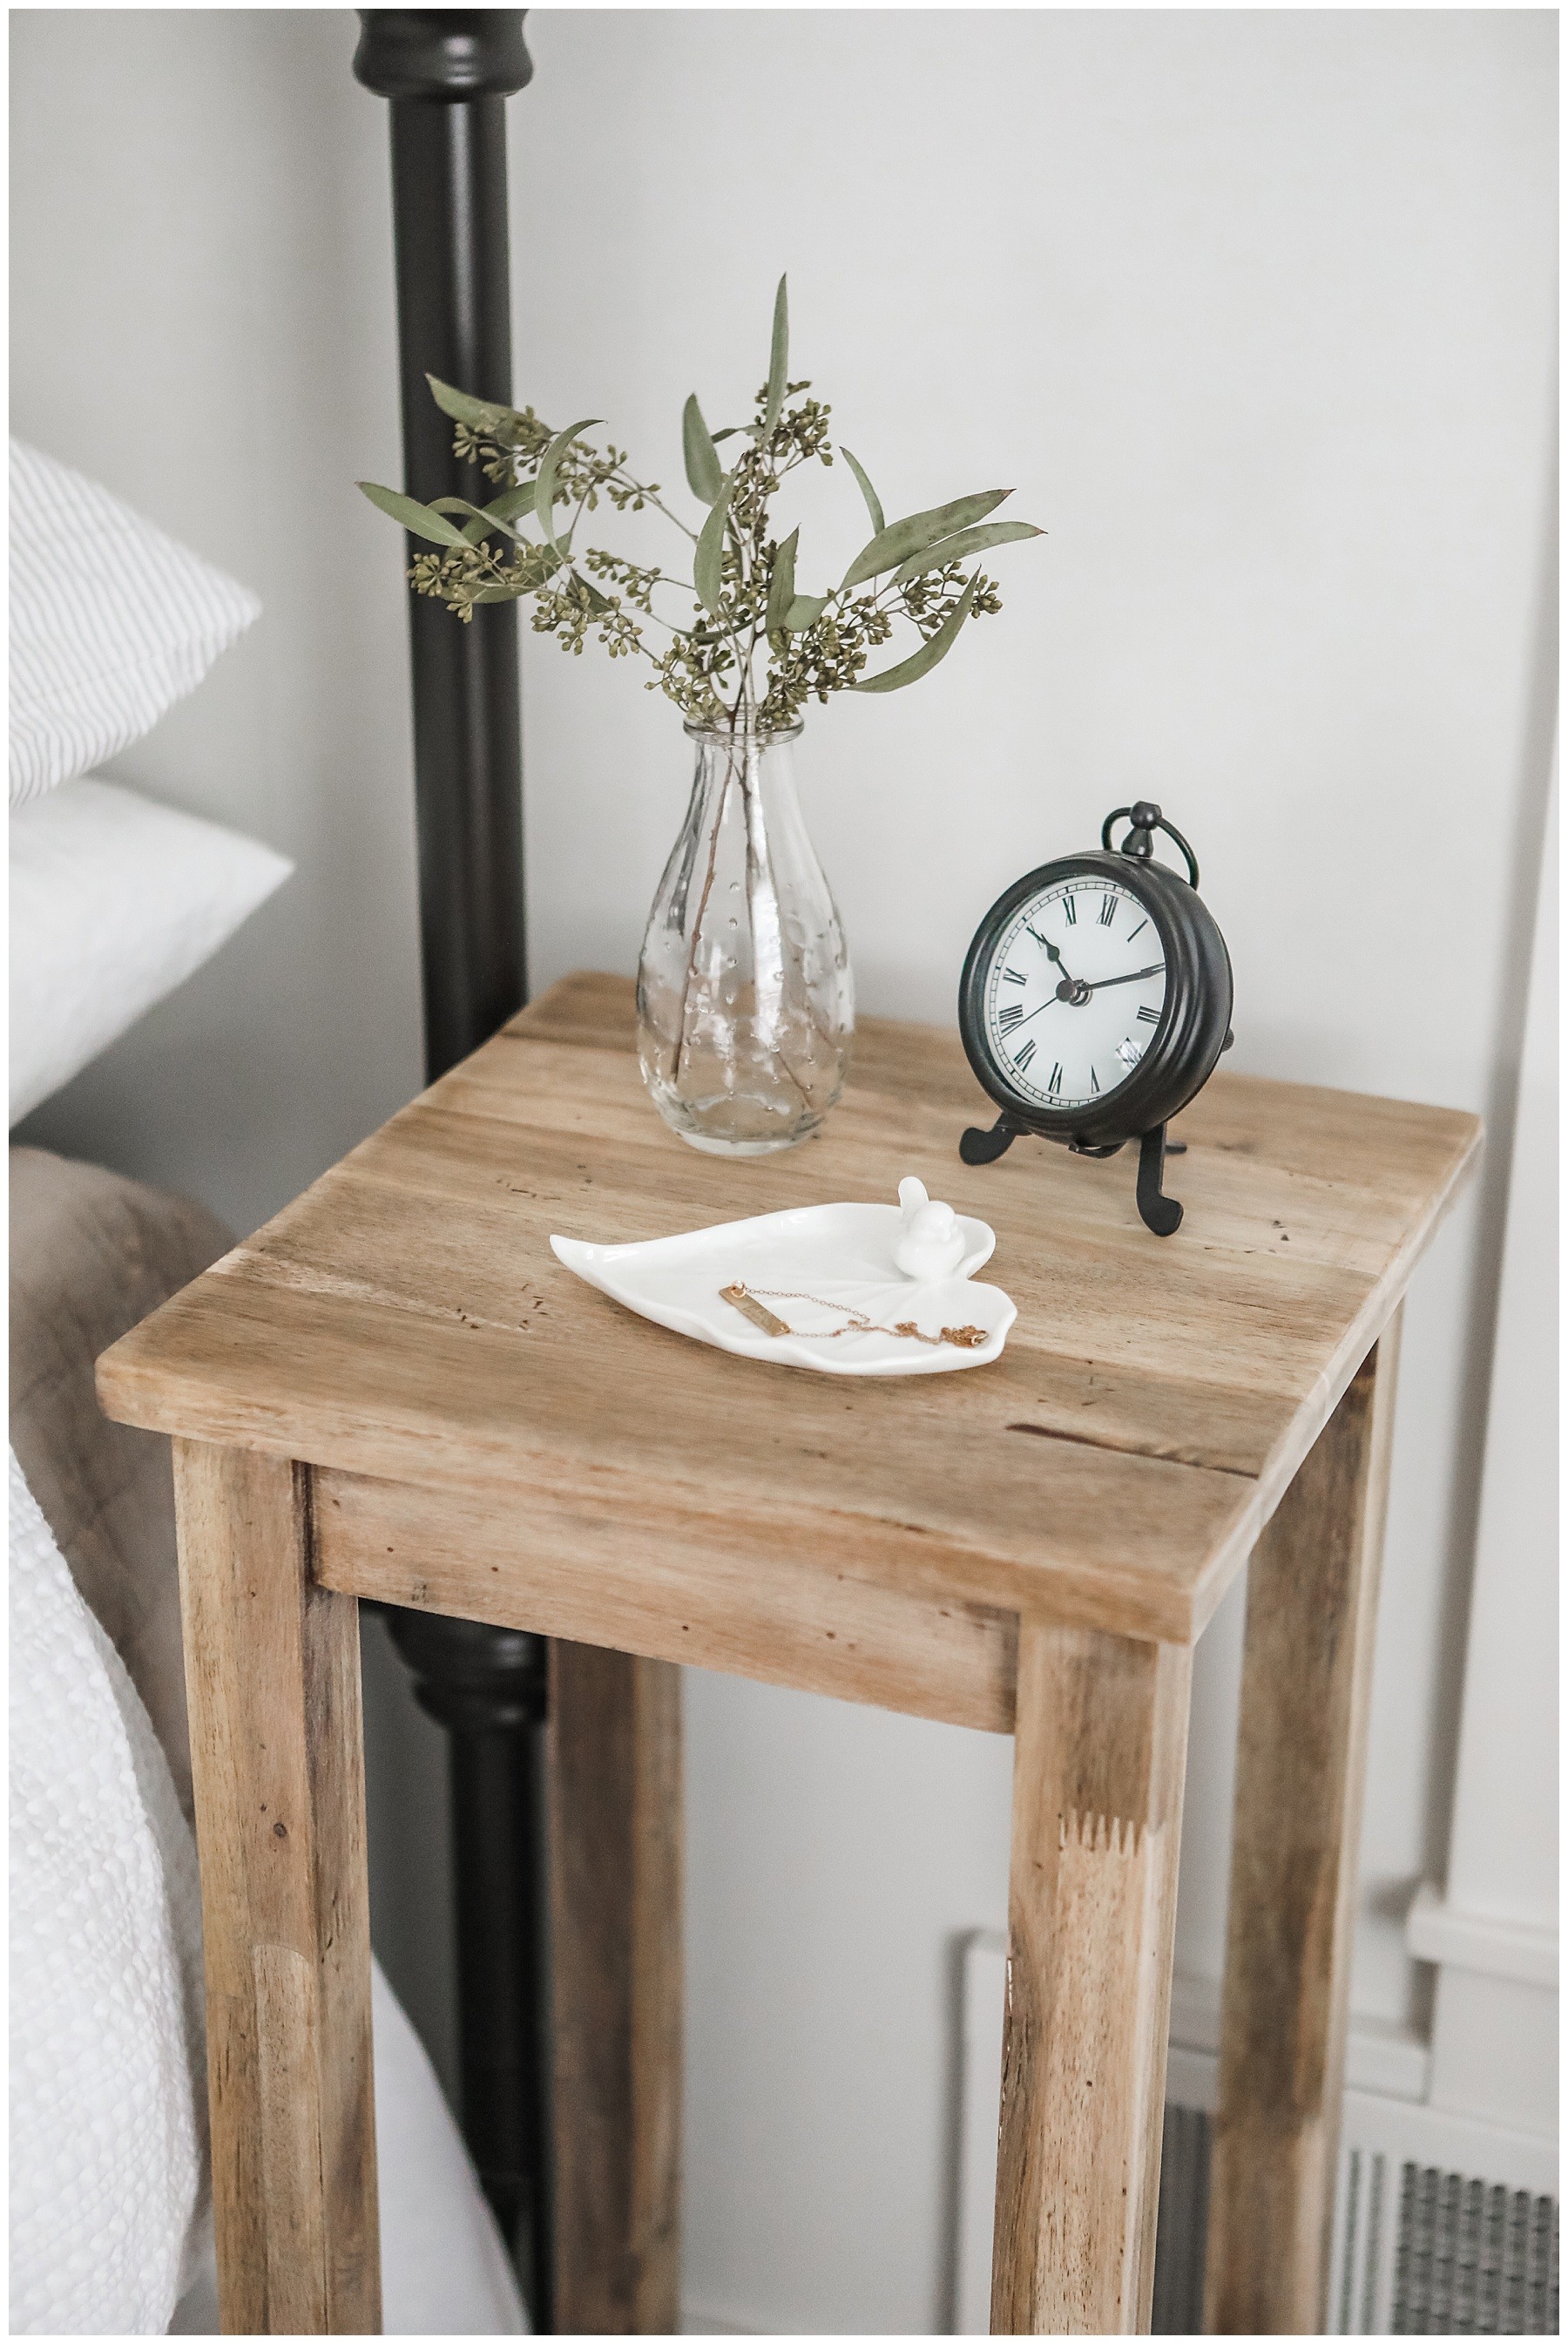
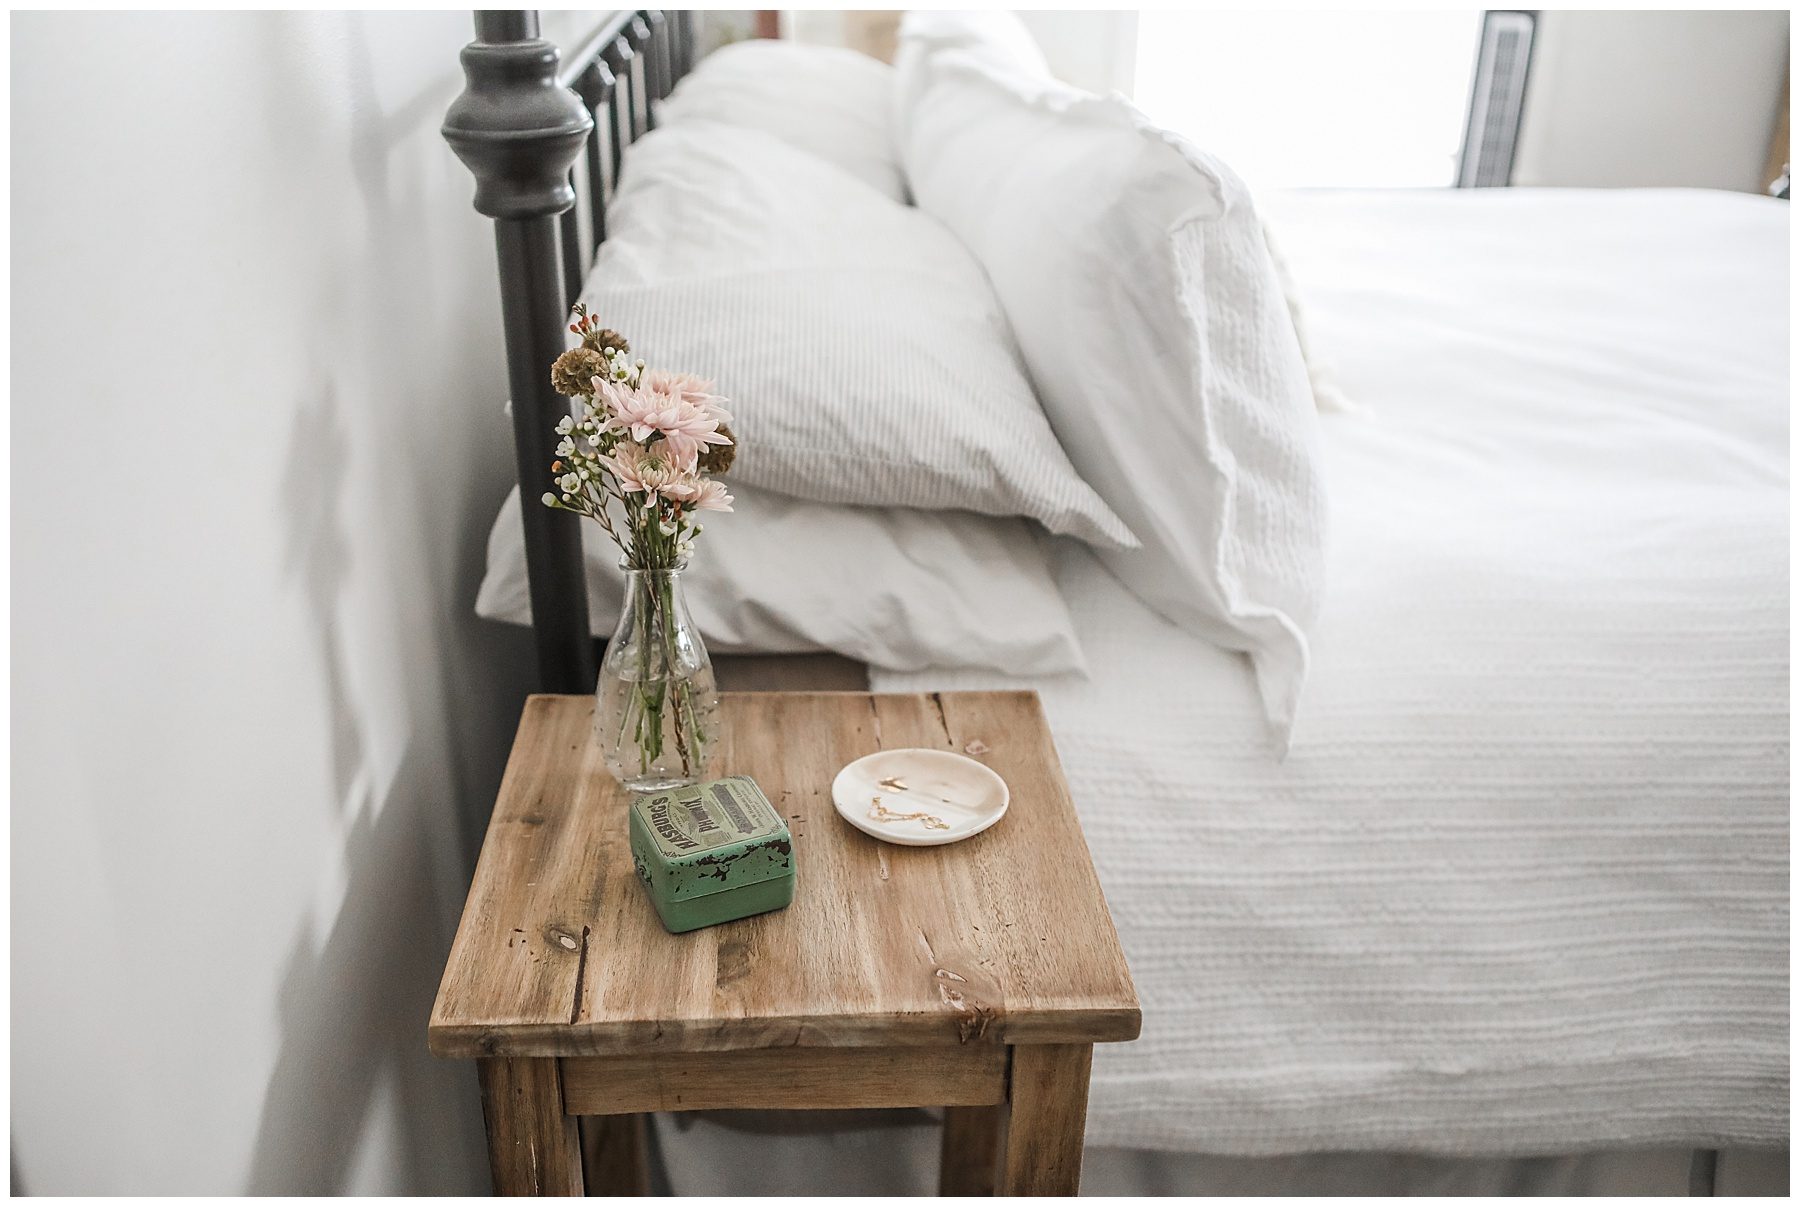
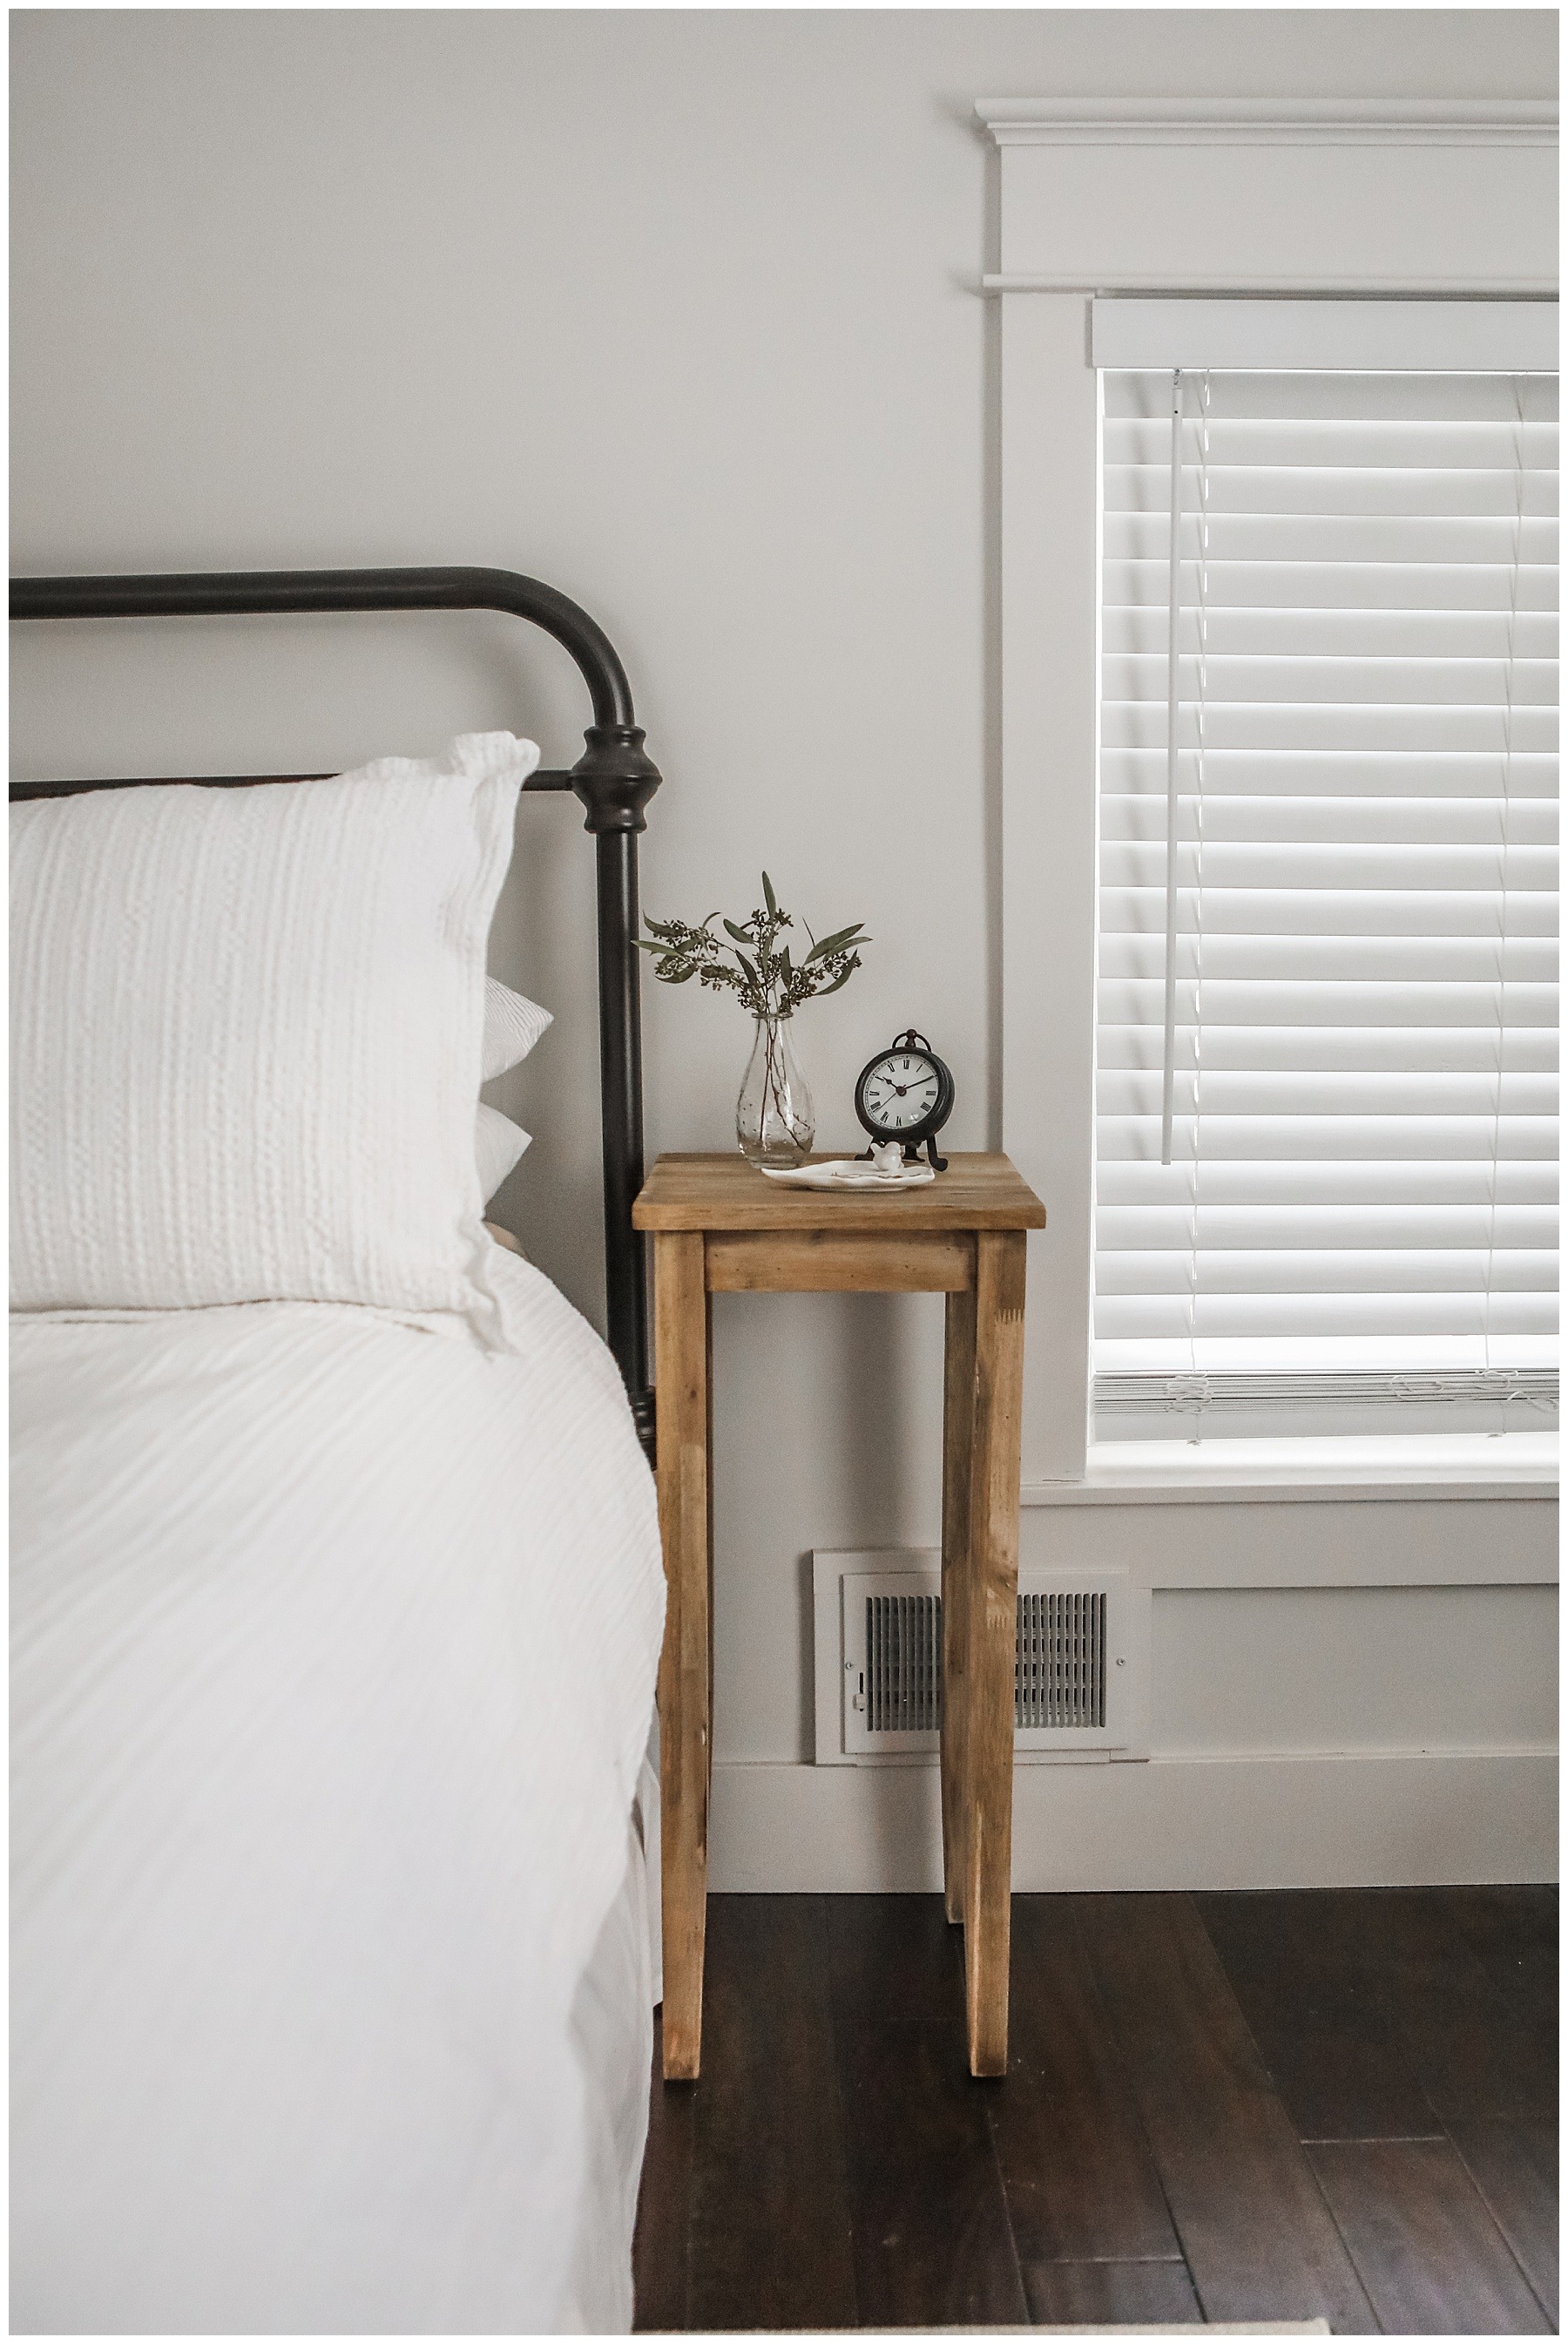
After a few months, I finally found some tables that had the clean lines I love. They were also small enough to fit our space. I bought two of the tall Chloe Accent Tables from World Market. The surface space is a 13 X 13-inch square and it’s 30 inches tall, which is taller than the average bedside table. However, they work for us because our bed is fairly high.
(If you like the size of these but they’re too tall for you, there is one that’s the exact same style but shorter here.)
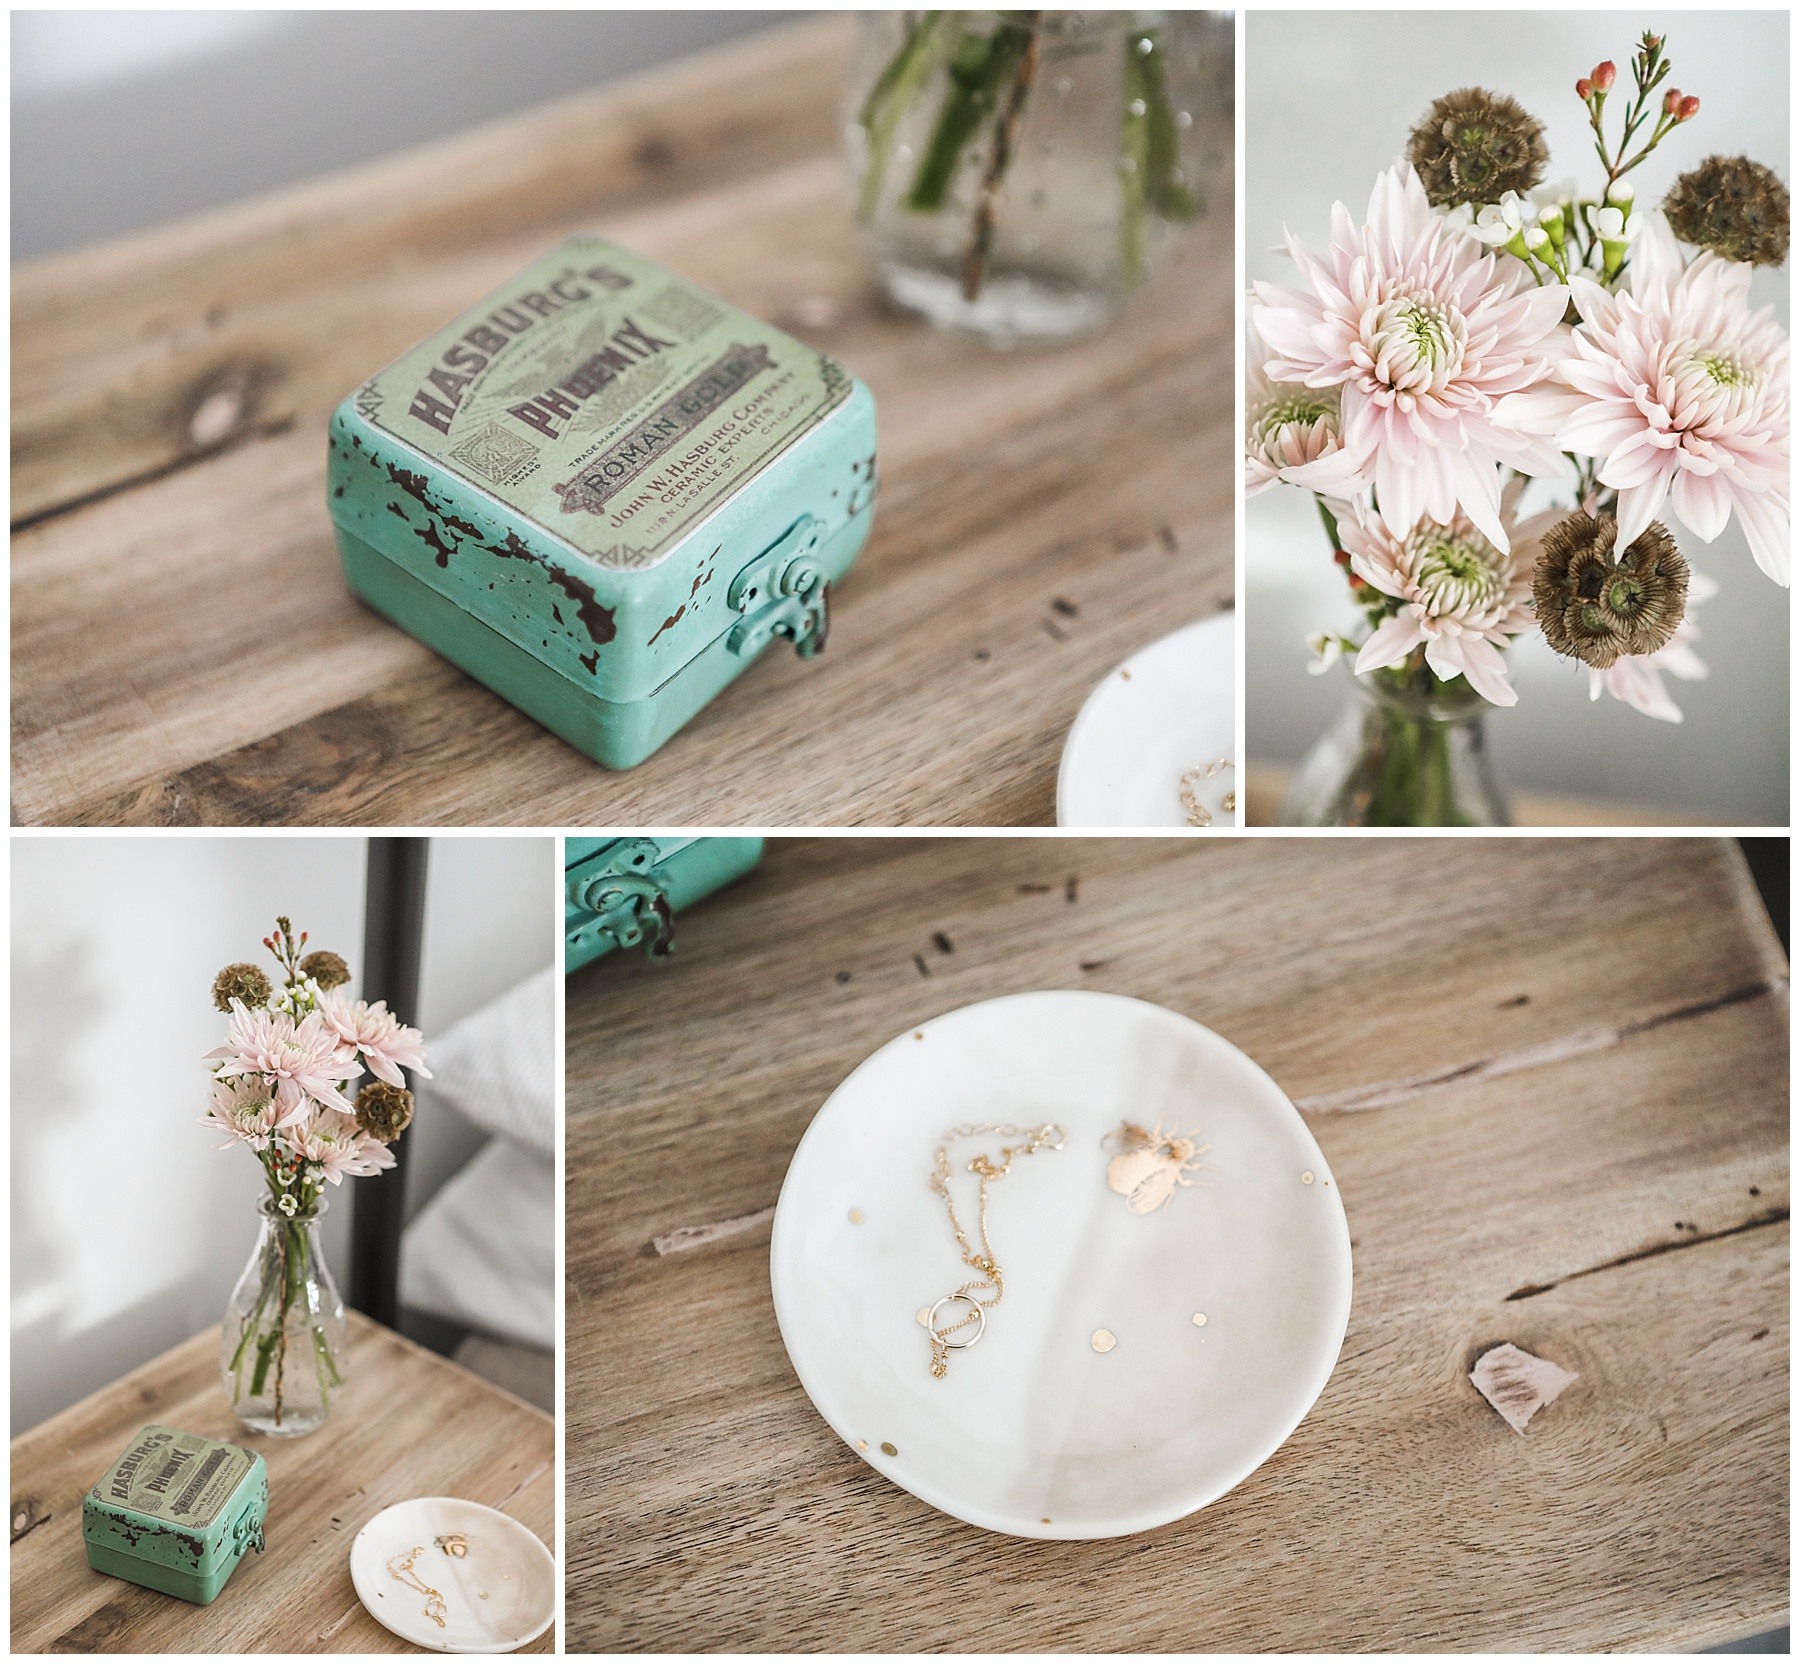
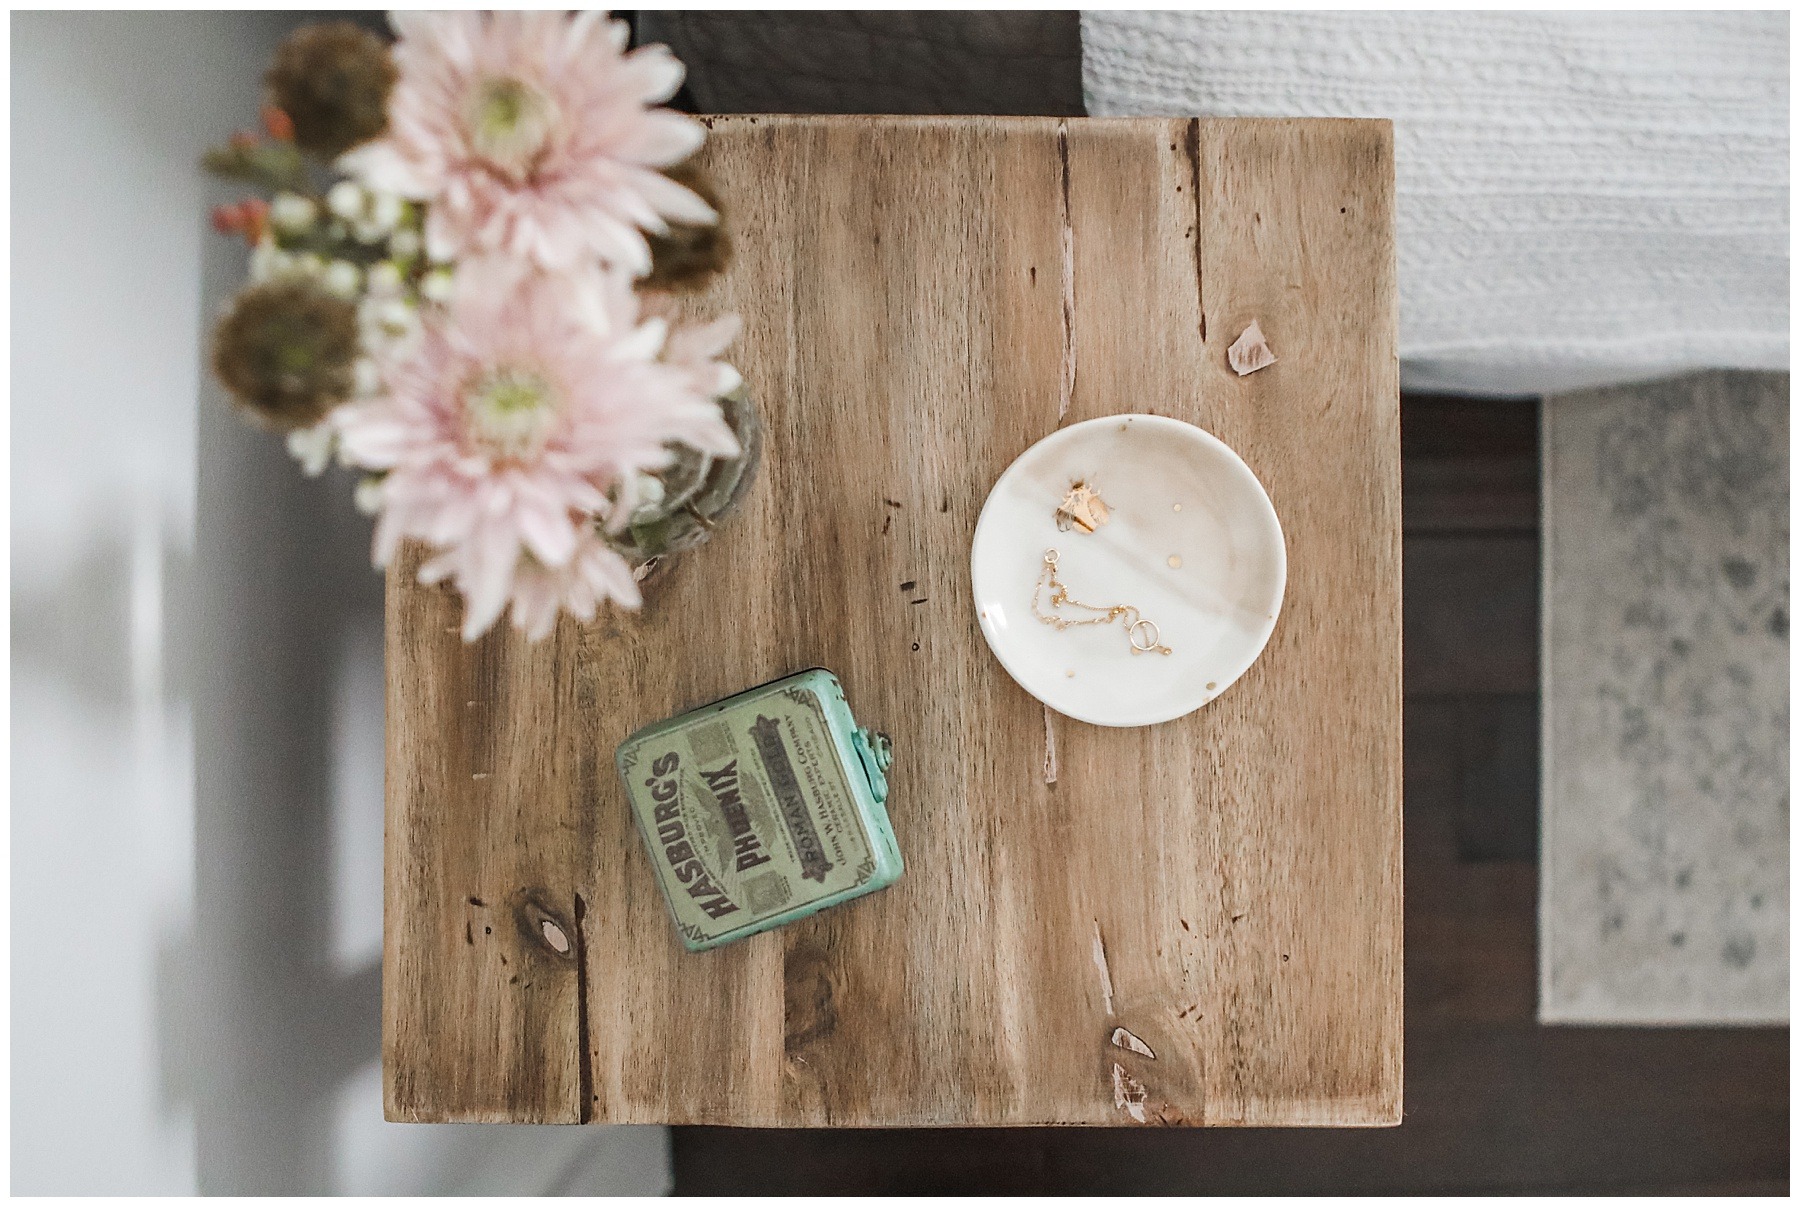
Perhaps the best part of these tables is the price point. They are only $34.99. The shorter table, which you can find here, is just $29.99. These both would also make perfect plant tables and I might get more of them for that too.
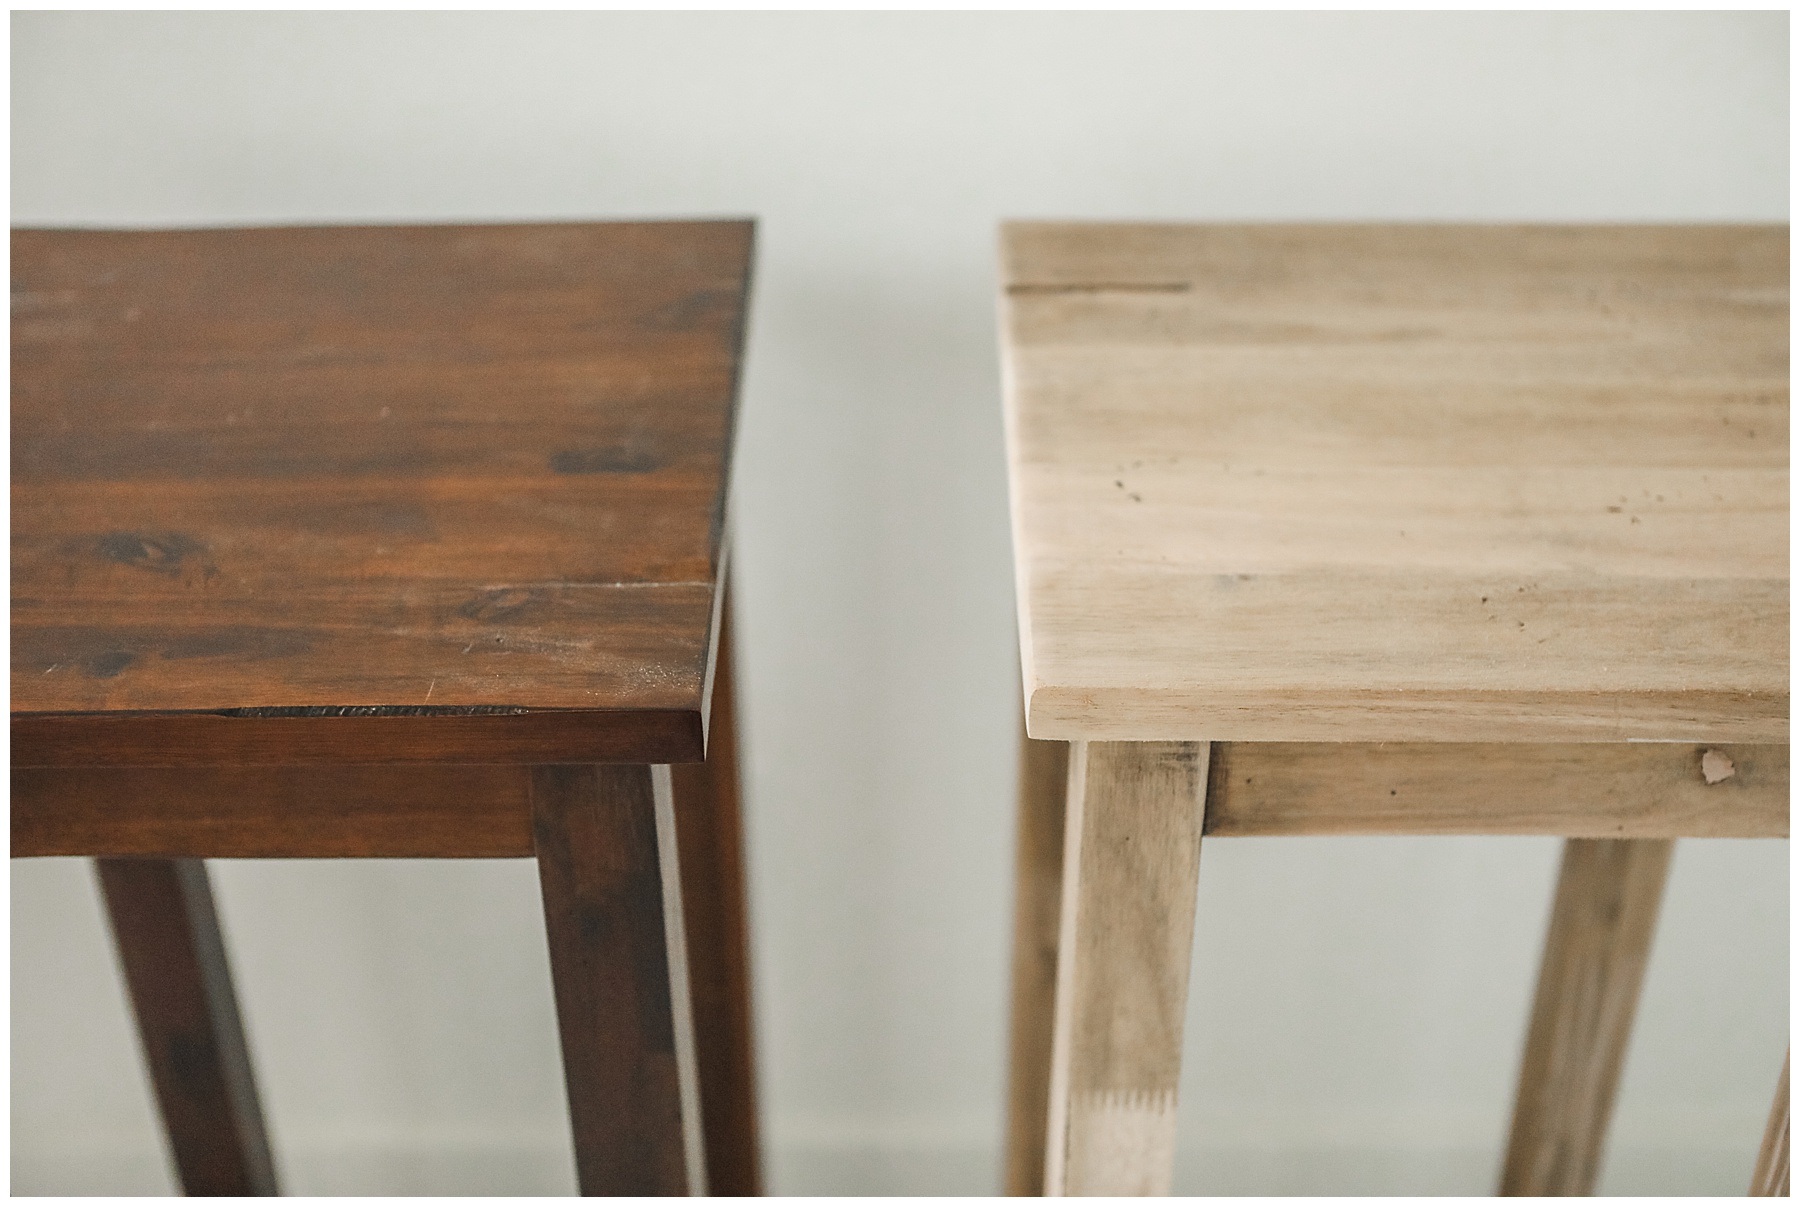
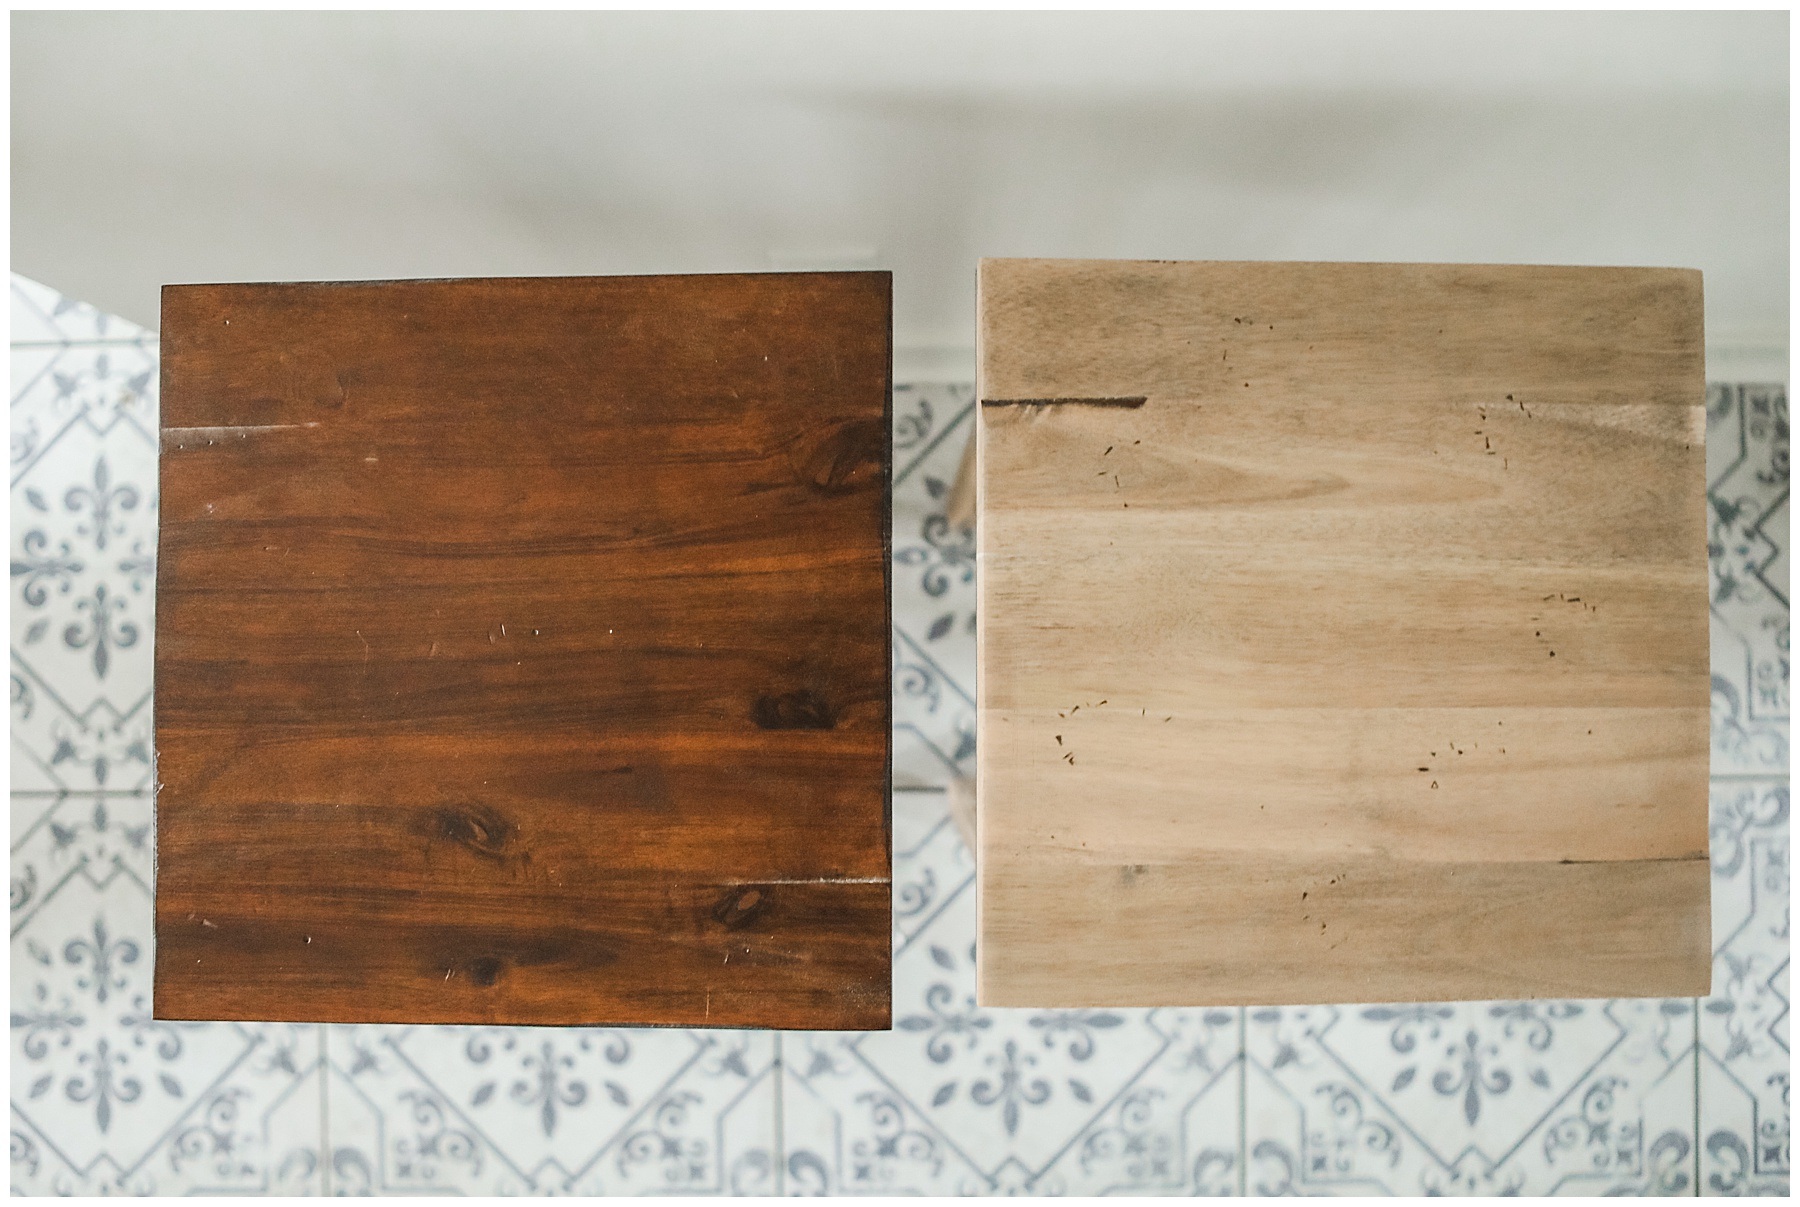
However, these tables were really the wrong color of wood. They were finished with a mahogany finish, which was really much too dark for me.
But I didn’t let that stop me. Instead, I decided that we would refinish them and I knew this was something we could do because our table in the barn was the same color, the same wood and the same finish as these side tables.
Refinishing the bedside tables
We had purchased it over nine years ago from World Market and had recently refinished it too. We had lived with that dark mahogany finish on it for years. Nine years ago, dark wood was on trend. But when we needed a table in the barn, we knew the time had some to strip it, sand it and get it to a color that we love.
After a few weeks, it was done. You can see it here in the holiday table post all decorated and in the photos below.

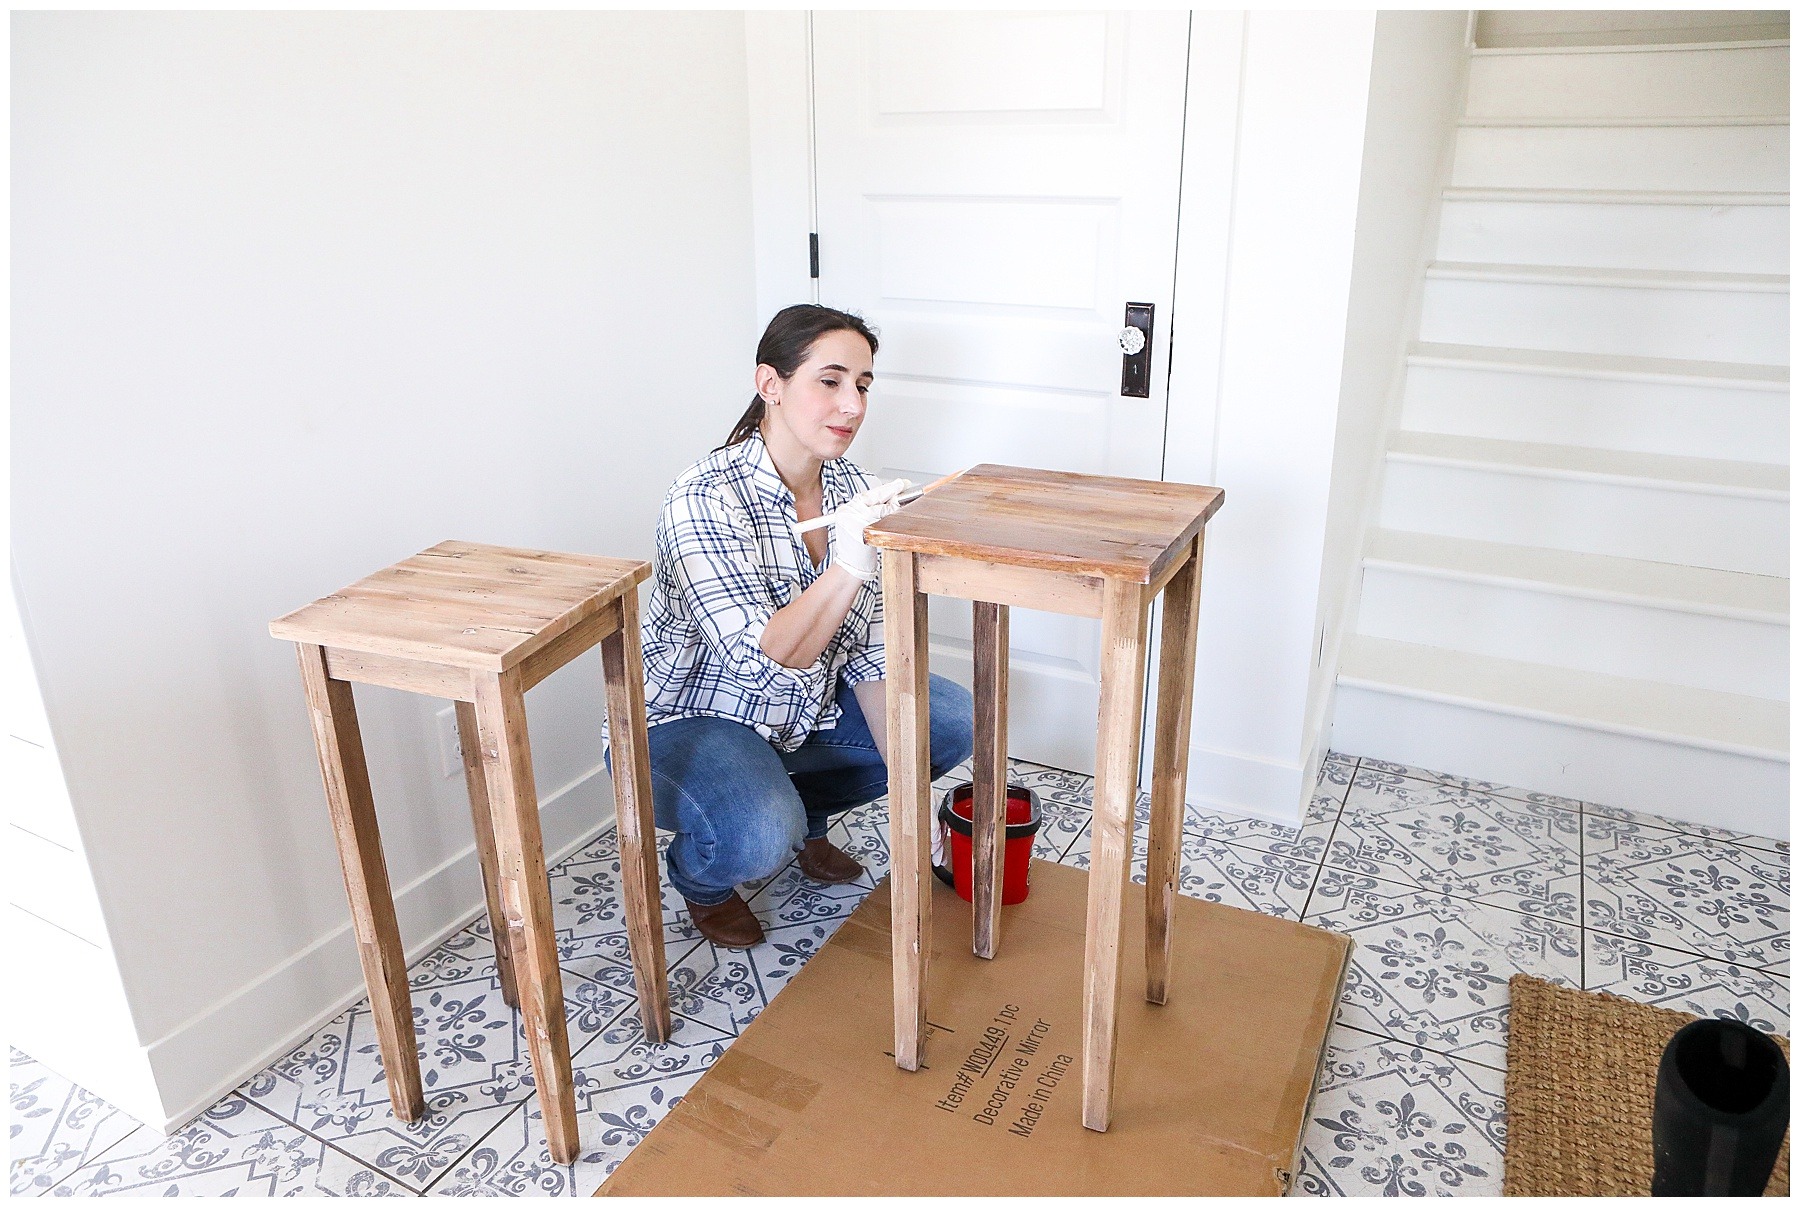
So, we set out to do that same thing to the side tables and I adore how they turned out! You can see the whole process in the video below. Make sure to scroll and check out the before and after too!
If you’re looking to do a similar refinishing project, here’s how we did it:

Stripping
Remove the top layer of stain and finish from your furniture piece using a furniture stripper. I like this one because it is biodegradable. Furniture stripper can be some nasty stuff so make sure you’re comfortable with whatever you’re using.
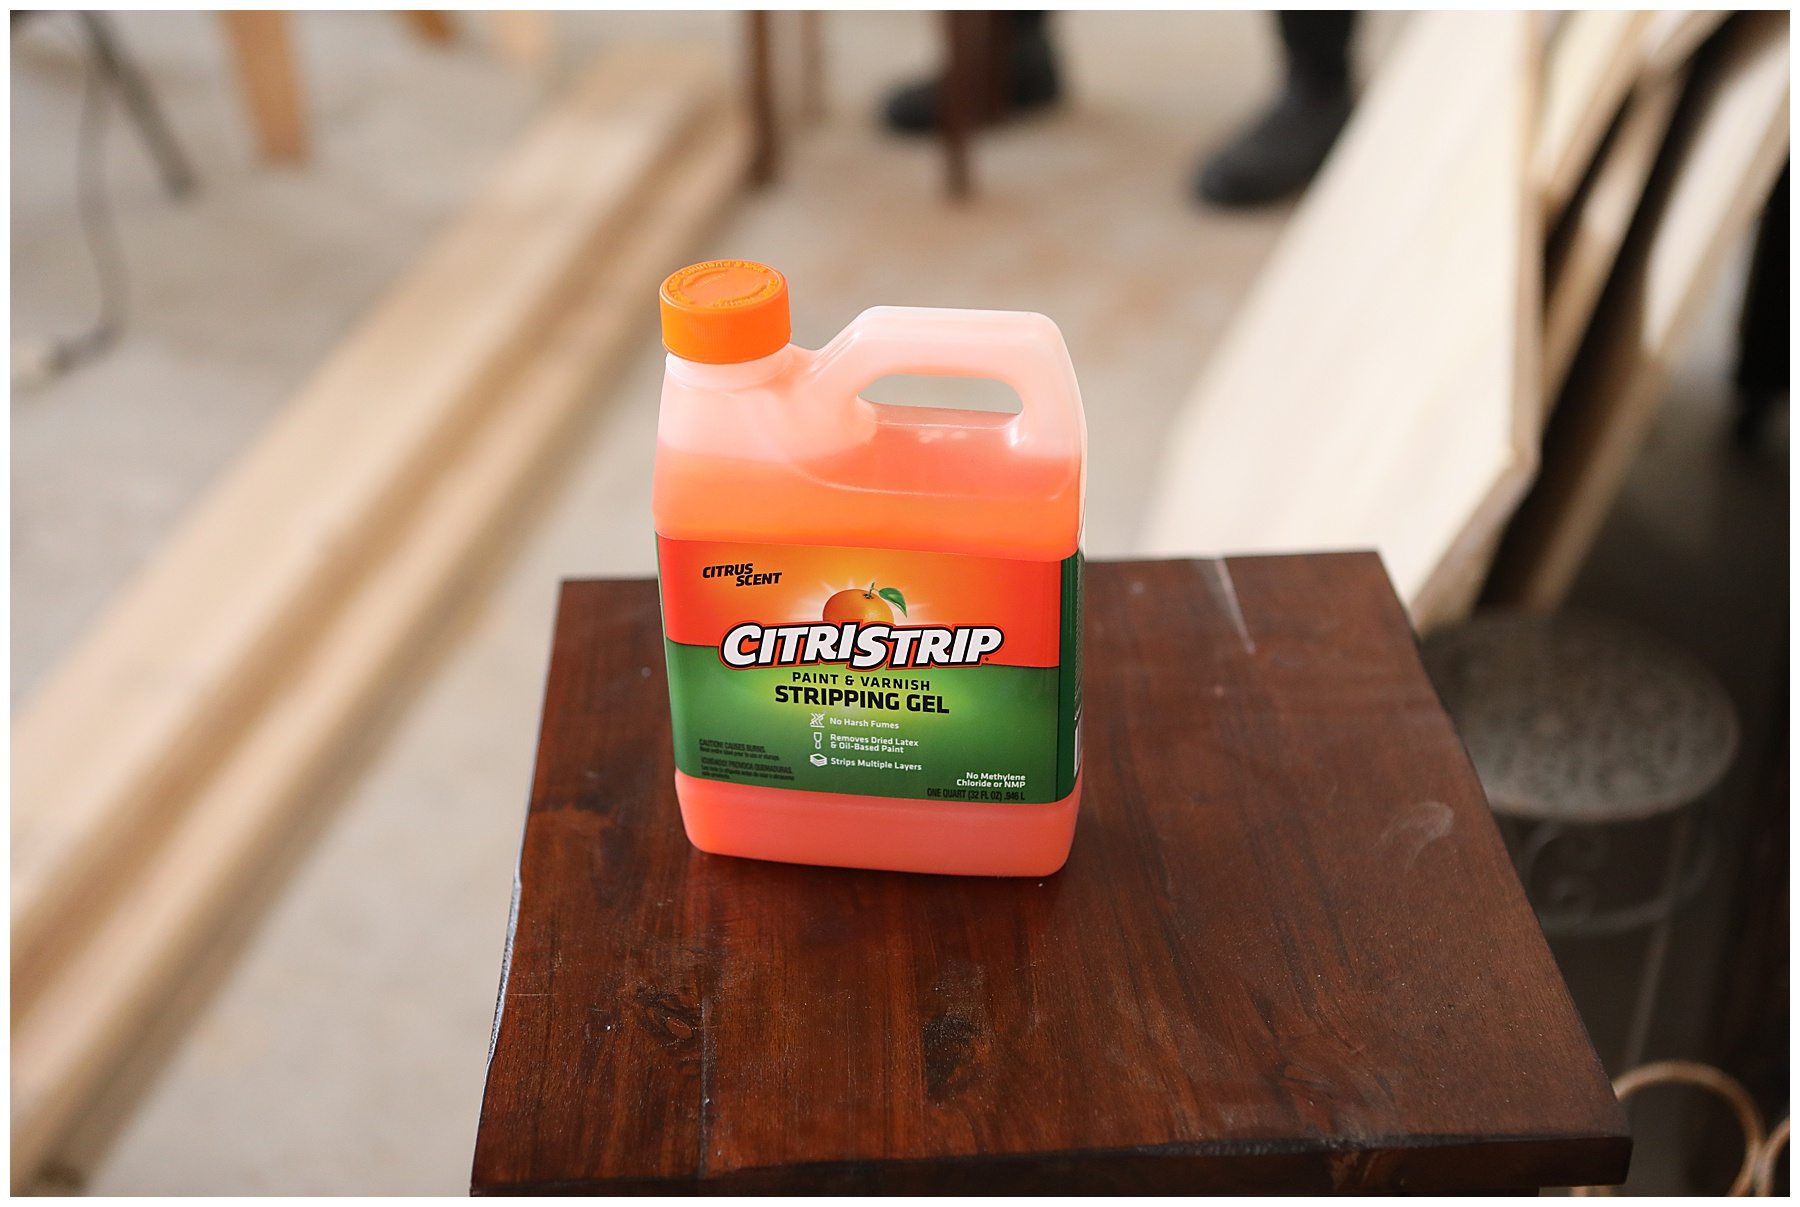
Always make sure to use it in a well-ventilated area. This one says you can use it inside but I still did it outside and wore a face mask and gloves.
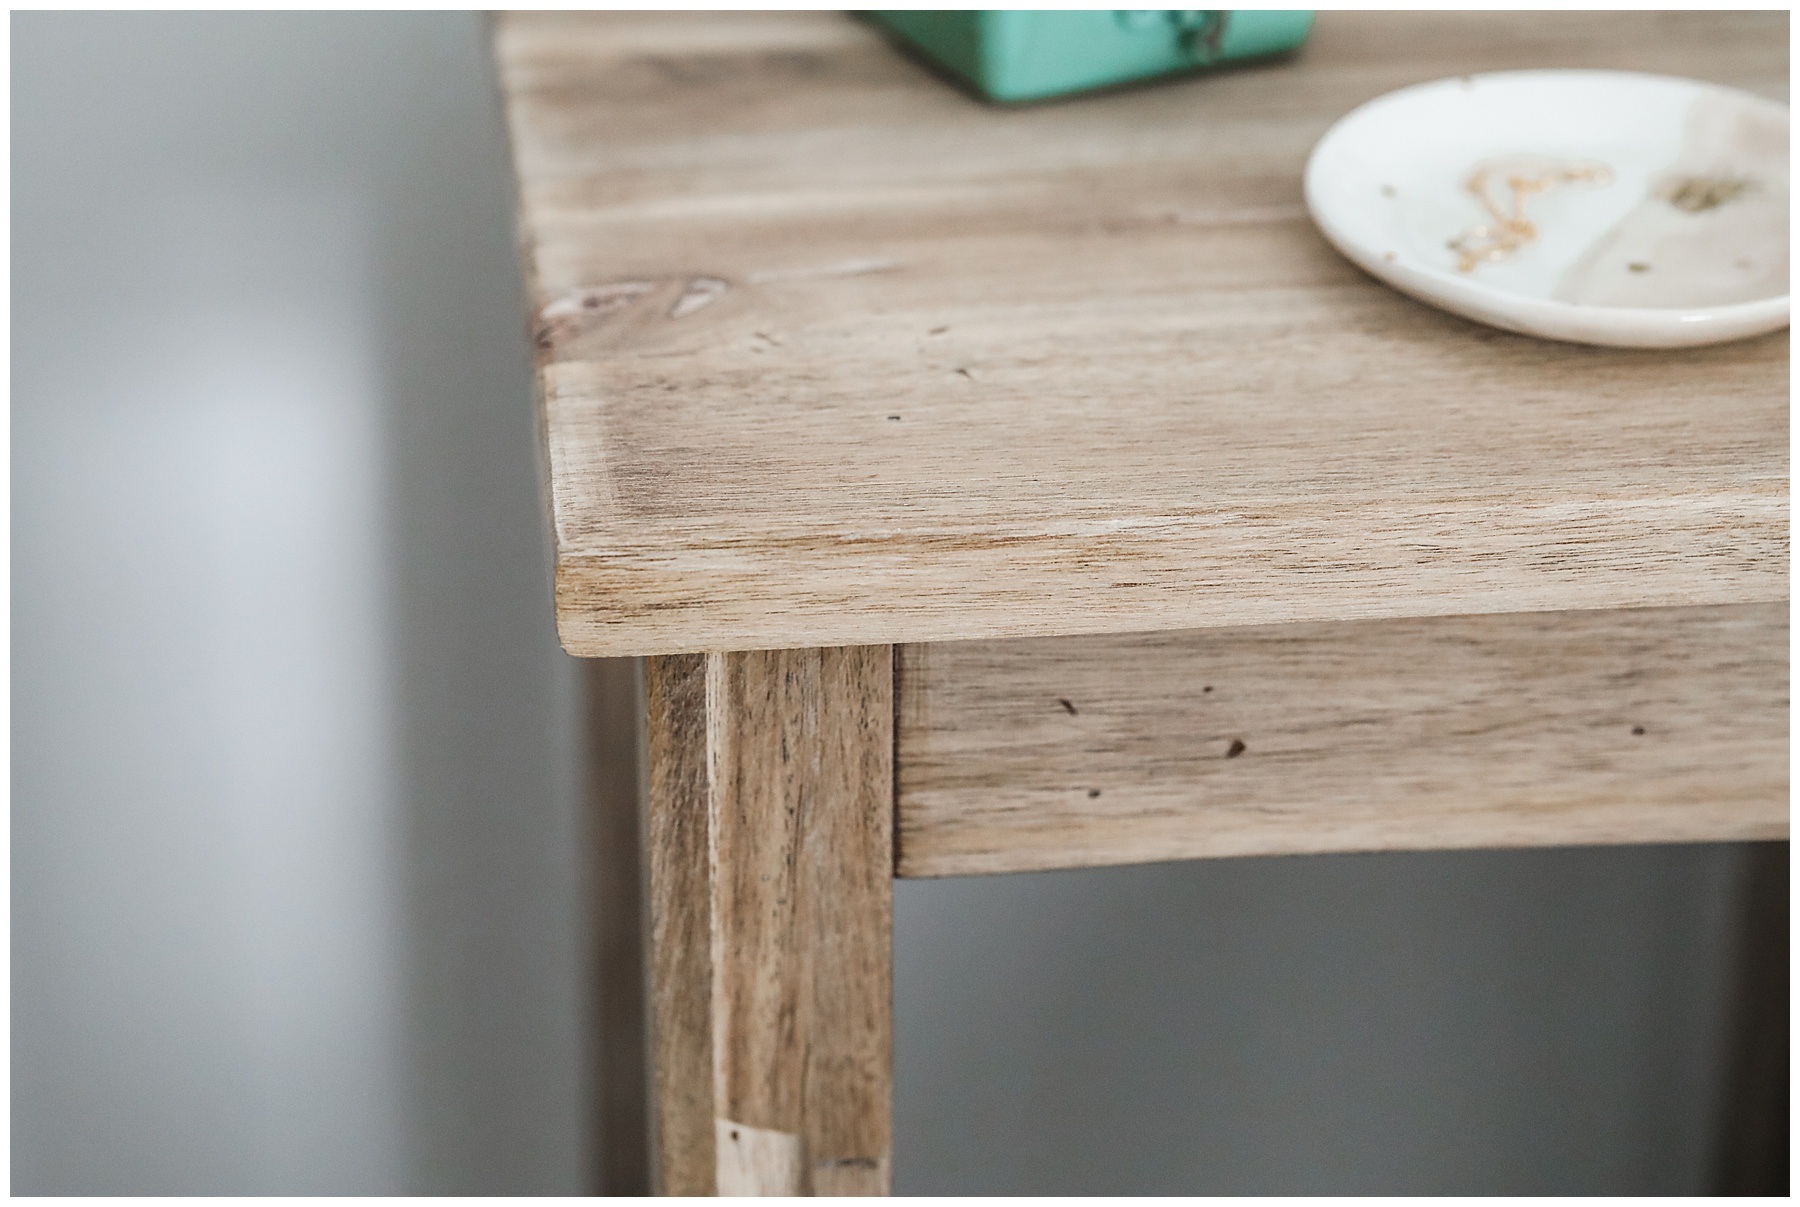
Sanding
This was the most intensive part of the project for us. Admittedly, Kevin did most of it. He also decided to forgo the electric sander and do most of it by hand – for the side tables AND the larger, dining table.
Since all of these tables had really straight lines, and the finish came off fairly easily, this worked well for us.
Sealing
Because we wanted to leave the tables natural, we skipped a step here that you might want to do. We didn’t use any new stain and instead we went straight to sealing the tables to protect them.
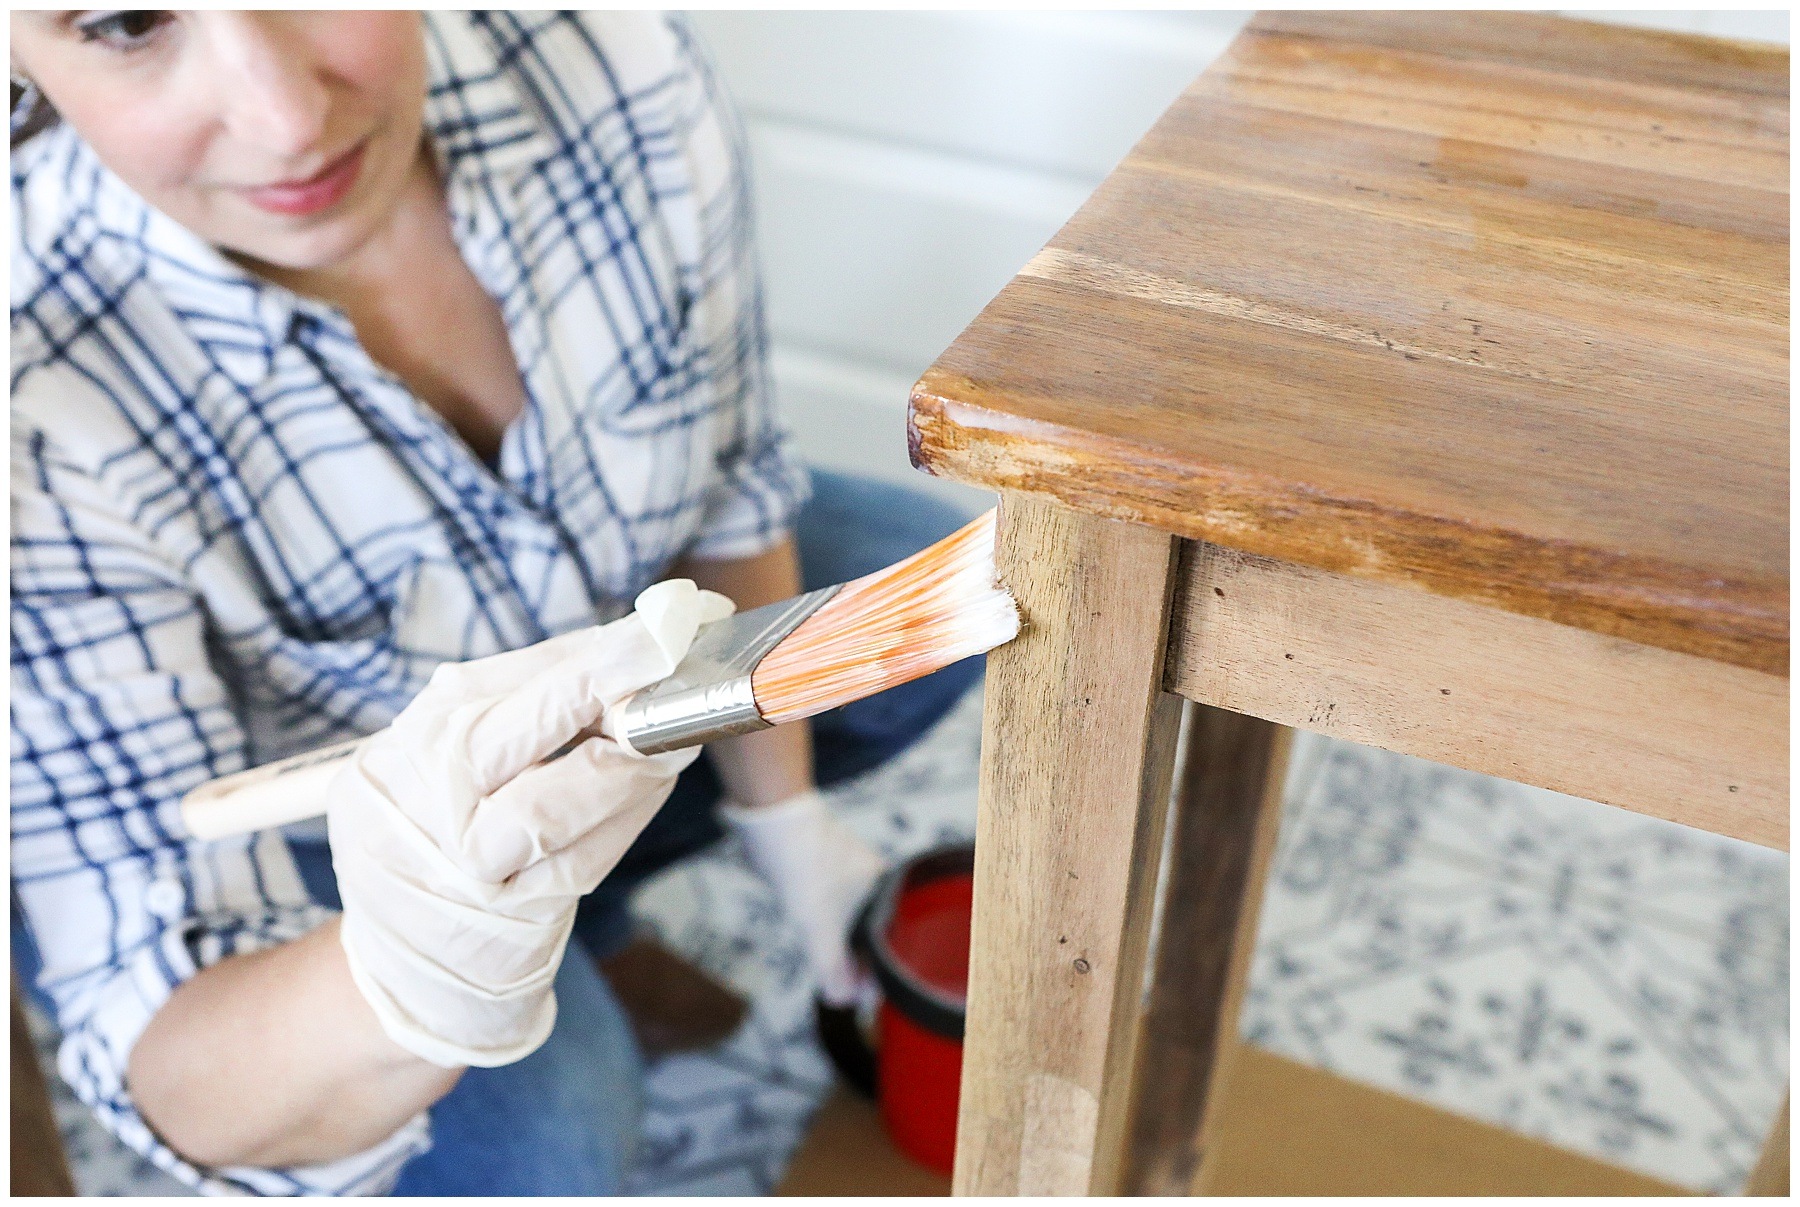
I wanted a sealer that wouldn’t change the finish of the tables – the color or the sheen. We tried one and I wasn’t happy with it. I ended up sanding the tables down again lightly to remove it. It turned the tables a bit yellow and a bit darker. I would not recommend it and will keep searching for one I do recommend.
Beside table results
That said, we still think it’s a big improvement from how they look before. What do you think?
Thank you for visiting today! I hope you’ll come back again soon. For more farmhouse projects, click here.


I love the farmhouse style. My mother-in-law bought me a ton of décor when I moved in and I told her what I liked, but you know sometimes people buy what they want. So I have been trying to shift to what I like piece by piece.
I love this! I might have to try this. My bedside tables are looking rather blah.
I like that you used a safer stripping chemical. I used one that was impossible to use indoors it was so toxic.
I need to try this. Maybe I will be lucky with a garage sale and find some tables
You make this look easy! The tables look perfect in your bedroom and fit your style so well!
I love the lighter look of the wood. What a perfect size for space too. We have our bedroom in the attic, so we deal with a slope too but since we have a queen bed, we have lots of space for side tables. They just need to be on the shorter end.
What a great solution! Those tables are so cute and a perfect fit for the space.
Most of the furniture in our home is a lot like the Before, and we’d like to do something like the after. At least in the boys’ room. Looking into these methods.
The result is amazing! I love how it turned out. It’s so pretty!
My husband and I are woodworkers, so I can officially say you did a spectacular job at explaining how to do this! And it looks phenomenal!
Thank you so much!
Wow you did an amazing job with those sidetables. Would never think it was a DIY project.
What a beautiful finished product! I love natural looks like this.
The table was decent before, but the do over you gave it really brightened it up. Thanks for giving such step bu step guide and easily breaking it down for me.
I love this unfinished look. I replaced and painted all the brown wood furniture in my husbands house when we met. We still joke about it to this day. It just looks too brown and blah lol.
This is really cool I love the farmhouse style. Really in today for the mdoel homes
The farmhouse style is very appealing. I like the way the tables look natural and rustic rather than finished and perfect.
This looks great. It definitely goes well with the bedframe. Great idea.
Ooo that is a really cute DIY project, I like the end result.
Love how beautiful how it turned out! Such an amazing project! Love the final result!
I absolutely love the way this turned out. I’m in the stage where I’m trying to figure out what to do for bedside tables in our room. We recently moved and I’m not a big fan of what we have.
Moving always makes you reexamine things. 🙂
What sealer did you end up using?
What stain or sealer did you end up using?
We actually didn’t. We still haven’t sealed them. Since they’re in our bedroom, they don’t really have food or glasses on them that would condensate and leave a ring. However, I’m going to be moving them to the living room so I think now I’m going to bleach them and seal them.