If you are thinking about adding a peel and stick mural wallpaper to your home, check out these tips of mine to help you feel more comfortable with this DIY process!

Last year we started renovating the kids’ bedrooms, which turned into months long projects because we had to do some construction in each room too. I’ll go more fully into the actual renovations and their room decor in separate posts, but after working in my son’s room to apply peel and stick mural wallpaper, I thought it might be helpful to give you all some tips on working with this decor trend.
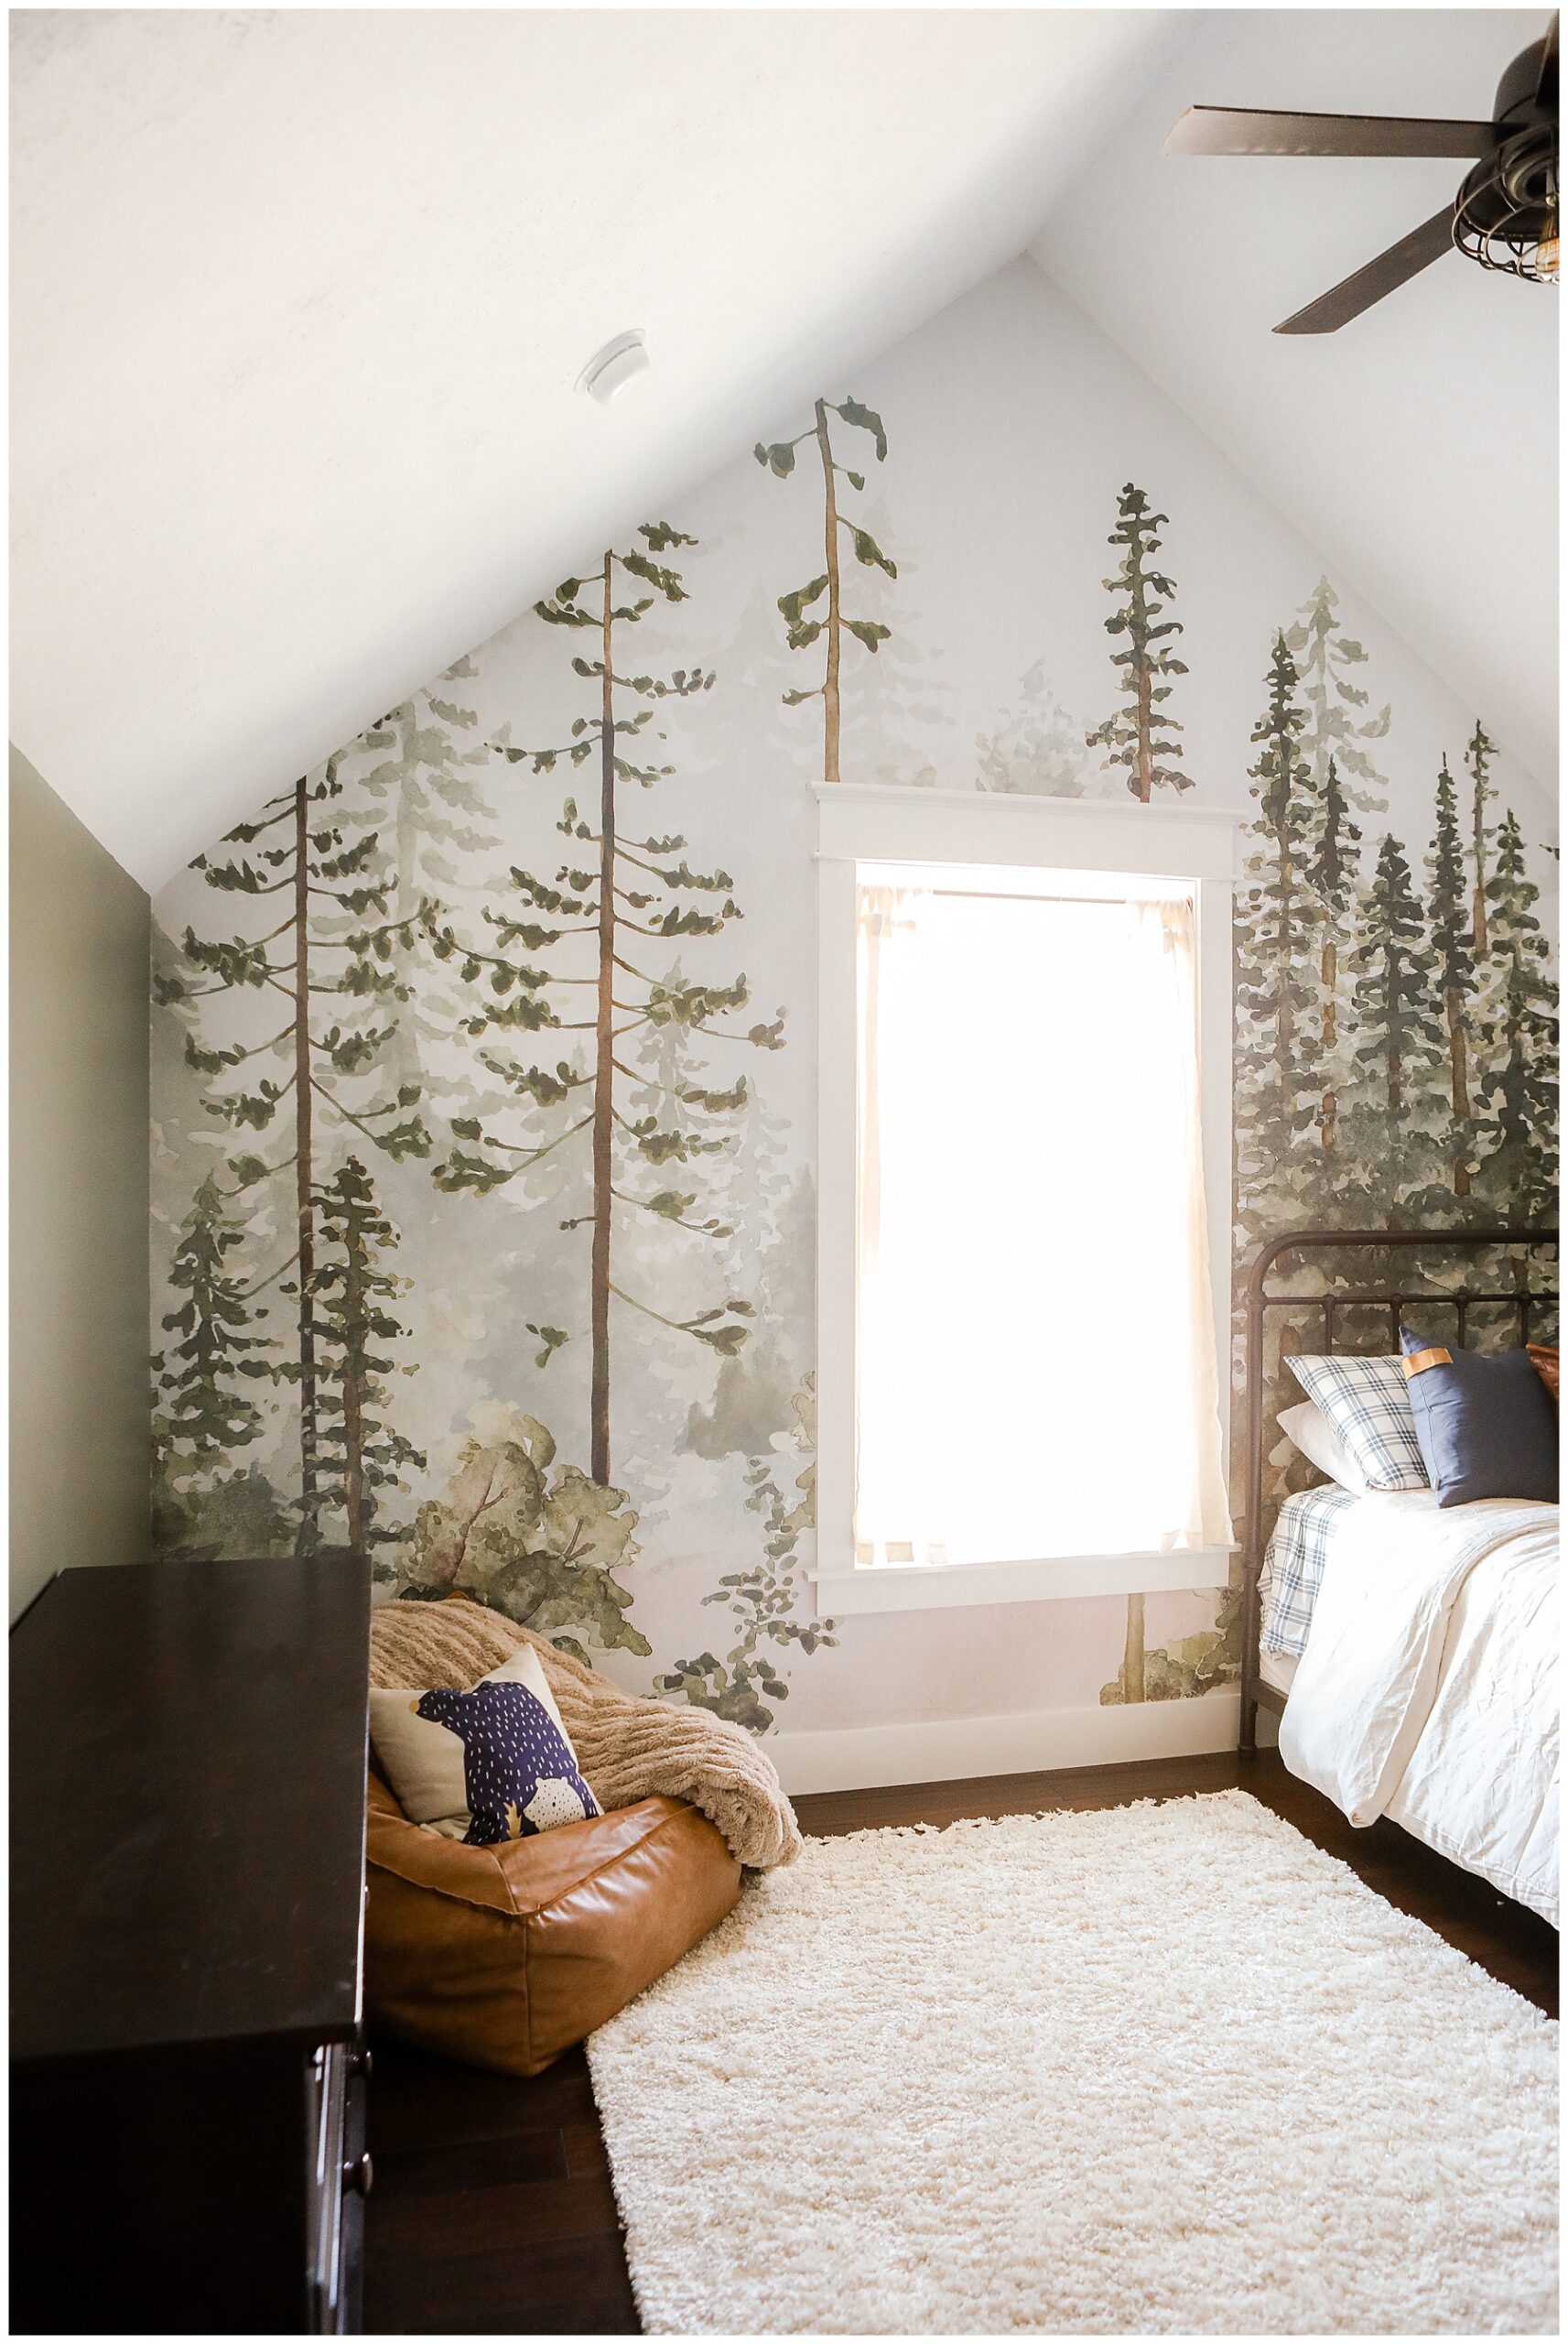
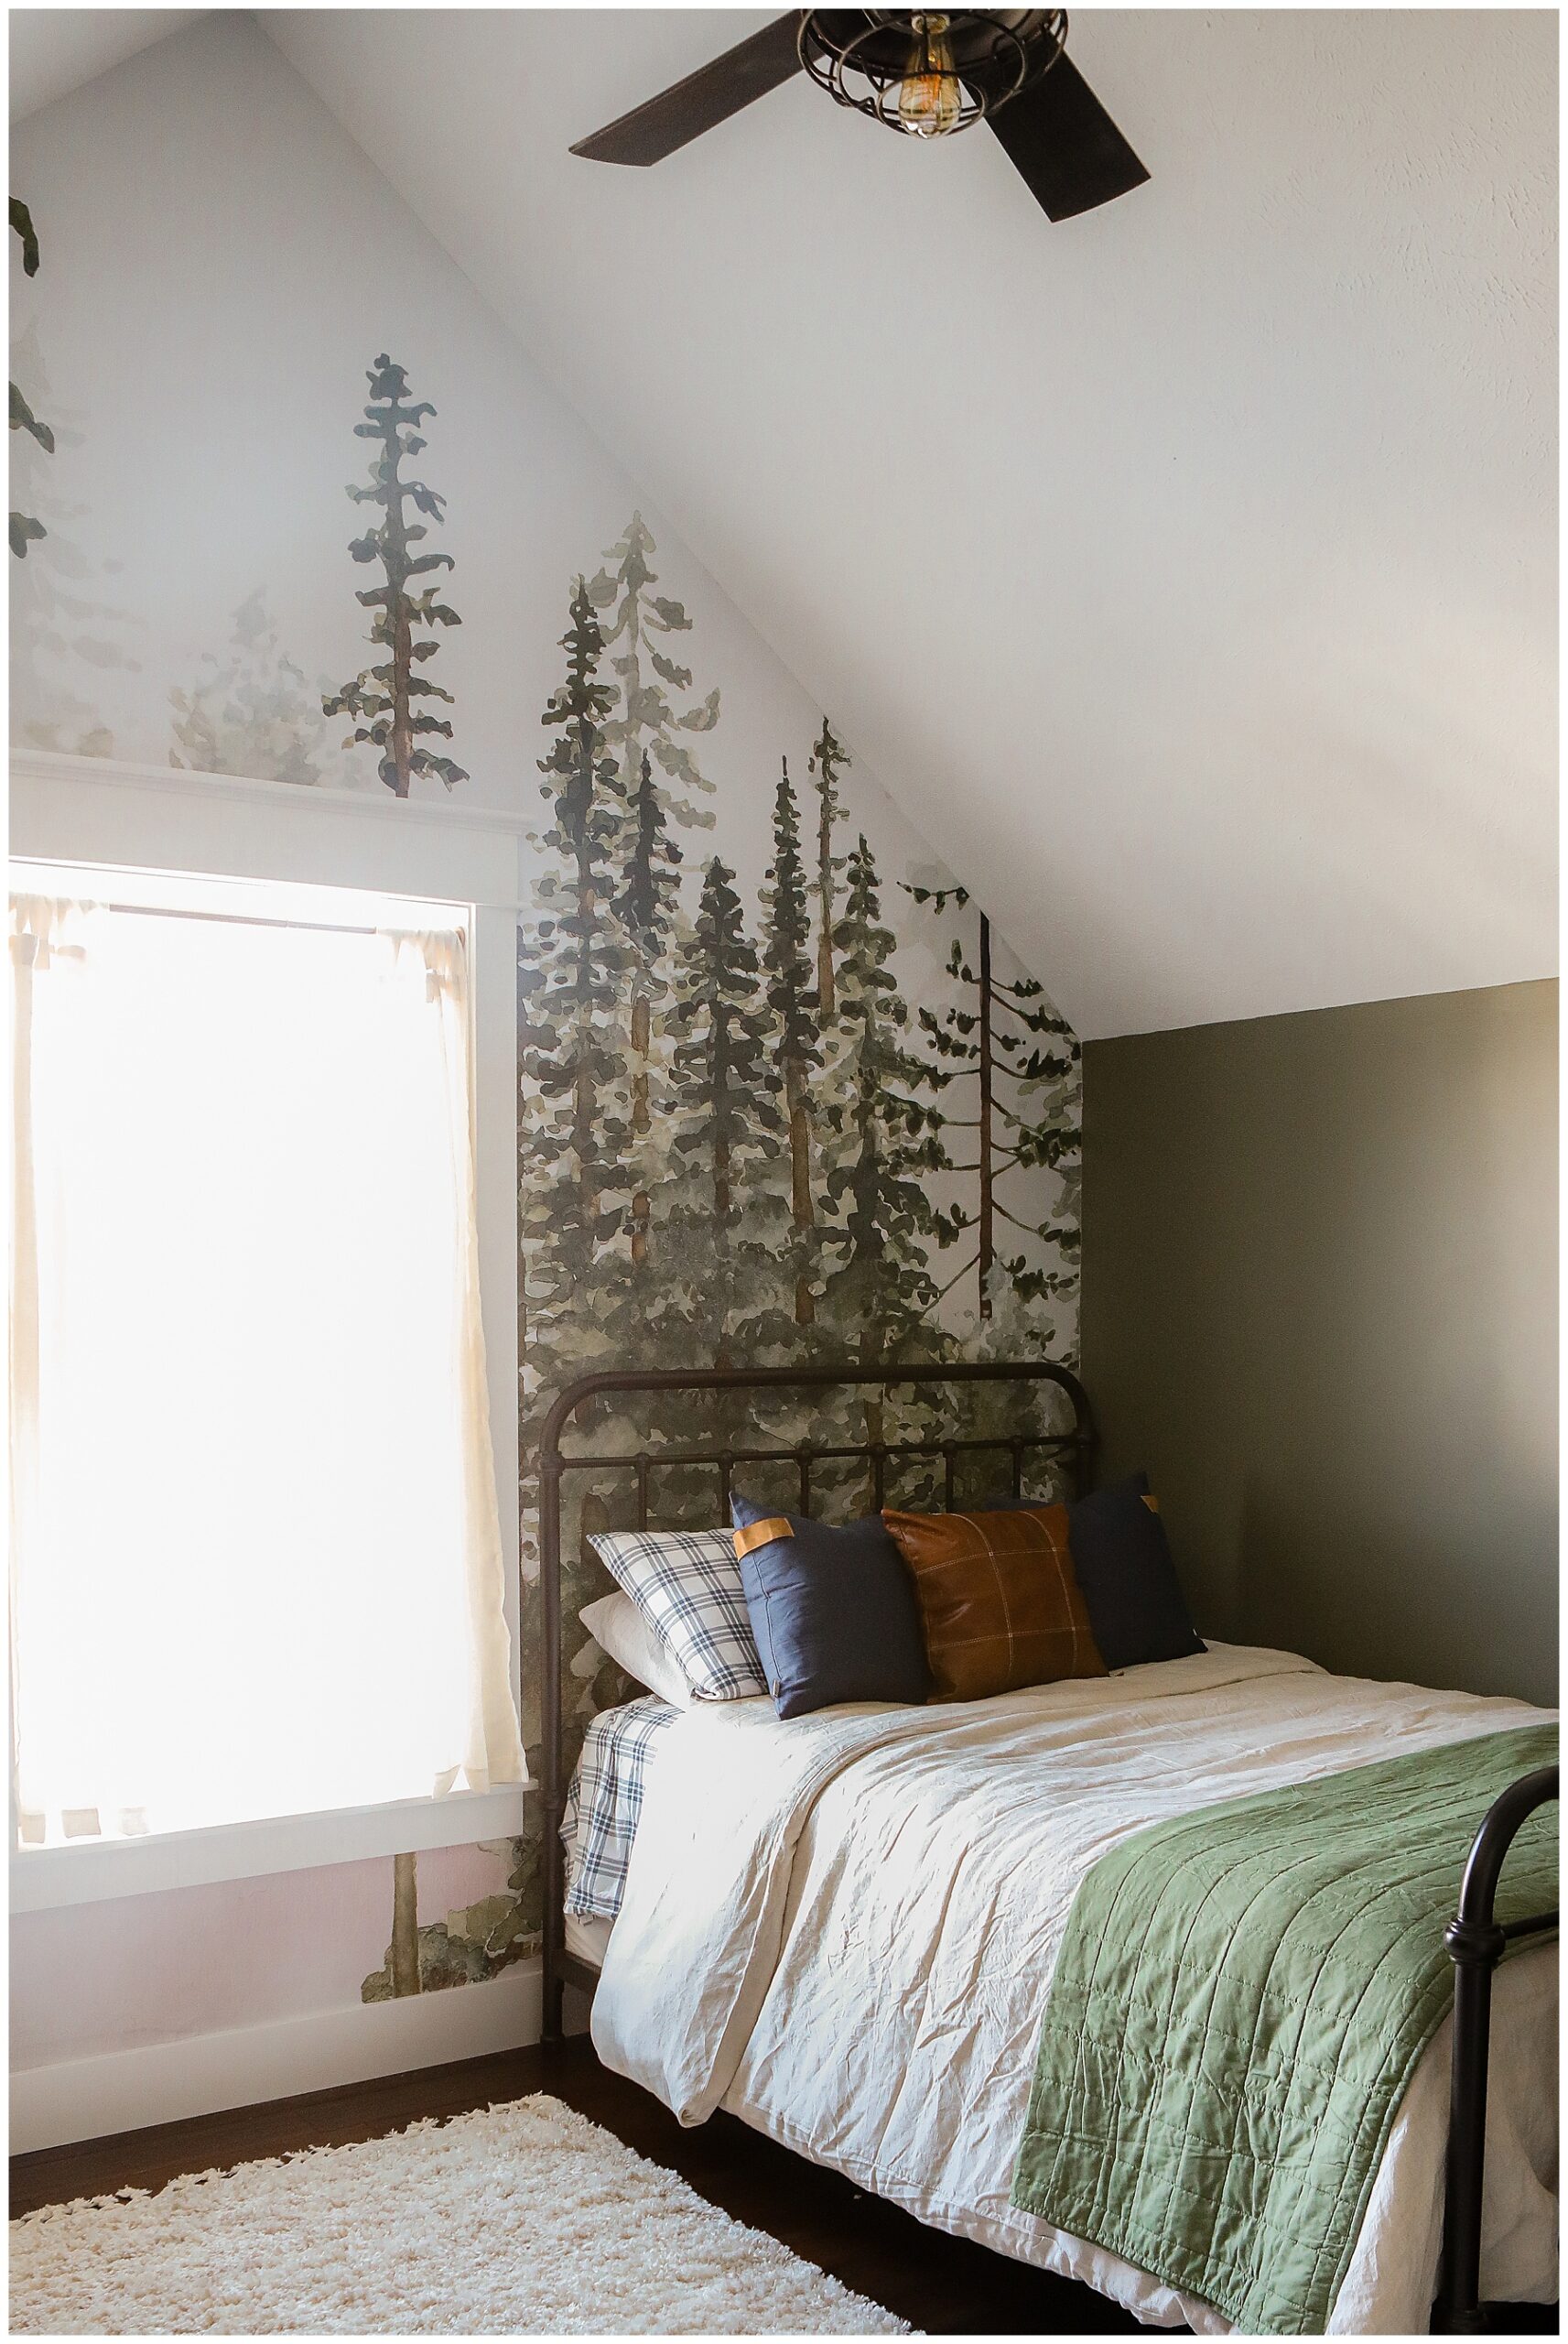
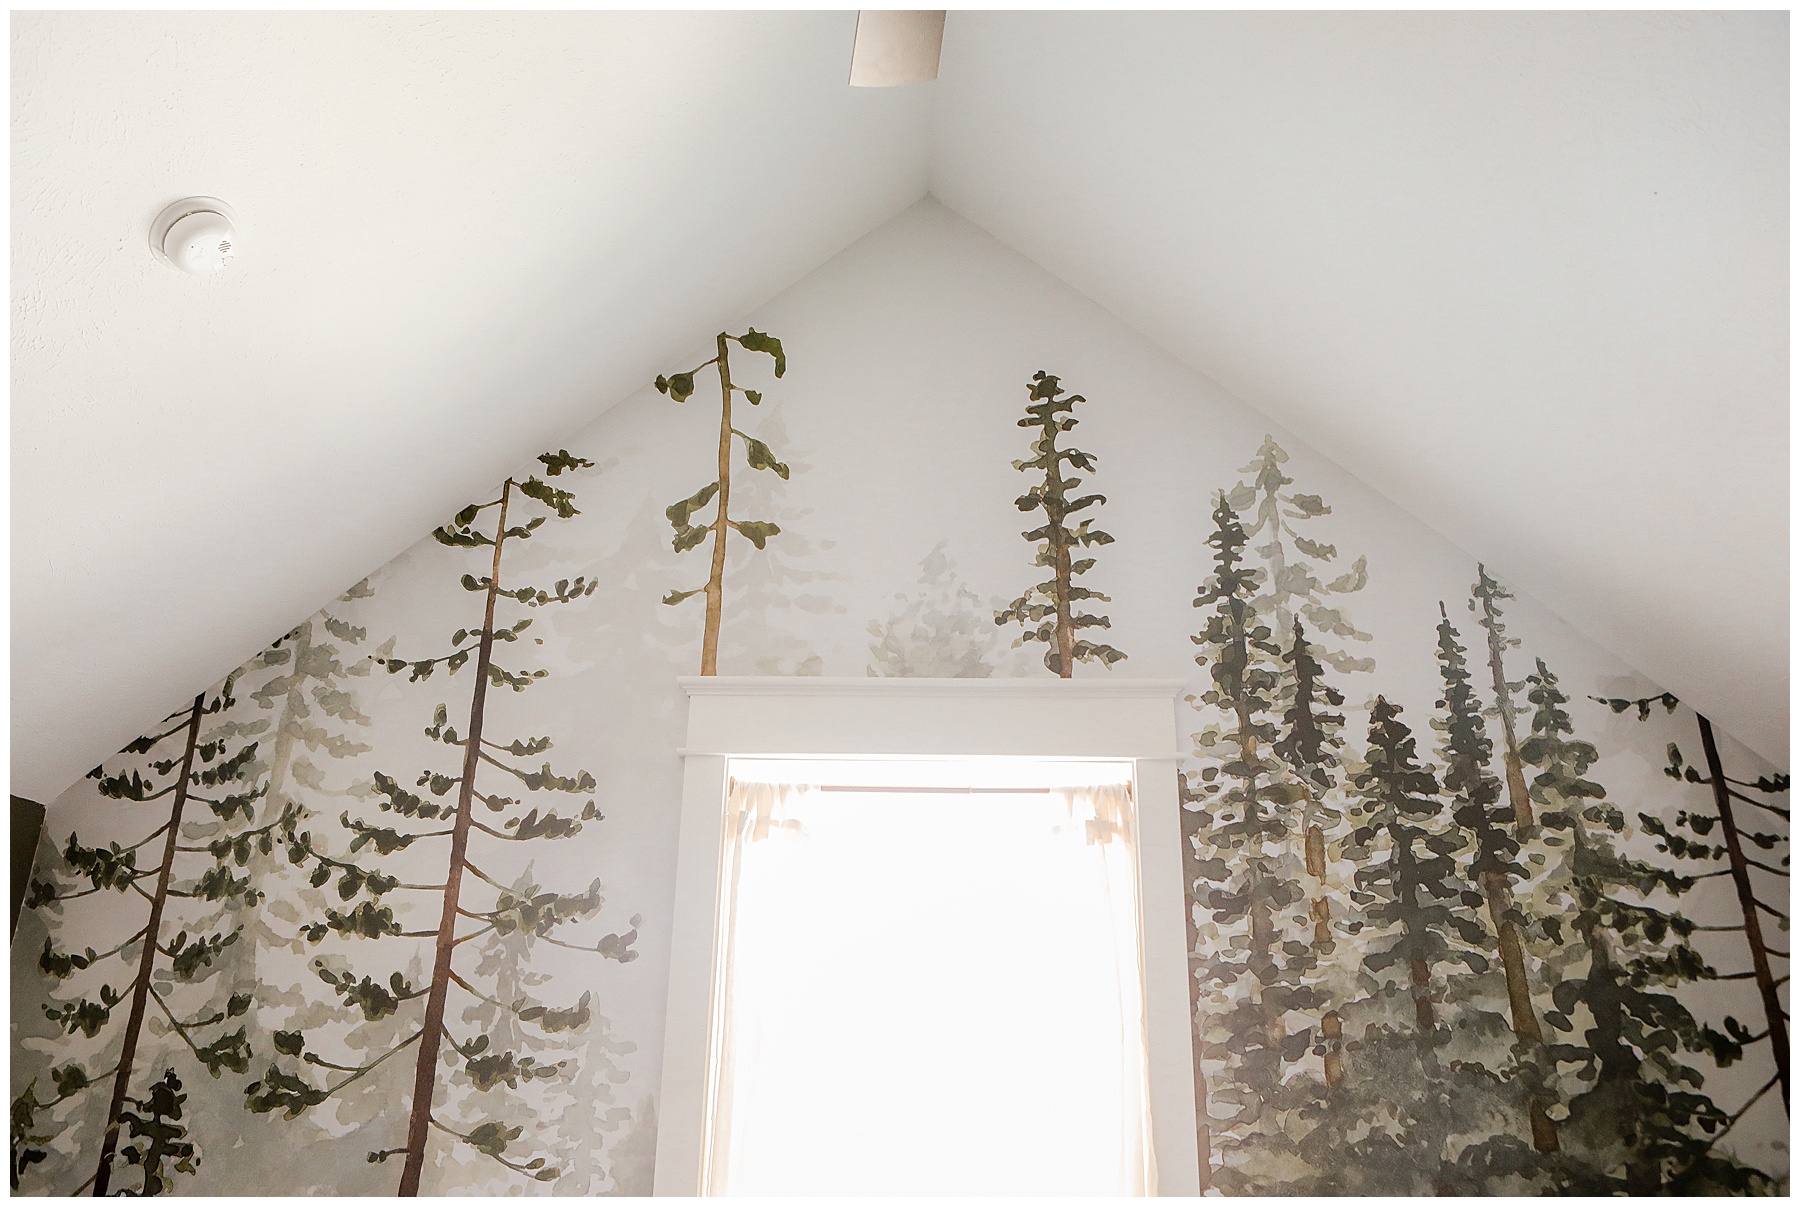
A forest room
When we started the renovations, Roman said he wanted his room decorated like a forrest. So I browsed around on Etsy with him and found a few options he liked. When he landed on this one as his favorite and I probably groaned out loud. I was hoping for something more simple. Like some basic decals that I could layer. But no, this is what he liked.
The only rule I have for my kids bedrooms is that they can’t have character rooms so I felt like I needed to concede to his design choice here.
I will tell you, I was nervous about this project. I have a little bit of OCD when it comes to lining things up and straight lines and I just knew ahead of time this project was going to test my patience. And it did. So that you’re prepared if you want to take on this task too, here’s all my tips for peel and stick mural wallpaper.
Use custom peel and stick mural wallpaper for oddly shaped walls
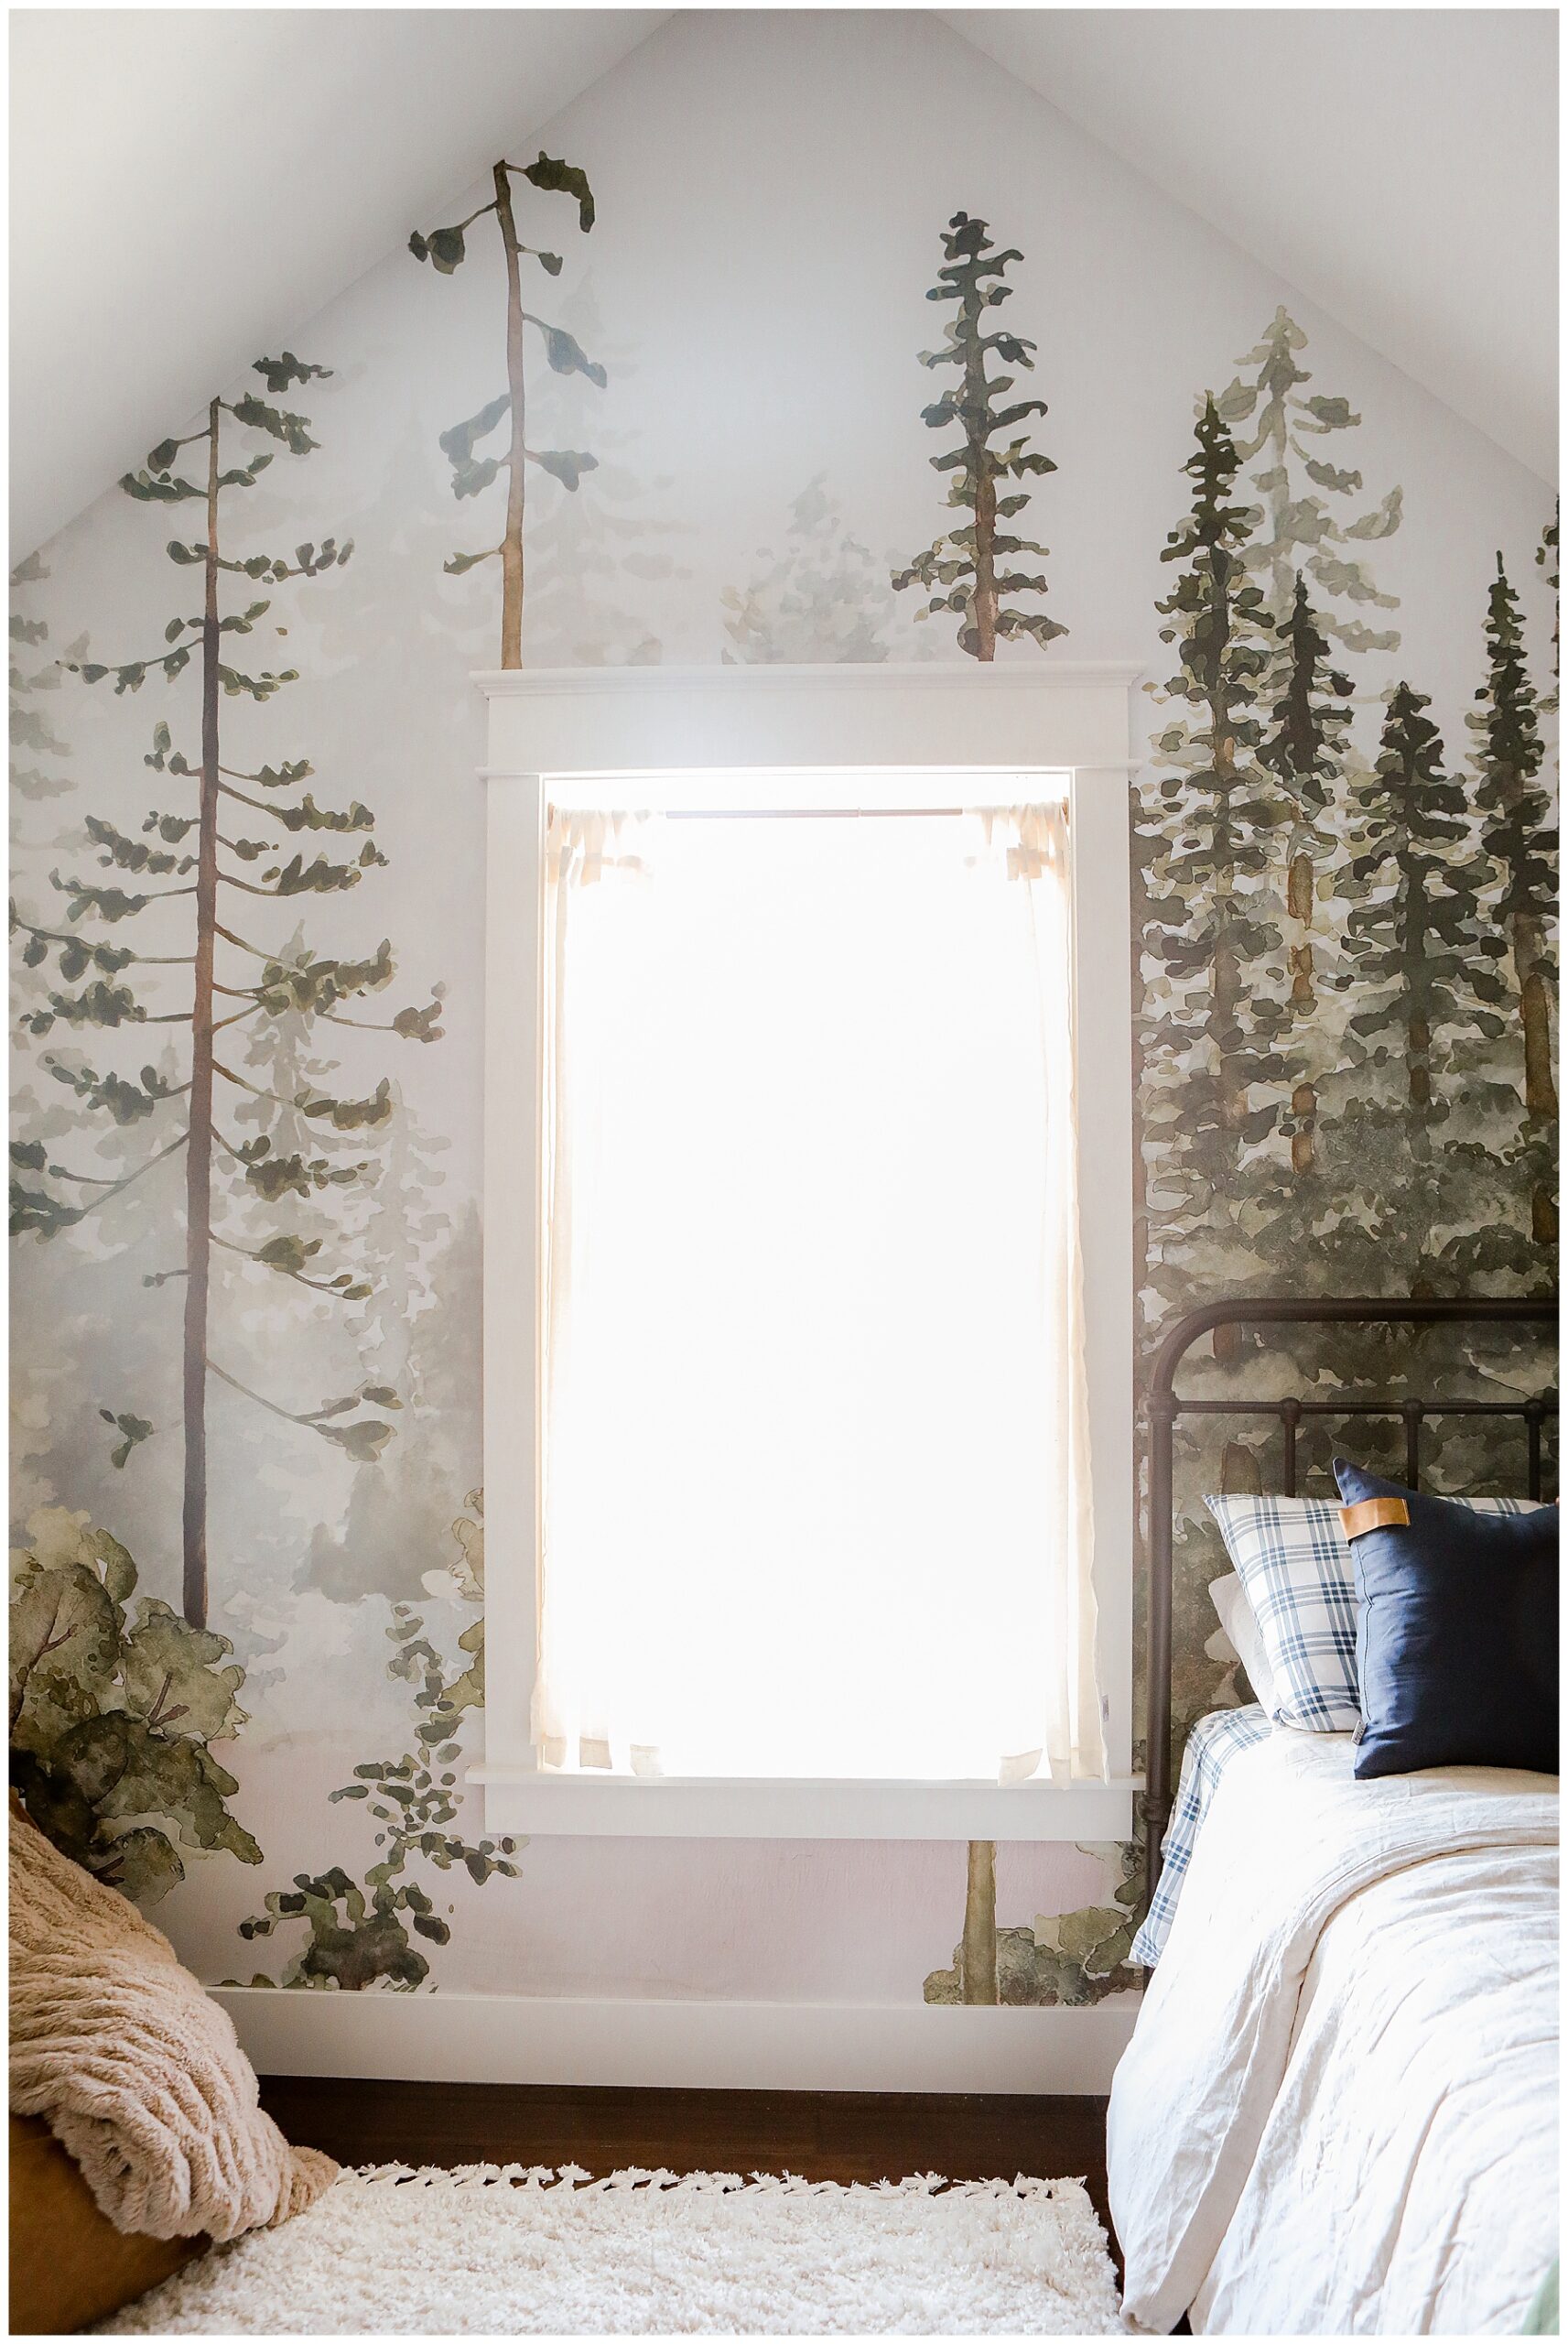
My peel and stick mural wallpaper was from a small seller on Etsy. That meant I was able to contact the seller directly and talk to her about my wall space, which is a vaulted ceiling with a peak. The two side walls are short and the third wall, which is also peaked, has his door and closet door on it. I felt like this was the only wall that would work. However, I was concerned that the mural wouldn’t fit right in this space. I contacted the Etsy seller, gave her the wall measurements and she worked something to ensure the trees would fit more appropriately on my wall. Because of this, I recommend going through small sellers when purchasing peel and stick mural wallpaper.
You can find our peel and stick mural wallpaper {HERE}.
Bring your time, patience and a friend
Don’t expect this to be a fast project. Our’s might have been a little more complicated because of my odd wall and the window space but it took Kevin and I together five hours to complete. Also, in this instance, it was imperative that we were both a part of this project. Our pieces of peel and stick mural wallpaper were really tall and I wouldn’t have been able to manage alone.
Abstract murals are your friend
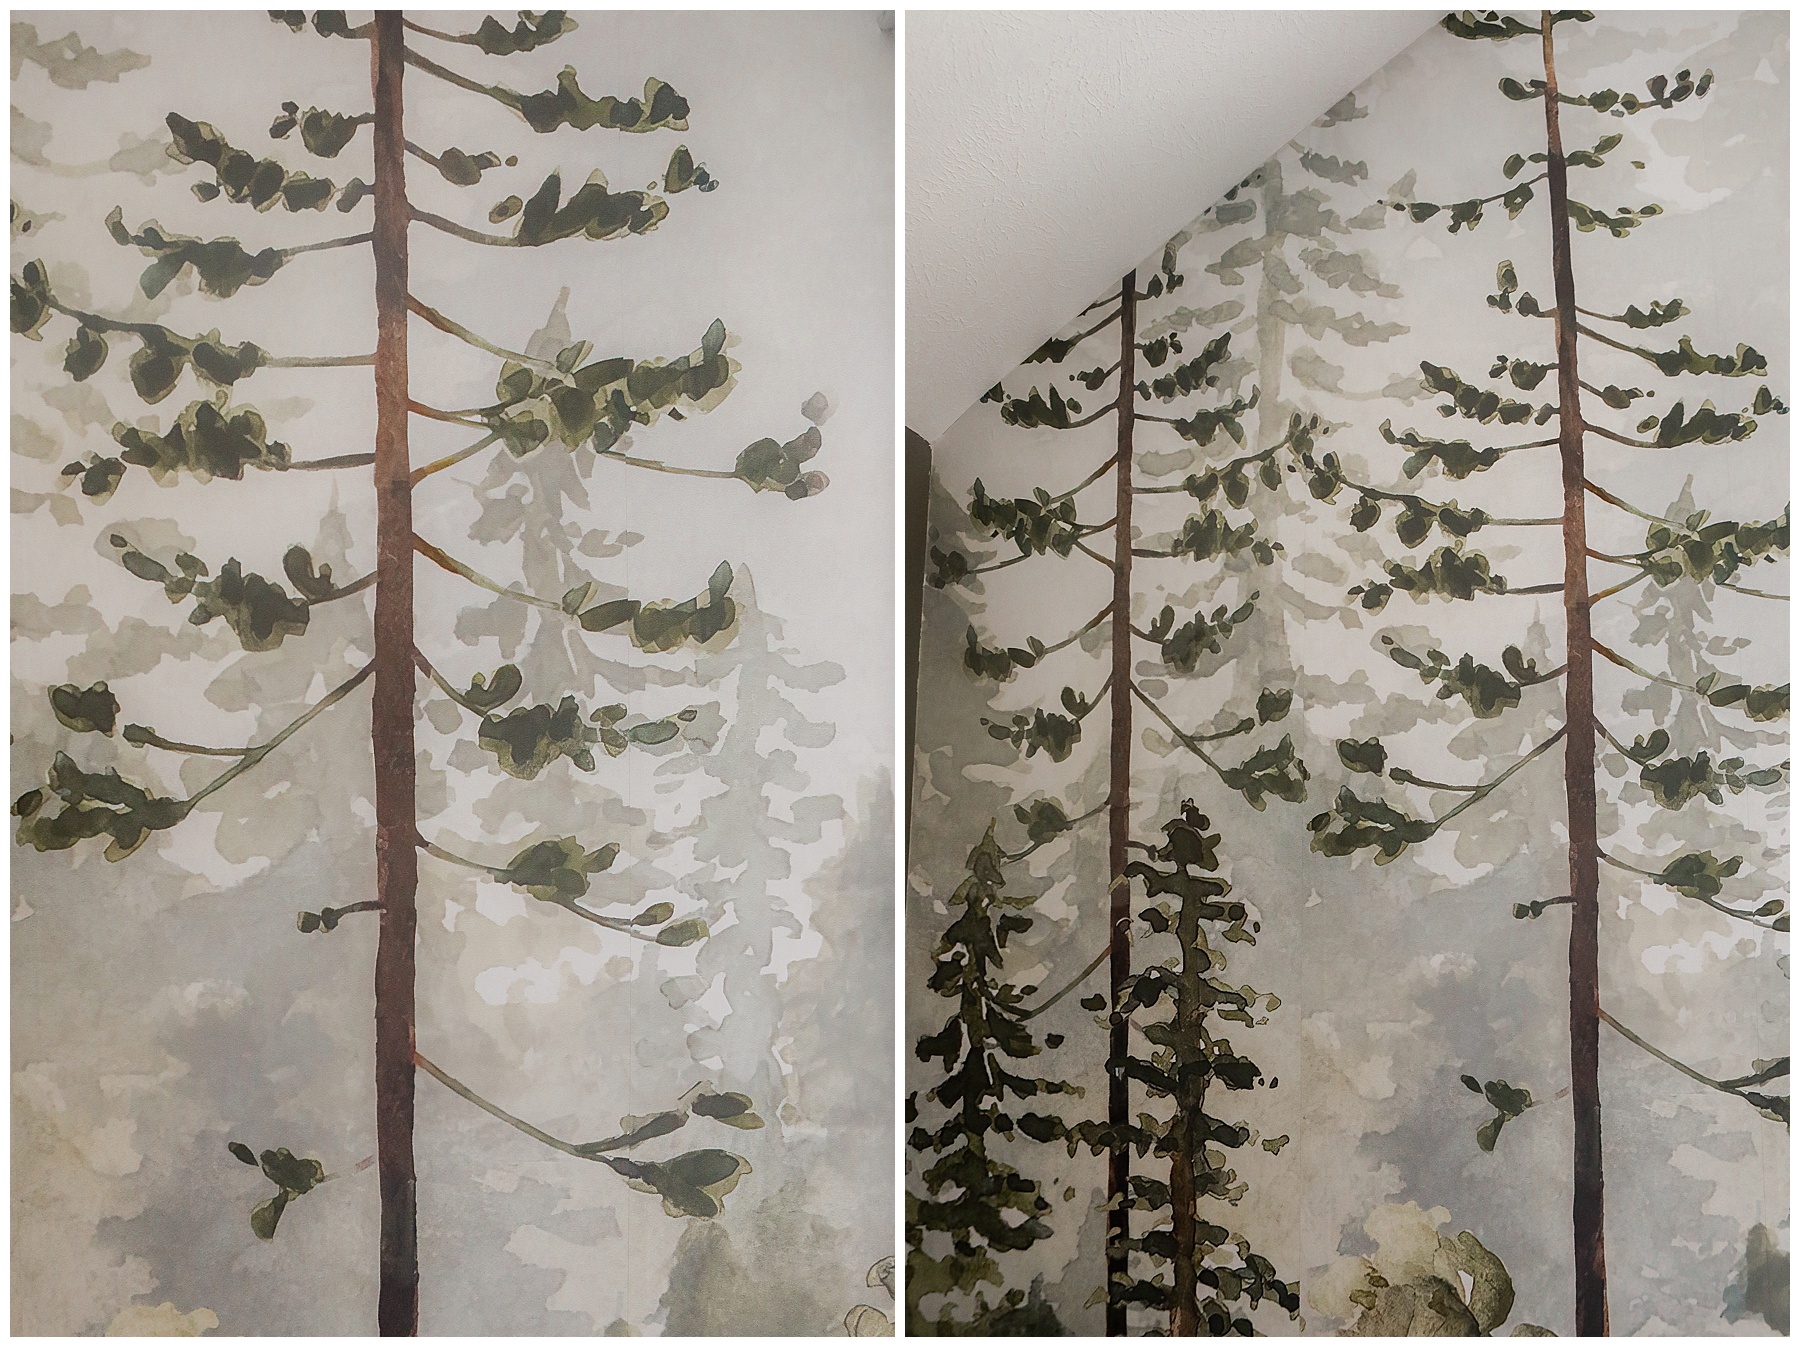
The only thing that made this peel and stick mural wallpaper project a little easier is the fact that the mural itself is an abstract, watercolor. The colors all flowed nicely to and from one another where the pattern was supposed to line up. And if it didn’t line up perfectly – which it didn’t – there wasn’t a true way someone would be able to tell.
Give up on perfection
Jumping off the point above – I know that we all want our rooms to look perfect when we put time and energy into renovating them. However, just let it go if you’re putting up a peel and stick mural wallpaper. I swear the first two columns of this wallpaper took Kevin and I forever and there was a lot of arguing because things were not lining up perfectly, Here’s the thing though. Your walls are probably not perfectly straight. Your floor and baseboards probably aren’t perfectly level. Lord knows that are ceilings are not exactly a straight line. I will tell you that because this was an abstract design, it didn’t matter as much. Even if you look closely, you will struggle to find a seam and the point where things are actually supposed to line up.
Start at the bottom
Since our design for this was heavy on the bottom, that became the starting point. We tried to do one column of the peel and stick mural wallpaper from the top and it didn’t line up at all. Not in the way I mentioned above where I was trying to get it to look perfect, but AT ALL. It was easiest to start at the bottom and peel the backing off as I moved up the wall. For this, I started out sitting on the floor and Kevin held the length of the wallpaper above me as I worked to line things up and smooth them out.
The Biggest Peel and Stick Benefit
The biggest benefit to using this peel and stick mural wallpaper was this: We could peel it and stick it multiple times to smooth it or to re-align it. Taking it off the wall didn’t leave any residue behind or cause the wallpaper itself to be less sticky. It was very helpful any time we got an unwanted air bubble we couldn’t smooth or needed to move things over ever so slightly.
Make it your own
Even thought the wall paper designer tweaked this peel and stick mural wallpaper for us to fit our wall, it still seemed to be missing something when we were done. The space above Roman’s windows was completely empty except for a few misty, faraway looking tree silhouettes. However, the fact that this was a peel and stick and an abstract mural allowed me to play with some of our leftover pieces. There were two full trees on the design we hadn’t used. I don’t remember if this was because they were in the space where the window is located or they were extra on the ends of the walls. Nevertheless, I cut those out and stuck them above the window, making the design our own and really making it work for our space.
Looking for more home design posts?
If you. love home design and DIY projects, check out these posts too!
- Brick Fireplace Limewash {HERE}
- How to make a backyard ice rink {HERE}
- Under the stairs wine cellar {HERE}
- How to hang a gallery wall {HERE}
- TV stand decor ideas and makeover {HERE}
- Neutral Bedroom Makeover {HERE}
Thank you so much for visiting today, friends! I hope that you love our peel and stick mural wallpaper tips and I hope that you’ll come back again!








This room looks great! I have wanted to try the peel and stick wallpapers so thank you for all the tips!
Pretty! I am tempted to try this in some areas of the house one day. They come out so nice. I will keep your tips in mind.
I love, love this!!! I have a friend who is expecting and this would be a great way to decorate a wall.
I love how it turned out! It looks so beautiful! I will have to try something similar in our home.
I need to try this in my exercise room. That way I can add excitement to the room.
Wow this is awesome! I am completely daunted by the thought of doing my own peel and stick wallpaper but maybe I should give it a go.
I love how this looks! It’s a really great way to decorate a room.
I have a set or two of something similar fro Etsy but have not yet used them for any of the rooms in our home. I may just have to after seeing this as it looks so good. When we redo my daughters room with new walls…. we will put birch trees on the one wall for a cool look.
I’m sure that will look wonderful.
These are excellent tips! This wallpaper is such a great way to transform a room. I would definitely struggle with the perfectionist part!
Wow! This looks really awesome! What a really great and very helpful tips you have here
I liked that you included a heads up about how this sort of project isn’t as fast and easy as the name implies, but the results are definitely worth the time and effort put in!
It is certainly not as easy as we all might hope.
I’ve been planning help my sister repaint her baby’s room and I guess this is a very good idea to use.
Love a good wallpaper! That forest scene is so lovely and soothing! I have only used the standard style wallpaper. Will have to reference this if we do a peel & stick style!
I’ve been wanting to get a stick on wall mural but haven’t had the time to do any research. I will look at abstract murals as it sounds like it would work best if I don’t line it up properly. Sounds like I may need help with it. Thanks for the handy advice x