Do you ever have those projects that you just know are completely worth it but also simultaneously dread starting? That’s what the building of the stone garden bed and landscaping around the front of our barn was for me. This project (or really projects) was a beast. But now I love how it looks so much now that I would do it all over again. (And we might elsewhere…)

How it all started
Two years ago, when we knocked down half our barn and then rebuilt it, we didn’t really realize there would be nothing around it. Of course, we knew we weren’t landscaping around the space, but we just didn’t understand how it would look. Or, how bad it would look without some attention to detail on the outside.
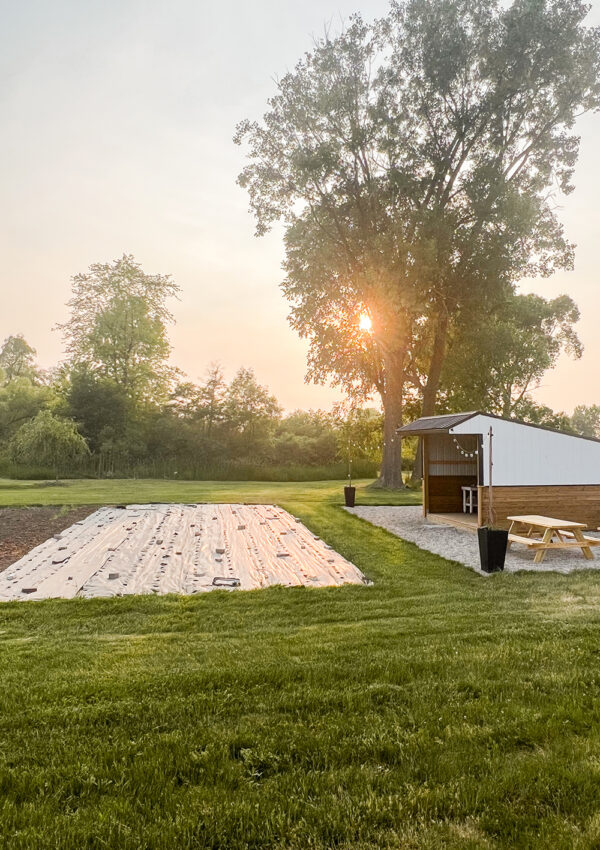
Little by little, we started changing that. We added a concrete patio. We added a row of hydrangeas and mulch on the west side of the building. But the front was the spot that needed the most attention. Specifically, right outside the front door of the barn.
When the building was done, we had mulch delivered and the dumped all 7 cubic yards of it right in that spot. A year later it became a big, weedy mess that we just left as we built the garden because we didn’t have the bandwidth to tackle it last year.
However, since the space is right next to the driveway, everyone can see it. Every delivery man, passerby, the mailman and all our family and friends that visit had a front row seat to our eyesore.

The transformation
This year we decided it was time to fix up the space. In partnership with Beyond Peat Professional Organics Raised Bed Mix, we took our weedy, messy space and changed it into a beautiful, little spot. It’s welcoming, it’s whimsical and it’s one of the first spaces someone will now see when they pull into our home.
So, what did we do? We dug out the extra mulch and soil. Then we built a raised, stone garden bed and sitting area to welcome guests and give us a place to sit when the kids are riding their bikes on the driveway.
Here’s how we did it.
Plan the space
Start by picking the space you want for your stone garden bed and then outline it with rope or string. Measure the space and make sure you know how many feet of stone you will need.
If you’re in a home that’s in the suburbs or the city, make sure you’re not going to hit any lines in the ground once you start digging.
Pick your stone
I recommend picking your stone first. You will need to know the type and size of the stone in order to calculate how much you need for your space.
I’m going to tell you honestly, I would not recommend using stone like we used. The stone I picked for the stone garden beds was not uniform. It was all different shapes, heights and widths. I wanted a kind of Irish wall stone garden bed look. That meant picking stones that looked varied. That also meant, a big pain in the rear for Kevin and I. Our project became a big game of Tetris and it took forever. If I were to do this again, that’s the one thing I would change.
Ideally, you want to order an extra 10 percent of stone per garden bed. This gives you options if you’re using stone like our’s that’s all different and it allows for some mistakes too.

Determine the binding agent
When I first came up with the idea for these, I was inspired by a photo on Instagram. The beds in the photo were made from found rock and were mortared together. I had originally planned on using mortar too.
However, mortared stone beds are not recommend for the Midwest because the dirt freezes in the winter. Mortaring the beds would not allow our dirt to expand and freeze without pushing the wall out, and perhaps down.
Another option, and a more popular one in this part of the country, was to dry stack the stones and leave some spaces for dirt and water to escape. However, the stones we were using really weren’t wide and thin enough to dry stack. If you’re going to go this route pick stone that’s just a couple of inches tall, but has a decent width and length. If you decide to dry stack, know that the dry stacked walls are normally limited to 3 feet to prevent them from falling over.
We finally decided to use a landscaping glue as we stacked our stone garden beds.
Level the space
Once you have your stone and know which binding agent you’re using, you can start leveling your space. For us this meant digging out a lot of mulch and then digging down several inches into the dirt and clay next to the barn.
You want the first level of stone to sit partially underground to give yourself a more stable base. In our case, about 2 inches of stone in the first row sits below ground. We used a string and a level to make sure each stone was straight and at the right height.
But before putting in your stone, you want to have a base of paver gravel and leveling sand. Dig down along the outline about 8 inches below the surface of your dirt. You want about 4 inches of paver gravel, two inches of sand and then a few inches for your first stone.
For us, the paver gravel and sand were vital in helping us to level since each stone was a different height. We had to level each individually.
Check the level of each stone each time you add a stone.

Stacking the stones
When it comes time to begin stacking, make sure you are always staggering the joints. This will help the stones to support one another.
If you’re building in a place where the ground freezes – like us – make sure to leave some small spaces for the dirt to expand into. We have some spaces near the bottom and a few little spots around the stone garden bed. Most stone layers will tell you to keep the front of the stone garden beds tight, but in speaking to our supplier, he suggested leaving some small spaces. This will also help with drainage.
Gaps on the inside of the wall won’t be seen so don’t worry as much about those.
You also want to back set each level of stone about ½ inch. The wall will slope slightly inward and that will help to keep it stable.
Fitting stones into specific spots
I mentioned that our garden beds were like a game of Tetris and at times that was fun. At other times it was frustrating. Every now and then we had to cut a stone to fit. We used a hand maul and masonry chisel to chip away at edges or cut some stones completely in half.
Filling the stone garden beds
One our bed was built, we back filled the space with some paver gravel and sand. This will help give the wall additional support near the bottom and help with drainage.
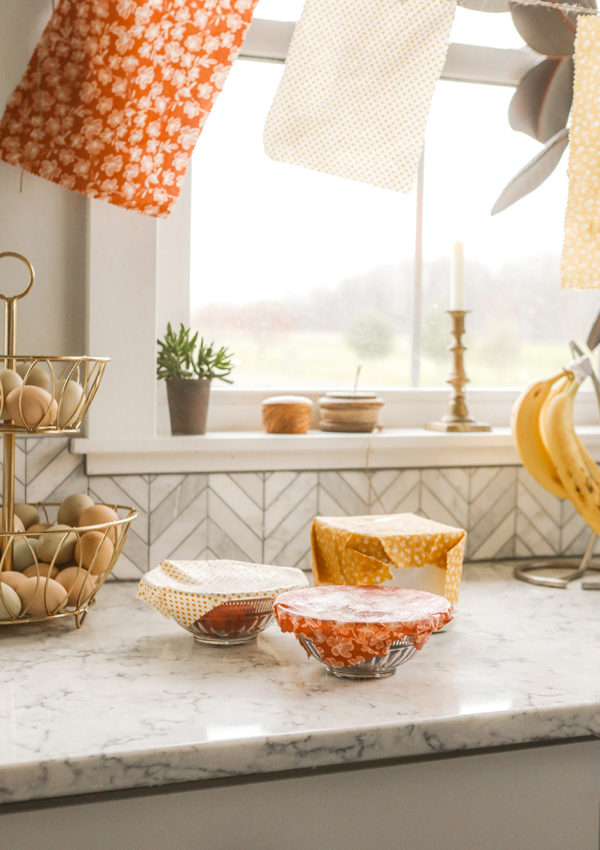
Then we added a layer of cardboard as a weed block. This is something we do in our garden {HERE} every single year and it’s my favorite way to ensure we don’t spend the summer weeding. Additionally, adding in cardboard versus landscape fabric will help to build the soil.


Picking the right dirt for garden beds
Once the cardboard was in, we added in the Beyond Peat Professional Organics Raised Bed Mix at Walmart. I really love this mix. You can see there’s so many good things in this soil, but it’s made without peat, which is actually not a renewable resource.
Instead, Beyond Peat Professional Organics Raised Bed Mix is derived from natural, renewable resources that are sustainable. It includes a professional grade organic fertilizer that will feed your plants for up to three months.
The Exclusive Bio-Fiber Technology absorbs up to seven times it’s own weight in water. And, it produces up to 25 percent more air space than products made with peat moss, leading to stronger root development.


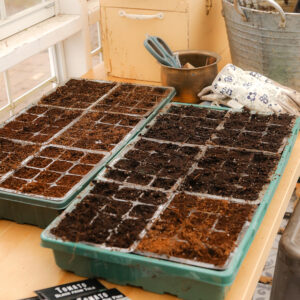
I actually used this same soil in some of our vegetable garden beds in March and planted our peas directly in the soil. They sprouted and have been growing beautifully ever since. I’m expecting to be able to harvest our first round soon!
Once the dirt was in the stone garden bed, I planted away and what a difference it made!


Thank you so much for visiting today, friends!
Let me know what you think of the new space in the comments below! I hope you’ll come back to visit us again.
To find out more about Beyond Peat, click {HERE}. To see what else we have happening in and around the garden this summer, click {HERE}.


I love the after and it really took great shape. You have such nice grounds and that stone garden adds to the ambiance
I’d love to do this. It’s so pretty! But sadly I cannot grow things. I’d still build one to relax by 😉
I love this! I used cardboard in my garden and it has kept the weeds out.
I’m loving the stone garden bed idea. We’re looking to add a garden space for my indoor garden when it gets too big. This would be ideal!
I would love to do this. It looks so beautiful. What a wonderful idea.
I love how your garden bed turned out. I want to build one in our yard, it’s a great area for sitting down in late afternoons.
We can also have coffee here or even a few drinks during the early evening. It’s really a good idea to have this in the yard.
So sad we do not have the space. I would have copy this if there was. Thanks for the great article.
Wow what a transformation! We actually made a similar bed but I I liked your stones better. Great choices, everything goes together so nicely.
So jealous of people with gardens because this would be so pretty to have around! I love it
That garden looks beautiful! You did a really good job making it!
It looks great! I am ready toove from my raised beds to planters like these. Your directions will be helpful for my husband.
I love the idea of making a stone bed garden in our backyard. It is so beautiful and easy. Thank you!
A stone garden bed is such an awesome idea. It’s definitely more elegant and resistible!
Love how it turned out. And the sitting area is absolutely beautiful. Had no idea there was a raised bed soil mix. Great tips.
You make it look so easy! We are definitely going to try this over the summer.
I love this idea. I’m wanting to update my raised beds and this is a great idea.
The before and after pictures say it all, such a pretty sight.The stone garden looks so beautiful.
This is stunning!!! I can’t wait to buy a place and be able to make something like this for myself I love it!!!!
Congratulations! It turned out so beautifully. You guys did such an awesome job. My hubby would also totally love this! He is trying to figure out what todo with our backyard!
Maureen | http://www.littlemisscasual.com
This is gorgeous! I would love to find somewhere on our property to put a garden bed like this
Wow, this totally changes your backyard space. I absolutely love it!
This is such a lovely project and you explain it so well. I would love to build a stone garden in my backyard
So pretty I love this idea. Putting cardboard boxes in so the weeds can’t grow up in just genius. Why have I never thought of doing that before.
Y’all are SO handy! I love this project!
This is really great idea. I need to build this for my vegetable garden bed. woods gives out after some time.
This is beautiful! Pinning it for a future project!
This is so adorable! I have a bunch of stones I should sooo make a stone garden bed!
This turned out so good. I’d love to try something similar.
Look so lovely! I Love this post.
This turned out amazing!!!! I love how it looks in the yard
We have some garden beds that have wood borders, and as I expected, they are starting to rot out. Stone beds would be a big improvement.